


What Is Hardwood Floor Delamination? A Homeowner's Guide

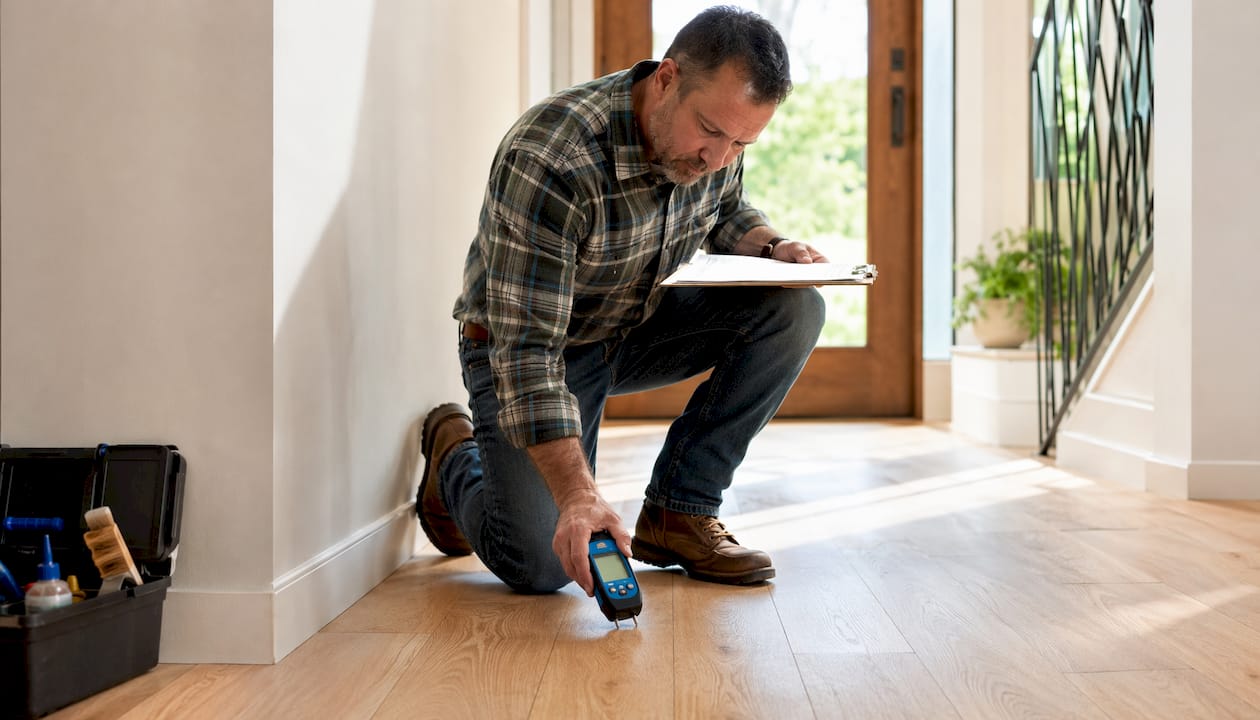
Hardwood floor delamination is the failure of the adhesive bond between layers in engineered hardwood or laminate flooring, causing those layers to physically separate. If you’re reading this because something looks or feels wrong underfoot, here’s what to do right now:
Stop the moisture source if water is involved. Turn off the leak, blot standing water, and dry the area as thoroughly as you can.
Keep foot traffic off the affected boards. Walking on delaminated planks accelerates the damage.
Photograph everything before touching it further. You’ll need documentation for any warranty claim or professional assessment.
Check your indoor humidity. If the air is extremely dry, a humidifier can slow further wood stress while you arrange an inspection.
The short answer on repairability: isolated delamination caught early is often fixable with adhesive injection. Widespread separation, warped boards, or any sign of mold usually means board replacement or larger restorative work.
Table of Contents
What is hardwood floor delamination, exactly?
Delamination in engineered hardwood is a separation along an internal adhesive interface, not a crack through the wood itself. That distinction matters more than it sounds.
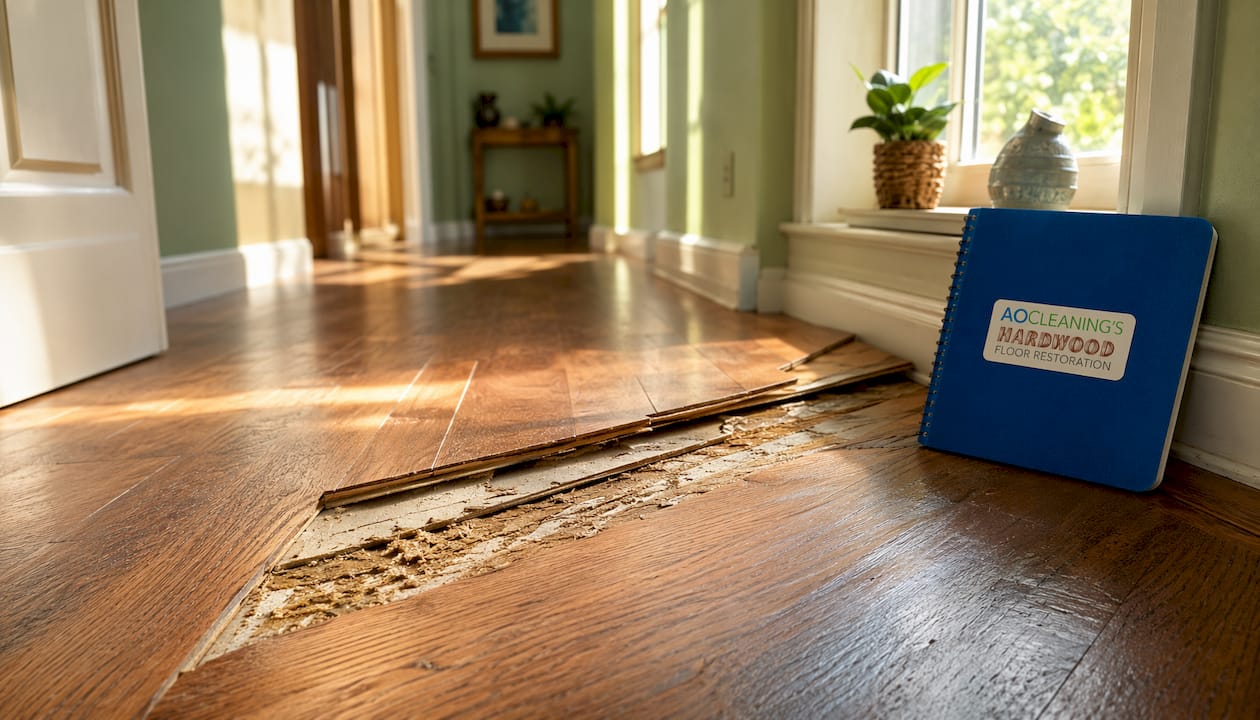
Engineered hardwood is built in layers: a real wood veneer on top, bonded to multiple cross-ply wood layers beneath. Laminate flooring follows a similar logic, with a photographic wear layer over a fiberboard core. Solid hardwood, by contrast, is a single piece of milled wood with no glue lines to fail. Delamination is structurally impossible in solid wood for that reason.
When the adhesive bond between layers releases, you get visible symptoms:
Bubbling or humping in the middle of a plank
Veneer peeling or lifting at the edges or ends
A hollow, drum-like sound when you walk over the area
End lift, where plank tips curl upward
Localized distortion or a ridge you can feel but barely see
Veneer flaking, especially in high-traffic zones
One thing to get clear before calling anyone: delamination is not the same as surface checking or finish peeling. Surface checking is a natural lengthwise separation of wood fibers in the finish layer, common in dry climates, and it does not affect structural integrity. Finish peeling is a coating failure. Delamination goes deeper, into the glue line itself. The repair path for each is completely different.
Products most commonly affected are sliced or rotary-peeled veneers, multi-ply engineered boards, and standard laminate planks. Thinner veneers are especially vulnerable because there’s less wood mass to resist the stress when adhesive bonds weaken.
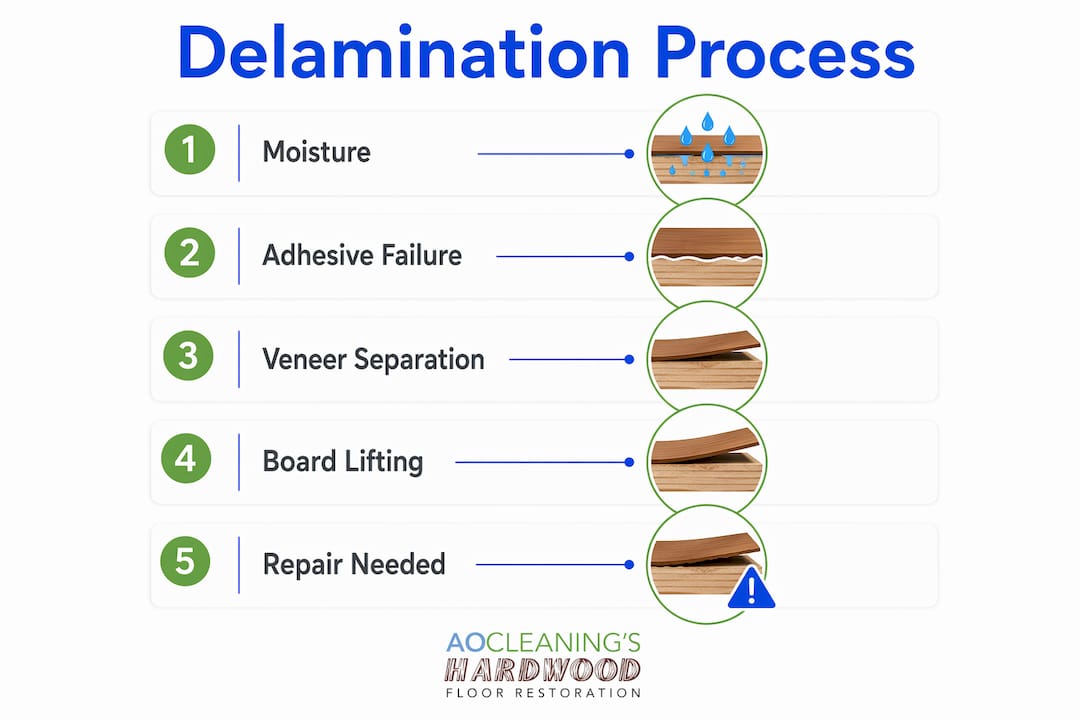
What actually causes wood delamination?
The causes split cleanly into two categories: manufacturing problems and site conditions. Knowing which one you’re dealing with changes everything, including whether your warranty covers it.
Manufacturing-related failures
Insufficient adhesive applied during production
Improper adhesive cure (steam pockets, wrong temperature or pressure during pressing)
Poor veneer selection or inconsistent veneer thickness
“Starved joints,” where adhesive was squeezed out under clamping pressure, leaving a discontinuous glue film with almost no bond strength
These failures typically show up in a limited number of boards, often within the first year. Bond-line failure from manufacturing produces a clean separation along the glue line. The wood fibers themselves are intact. That’s actually good news: it means the boards may be candidates for adhesive injection rather than full replacement.
Site-related causes
Standing water or flooding (the most common culprit)
Repeated moisture cycles, such as seasonal humidity swings in a home without climate control
Excessive subfloor moisture, especially over concrete slabs
Extreme dryness that causes wood to shrink and pull layers apart
Heat exposure near vents, radiators, or south-facing windows
When site moisture is severe enough, the wood fiber itself tears rather than the glue line releasing cleanly. This is called wood shear, and it’s a more serious finding. Shear means the stress exceeded what the wood could handle, not just what the adhesive could hold.
Other contributors worth knowing:
Harsh or acidic cleaners (including vinegar-based solutions) that degrade the finish and allow moisture to penetrate the veneer
Steam mops, which force hot moisture directly into seams
Improper acclimation before installation, where planks weren’t given time to adjust to the home’s temperature and humidity
Defective subfloor materials, including swollen plywood or OSB that transfers movement upward into the flooring
On warranties: moisture-related delamination is routinely excluded from limited warranties. If your floors flooded or if elevated humidity was present, the manufacturer’s warranty almost certainly won’t cover it. Manufacturing defects are a different story, but you’ll need documentation and often a professional inspection report to make that case.
Pro Tip: Before installation, always acclimate engineered hardwood in the room where it will be installed for the period specified by the manufacturer. More importantly, test subfloor moisture content with a pin-type or non-destructive moisture meter before the first plank goes down. Elevated moisture readings in a wood subfloor are a warning sign. Catching that before installation is far cheaper than dealing with delamination afterward.
How do you know if your floor is delaminating?
Start with what you can do right now, before spending money on anything.
Quick visual and walk test:
Walk slowly across the suspect area and listen for a hollow, drum-like sound. Solid, well-bonded boards sound dense underfoot.
Look for raised edges, end lift, or any board that rocks slightly when you step on it.
Get a flashlight and shine it at a low angle across the floor. Delamination often creates subtle ridges or waves that are invisible in normal light.
Check the seams between boards for any gap that wasn’t there before, or for veneer that’s lifting at the edge.
Tools to use:
Pin-type or non-destructive moisture meter: measures moisture content in the wood. Readings above 12% in the floor boards, or spikes compared to surrounding areas, point to a moisture source that needs addressing before any repair.
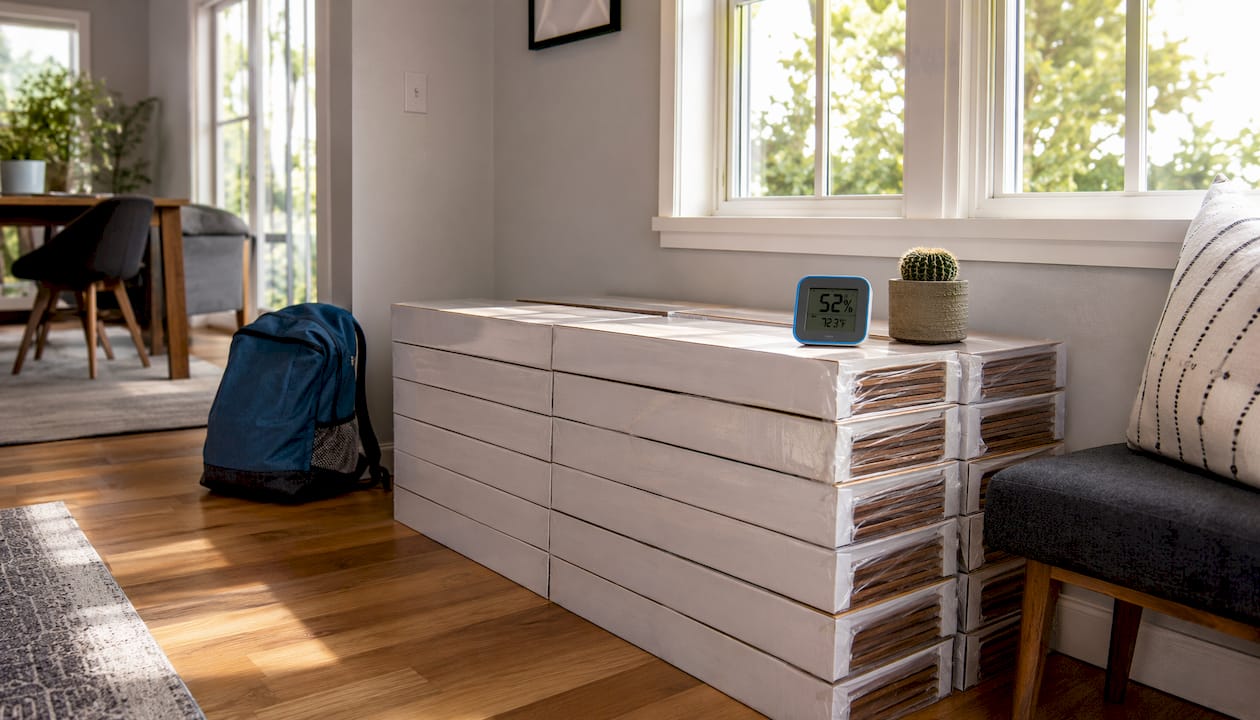
Hygrometer: checks indoor relative humidity. Engineered hardwood performs best within a recommended mid-range of indoor relative humidity. Outside that range, you’re stressing the adhesive bonds.
Flashlight: for low-angle inspection of glue lines and surface distortion.
Small pry bar: only if you’re comfortable doing it carefully at an edge or near a threshold, to check whether a board lifts more than it should.
Stepwise diagnostic checklist:
Photograph the affected area from multiple angles before touching anything.
Identify and eliminate any active moisture source.
Measure indoor RH with a hygrometer and wood moisture content with a meter.
Map which boards are affected. Is it one plank, a cluster, or spreading across the room?
Note whether the damage is near a moisture source (bathroom, kitchen, exterior wall, vent).
Document everything for a warranty claim or professional assessment.
A professional in-home assessment becomes necessary when moisture readings are elevated across multiple boards, when the damage covers a significant portion of the room, or when you find soft spots, discoloration, or any smell suggesting mold. Proper evaluation considers the pattern, severity, location, construction type, and service history of the floor together. A moisture meter reading alone doesn’t tell the whole story.
Repair options: DIY, professional, and when to replace
The honest answer first: minor, isolated delamination with intact wood fibers and no subfloor damage can sometimes be repaired with adhesive injection. Structural wood shear, widespread moisture damage, failed tongue-and-groove connections, or any sign of subfloor rot almost always requires board removal and replacement.
Repair method | When it applies | Durability | Visual outcome | Typical cost range | Typical timeline |
Adhesive injection | Small area, glue-line failure only, boards not warped | Good if moisture is corrected | Nearly invisible if done well | $150–$400 per area | Same day |
Localized board replacement | Structural shear, warped/softened boards, failed T&G | Excellent | Requires color/sheen blending | $300–$800+ per area | 1–2 days |
Full-room replacement or refinish | Widespread damage, subfloor failure, mold | Permanent | Complete renewal | $2,000–$8,000+ | 2–5 days |
Cost ranges are general U.S. homeowner estimates. Actual pricing varies by region, floor size, material, and subfloor condition.
What a standard professional repair job looks like:
A restoration pro starts with a moisture assessment, not a repair quote. They’ll test the subfloor and the boards, map the damage, and determine whether the separation is a clean glue-line failure or wood shear. For injectable repairs, adhesive injection requires clean penetration to the glue line, sustained weight or clamping while the adhesive cures, and a flatness check afterward to avoid ridging under the finish. For board replacement, the pro verifies subfloor flatness and moisture content, confirms proper tongue-and-groove fit on the new plank, and performs a spot sand-and-refinish or screen-and-recoat to blend color and sheen with the surrounding floor.
Pro Tip: Never skip the subfloor check. Repair quality depends on correcting the moisture source and confirming subfloor integrity first. A perfectly executed injection repair will fail again within months if the underlying moisture problem isn’t resolved.
Red flags that mean call a professional immediately:
Failed tongue-and-groove connections (boards no longer lock together)
Wood shear with torn fibers visible at the separation
Subfloor feels soft, spongy, or shows visible rot
Black discoloration, mold, or mildew odor
Delamination recurs after a previous repair
How to prevent delamination and maintain your floors long-term
Prevention is mostly about moisture control and cleaning discipline. Neither requires expensive equipment.
Maintenance checklist:
Keep indoor relative humidity between 35% and 55% year-round. A whole-home humidifier or dehumidifier makes this easier than portable units in individual rooms.
Clean up spills within minutes, not hours. Water sitting on engineered hardwood seeps into seams faster than most homeowners expect.
Never allow standing water near appliances, sinks, or exterior doors.
Use door mats at every entry point to reduce tracked-in moisture and grit.
In bathrooms and kitchens, inspect the floor along the base of cabinets and appliances every few months.
Schedule a routine floor inspection at least once a year, especially before and after winter.
Cleaning dos and don’ts:
Use a pH-neutral cleaner specifically formulated for hardwood. Acidic solutions, including vinegar-and-water mixtures that circulate widely online, degrade the finish over time and make the veneer more vulnerable to moisture penetration. Steam mops are a hard no: the heat and moisture combination forces water directly into seams and accelerates veneer failure. For product guidance, safe hardwood cleaners are worth reviewing before you reach for whatever’s under the sink.
The same principle applies to other wood surfaces in your home. If you’re wondering what to use on interior wood doors, the answer is similar: gentle, pH-neutral products and no excess moisture.
Installation best practices to verify with your installer:
Proper acclimation period (manufacturer-specified, typically 3–7 days in the installation room)
Subfloor moisture testing before installation begins
Correct adhesive type and trowel notch size for the product
Adequate expansion gaps at walls and transitions
Proper fastening method for the floor type (nail-down, glue-down, or floating)
Hardwood floor maintenance best practices cover these points in more detail for homeowners who want a full reference.
Key Takeaways
Hardwood floor delamination is an adhesive bond failure specific to engineered and laminate flooring, and catching it early determines whether you repair or replace.
Point | Details |
What delamination is | Adhesive bond failure between layers in engineered or laminate flooring, not a crack through solid wood. |
Primary causes | Moisture exposure and manufacturing defects are the two main drivers; moisture-related failures are typically excluded from warranties. |
Immediate steps | Stop the moisture source, photograph damage, keep foot traffic off affected boards, and measure indoor humidity. |
When to call a pro | Call immediately if you find wood shear, subfloor softness, mold, failed tongue-and-groove, or recurrence after a prior repair. |
Aosaveswoodfloors | Aosaveswoodfloors offers in-home moisture assessments, selective board replacement, and single-day restoration for homeowners in the St. Louis metro and central Illinois area. |
What most homeowners get wrong about delamination
The conventional advice is to fix the visible damage and move on. That’s backwards.
The floor is a symptom. The moisture source, the subfloor condition, the indoor humidity level — those are the actual problem. Homeowners who skip straight to cosmetic repair almost always end up calling a professional six months later, usually with worse damage and a higher bill. The boards that look fine today may already have elevated moisture content. A moisture meter costs less than $30 at any hardware store, and five minutes of testing before you decide anything is worth more than any repair guide.
There’s also a real tendency to confuse delamination with surface checking or finish issues, and that misdiagnosis leads to the wrong fix. Checking is a natural wood characteristic that doesn’t threaten structural integrity. Delamination does. The difference between a clean glue-line separation and wood shear is equally important: the first may be injectable, the second usually isn’t. A professional who skips that distinction and injects adhesive into sheared wood is wasting your money.
One more thing: engineered hardwood is not inferior to solid wood because it can delaminate. Solid wood has its own failure modes under moisture stress, including cupping, crowning, and buckling. The right floor for a given space depends on the subfloor, the moisture environment, and the installation method. Engineered products are often the smarter choice over concrete slabs or in below-grade spaces precisely because their cross-ply construction resists seasonal movement better than solid planks. The adhesive bond is a design feature, not a weakness, as long as it’s protected.
*— Jim
Aosaveswoodfloors handles delamination the right way
If your moisture readings are elevated, your boards are lifting, or a previous repair didn’t hold, a professional assessment is the next step, not another DIY attempt.

Aosaveswoodfloors has been restoring hardwood floors across the St. Louis metro and central Illinois since 2003, with over 450 Google reviews from homeowners who chose restoration over replacement. Their process starts with an in-home moisture assessment, not a sales pitch. From there, the team handles selective board replacement, dustless refinishing, screen-and-recoat blending, and full sand-and-refinish jobs, most completed in a single day with floors walkable in about three hours. For homeowners who want to maintain floors between professional visits, their pH-neutral hardwood cleaner is formulated specifically for engineered and finished hardwood surfaces. Before you price out new flooring, schedule a restoration consultation with Aosaveswoodfloors and find out what’s actually salvageable.
Useful sources
Floor Detective: Delamination (Engineered Hardwood) — Detailed symptom descriptions and the technical distinction between adhesive-interface release and wood shear; useful for diagnosis.
Wood Floor Business: Bond-Line Failure and Shear — Industry-level explanation of manufacturing versus site-related causes, including warranty implications.
BuildDirect: Wood Flooring Issues — Delamination — Practical homeowner guidance on humidity control, acclimation, and cleaner selection as preventive measures.
Weles: Wood Floor Water Damage and Restoration — Restoration professional perspective on subfloor evaluation, moisture pathways, and injection repair technique.
Jaspector: Repairing Damaged Hardwood — Decision framework for spot repair versus board replacement, including subfloor verification steps.
NWFA via Crescent Hardwood: Problems, Causes, and Cures — Authoritative industry reference for delamination cure sequences and the importance of correcting moisture before any repair.
Recommended

Comments