


60–80°F, 30–55% RH: What Homeowners Must Measure Before Finishing

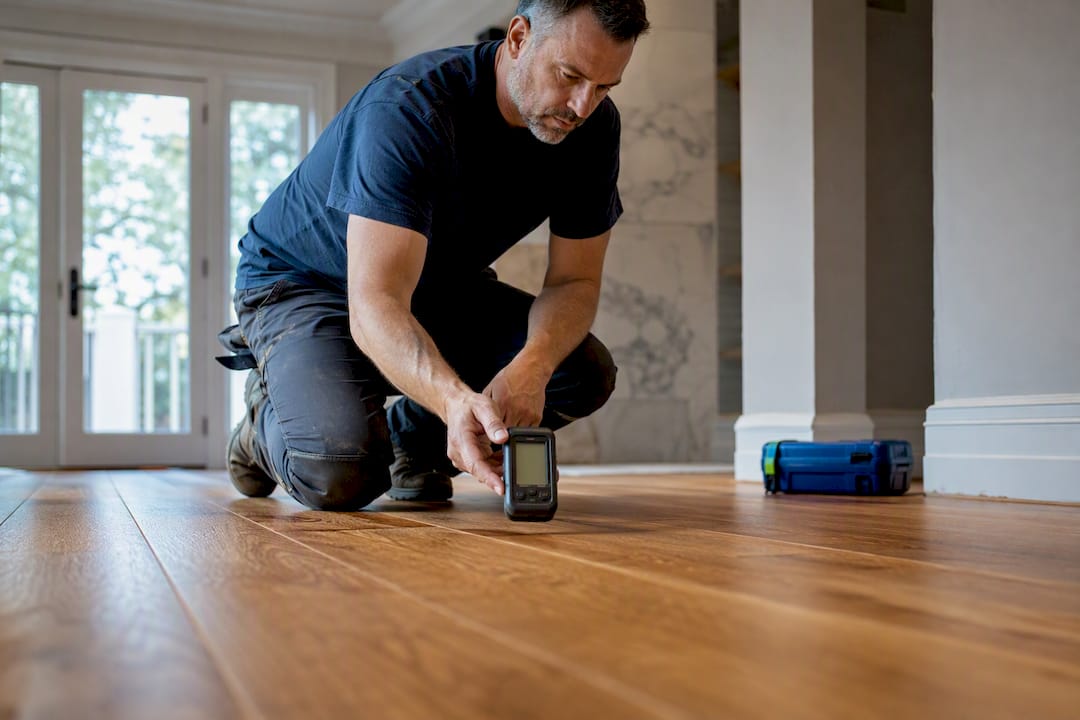
Aim for 60 to 80°F and 30 to 55% relative humidity when finishing hardwood, and hold that band steady through the entire cure. Before you open a can of finish, check ambient RH with a hygrometer and check the wood itself with a moisture meter. If either reading falls outside that range, stop and fix the room’s conditions first. Guessing costs far less time than sanding out a failed coat.
TL;DR:
Maintaining a stable indoor relative humidity of 30 to 55% and temperature of 60 to 80°F during the entire 7 to 10 day curing process is essential for preventing finish defects.
Wide plank and exotic hardwood floors are more sensitive to humidity swings, requiring tighter control within the lower half of the recommended range, especially during finishing.
Using a hygrometer at floor level and testing multiple spots with a moisture meter for at least 48 to 72 hours before finishing ensures accurate site conditions.
Humidity that exceeds 60 to 65% can cause water-based finishes to stay tacky, while below 35 to 40% can lead to fast-drying and cracking of oil-based finishes.
Older finish problems such as blushing, tackiness, or buckling often result from overlooked moisture issues, emphasizing the need for professional humidity management and proper site preparation.
Table of Contents
What Humidity Range Should You Target for Finishing?
The Maple Flooring Manufacturers Association sets the standard most flooring pros work from: 60 to 80°F and 30 to 55% relative humidity, held steady for the full 7 to 10 day cure of a site-finished floor. That stability matters more than hitting a perfect number for one afternoon. Even a single HVAC hiccup during the cure period can cause defects.
A few practitioners recommend keeping relative humidity in the mid-30s to mid-50s percent range for the cleanest results, especially with water-based finishes that are more sensitive to slow evaporation. The NWFA’s acclimation guidance points to similar indoor conditions, usually 60 to 80°F and 30 to 50% RH, tied to an equilibrium moisture content compatible with how the wood was milled.
A few situations call for tighter tolerances:
Wide plank flooring (5 inches or wider) moves more per percentage point of RH swing, so stay in the lower half of the band, closer to 35 to 45%.
Exotic species like Brazilian cherry or tigerwood are denser and react more slowly to humidity changes, but once they do move, the shift is harder to reverse.
Site-finished floors need the RH held flat for the entire cure window, not just during application. Pre-finished and engineered products are more forgiving here since the finish already cured under controlled factory conditions.
Why Does Humidity Matter So Much for Wood Floors?
Wood is hygroscopic. It absorbs and releases moisture until it reaches equilibrium with the surrounding air, a state called equilibrium moisture content, or EMC. Change the relative humidity in a room, and you change how much water the wood holds, whether or not you ever touch it.
The math here is not trivial. Building Science Corporation’s research shows wood EMC rising approximately from 5% at 25% RH to about 11% at 60% RH, reflecting significant seasonal moisture variation common in many homes.
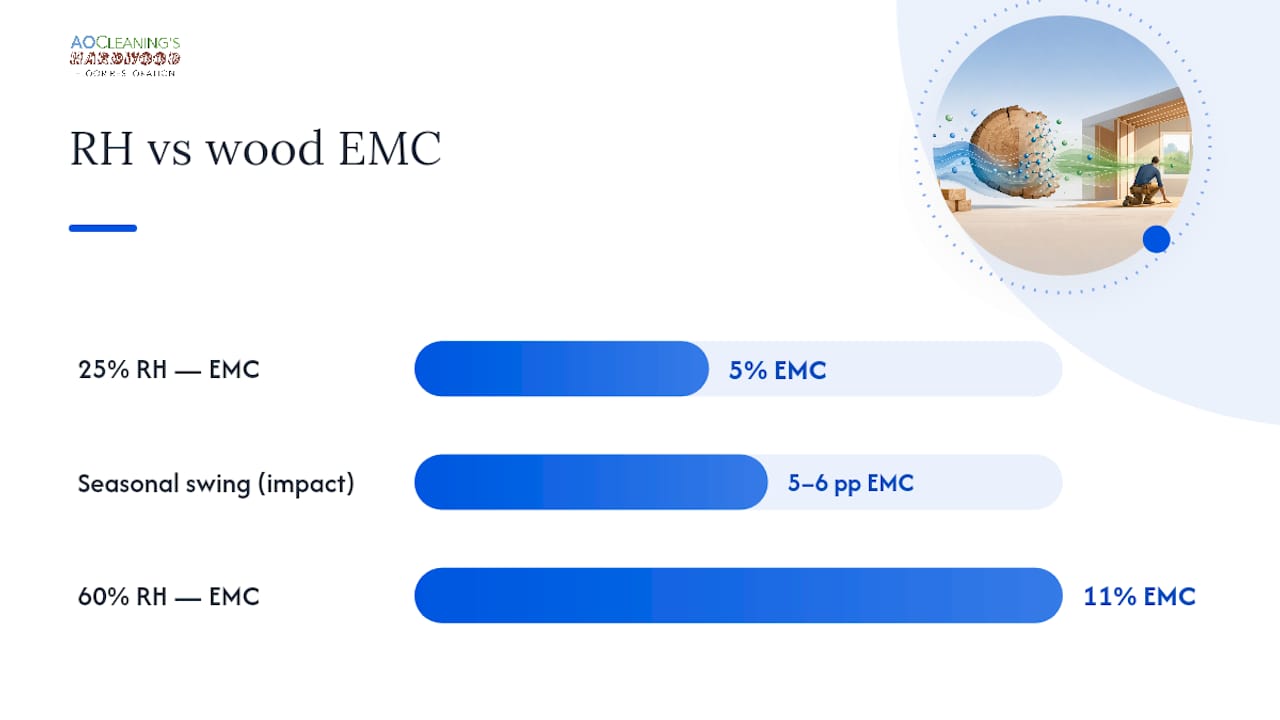
A 5 to 6 percentage point jump in wood moisture content, driven by nothing more than seasonal air changes, is enough to open gaps between boards in winter and cause cupping in summer.
A finish coat cannot stop this movement. It slows moisture exchange at the surface, but the wood beneath keeps expanding and contracting with the seasons. That’s exactly why ASHRAE and the NWFA both recommend keeping indoor RH in a moderate, stable band year round, not just during the finishing window. A floor finished under ideal conditions still needs a home that keeps those conditions close to constant.
How Do You Measure and Prepare the Site Correctly?
Two tools do the real work here: a hygrometer for the room and a pin or pinless moisture meter for the wood. Skip either one and you’re finishing on a guess.
Pro Tip: Place your hygrometer at floor level, away from exterior doors, vents, and direct sunlight. Room-center readings taken at chest height often run drier than what the wood actually experiences.
Log ambient RH daily for at least 48 to 72 hours before you start, not just once. A single good reading tells you nothing about stability.
Test moisture content across the flooring itself, not just one board. Potomac Floors recommends checking 20 or more boards along with 20 or more subfloor points for a real confidence level.
Apply the NWFA’s delta rule: wood MC should be within 4% of the subfloor for solid strip flooring under 3 inches wide, and within 2% for wider plank and most engineered products.
Confirm acclimation timing by product type. Engineered flooring typically needs 3 to 5 days on site; solid hardwood usually needs 7 to 14 days, longer in winter when indoor air runs drier.
Pass the site before you finish: two consecutive daily RH readings inside your target band, plus moisture meter readings that meet the delta rule at multiple spot checks.
How Humidity Affects Finish Drying and Curing
Water-based and oil-based finishes fail in opposite directions when humidity strays from the target band, and knowing which failure you’re risking changes what you do about it.
Above 60 to 65% RH, solvent evaporation slows dramatically. Water-based finishes stay tacky far longer than the can label promises and can develop a hazy blush as moisture gets trapped in the drying film.
Below 35 to 40% RH, the opposite problem shows up. Finish skins over too fast, trapping air bubbles beneath the surface and leaving oil-based coats brittle enough to crack under normal foot traffic.
Water-based finishes are the more sensitive of the two, since they rely on water evaporation as part of the cure. Oil-based products cure more through a chemical reaction, so they tolerate a slightly wider humidity swing, but not by much.
Adjustments exist for tight windows. A retarder additive slows dry time in low-humidity conditions, and extending flash time between coats gives high-humidity jobs more room to off-gas before the next layer goes on.
If your schedule doesn’t allow for waiting out a bad-weather week, a fast-drying finish formulated for tighter windows can help, but it doesn’t replace getting the room into range first.
What Are the Best Ways to Control Humidity Before Finishing?
Fixing the room is usually simpler than fixing the finish after it fails. The right tool depends on which direction your reading is off and how long you need to hold it there.
RH too high? Run a dehumidifier, sized for the room’s square footage, and keep it running through the entire cure window, not just the application day.
RH too low? A humidifier helps, but placement matters. Keep it several feet from the work surface. A humidifier aimed directly at fresh finish invites blushing and uneven cure.
Whole-home HVAC adjustments tend to outperform portable units for stability over multiple days. A properly balanced HVAC system that keeps RH between 35 and 55% year round does more to prevent gapping and cupping than any single pre-finish fix.
Pre-condition the space 48 to 168 hours before starting, depending on season and plank width. Winter jobs and wider planks need the longer end of that range.
Keep monitoring through the full cure, not just the setup phase. Finish failures often trace back to one missed variable mid-cure, an HVAC unit that cycled off, a storm front that spiked outdoor humidity, rather than bad conditions at the start.
Pro Tip: Spring and fall shoulder weeks are the easiest windows to finish in most climates. Indoor RH naturally sits closer to the target band without heavy equipment running around the clock.
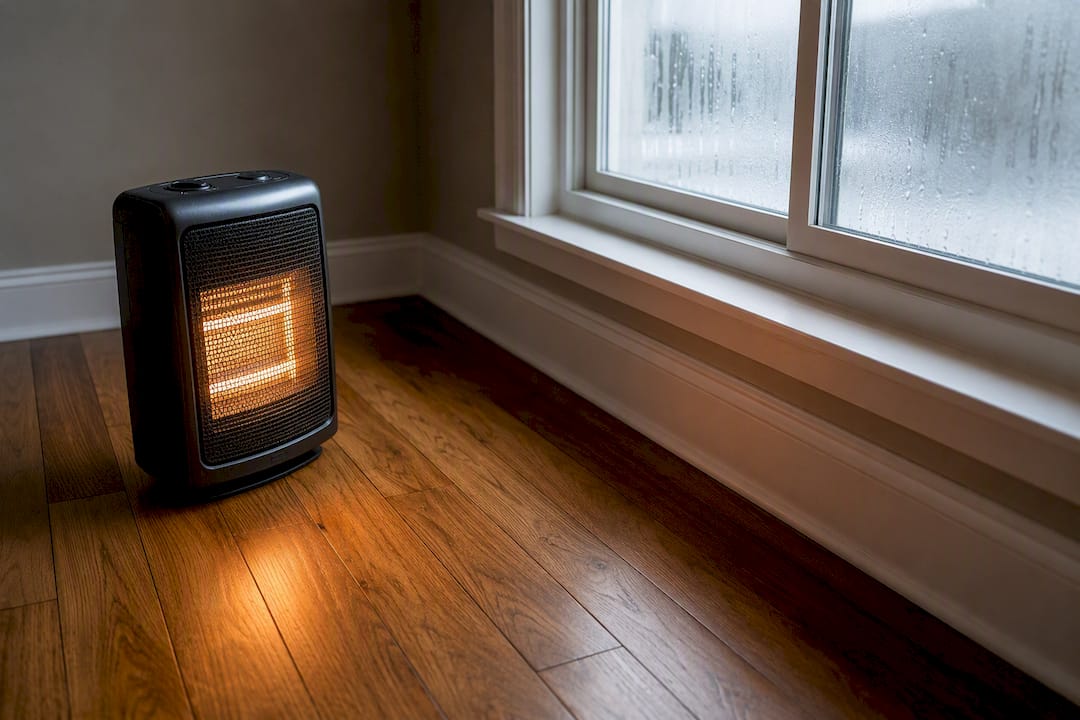
Avoid quick fixes that create new problems, like running a space heater to “dry the air” in one corner. Localized heat spikes create condensation elsewhere in the room and can cause blushing right where you least expect it.
How Do You Fix Finish Problems Caused by Humidity?
Most humidity-related finish defects show up within hours of application, and catching them early saves a full resand.
Blushing or a milky haze usually means the room ran too humid during cure. Increase airflow, run a dehumidifier, and give the coat extra time before judging whether it needs a light screen and recoat.
Persistent tackiness days after the label’s dry time points to trapped moisture. Ventilate the room and wait; if it’s still soft after 48 hours of proper airflow, that coat likely needs to be removed and reapplied.
Fisheyes or bubbling often trace to finish that dried too fast in low humidity, trapping air. A light sand and fresh coat under corrected conditions usually solves it.
Cupping or gapping that shows up after the fact signals a seasonal moisture swing in the wood itself, not a finish defect, and points to a whole-home humidity control problem rather than a redo.
If you’re seeing widespread buckling, boards separating from the subfloor, or tackiness that won’t resolve after days of proper ventilation, stop working the floor yourself. Those symptoms usually mean moisture has reached the wood at a depth a homeowner can’t fix with surface work, and it’s time to call in a professional refinishing crew.
A Field Perspective on Humidity and Finish Failures
Most humidity failures we see at AO Cleaning aren’t caused by bad finish or bad technique. They’re caused by someone trusting how a room feels instead of what a meter says. A basement that feels comfortable in July can still be sitting at 68% RH, which is plenty humid enough to blush a water-based topcoat that looked perfect going on.
We favor a measurement-led, dustless approach precisely because it removes that guesswork. One St. Louis job stands out: a homeowner had scheduled a recoat around a family event, but our pre-job RH readings ran high three days straight because of a stuck HVAC damper. We delayed two days, fixed the airflow issue, and the recoat cured clean on the first pass. Rushing it would have meant redoing the whole job during the party week.
— Jim
Ready for a Pro to Manage the Humidity for You?
Getting the room right takes real attention: daily hygrometer logs, moisture meter checks across dozens of spots, and a willingness to delay if the conditions aren’t cooperating. Professional hardwood floor restoration companies build that discipline into every job, so you skip the guesswork and the redo. If your existing finish already shows blushing, persistent tackiness, or cupping from a past humidity slip, a full sand, stain, and refinish resets the floor correctly. If the wood underneath is sound and you just need a fresh top coat, screen and recoat is usually the faster, less invasive fix.

Most restoration jobs finish in a single day, with floors walkable in about three hours, because the crew is already managing humidity and cure conditions while you go about your day. Not sure which service fits your floor’s condition? Schedule an in-home consultation and get a straight answer before you spend a weekend on a DIY fix that might not hold.
Sources
FAQ
What Is the Ideal Humidity for Hardwood Finishing?
Aim for 60 to 80°F and 30 to 55% relative humidity, held steady for the full 7 to 10 day cure period on site-finished floors.
How Long Does Hardwood Flooring Need to Acclimate?
Engineered flooring typically needs 3 to 5 days on site, while solid hardwood usually needs 7 to 14 days, longer in winter, based on moisture meter readings rather than a fixed calendar date.
Does AO Cleaning Check Humidity Before Refinishing a Floor?
Yes. Aosaveswoodfloors uses hygrometer and moisture meter readings before starting any refinishing job to confirm the site is within the target range before finish goes down.
Recommended

Comments