


Homeowners: Diagnose and Fix Squeaky Hardwood Floors Without Guesswork

Most squeaky hardwood floors are fixed by cutting friction or re-securing loose layers, not by replacing anything. Start with powdered graphite or talc if the sound is boards rubbing edge to edge. If it keeps coming back, move to breakaway screws from above or shims and fasteners from below. Widespread squeaking, soft spots, or sagging means it’s time to call a professional.
TL;DR:
Most squeaky hardwood floors result from mechanical issues like loose fasteners or board friction, not structural failure.
Diagnosing the squeak location accurately involves listening from below and marking noisy spots to avoid unnecessary drilling.
Temporarily fixing squeaks from above includes applying powdered graphite or talcum powder and securing boards with grow-in screws or nails.
Lasting repairs from below may require shimming, sistering joists, or replacing damaged subfloor sections for durable quietness.
Ongoing prevention involves maintaining stable indoor humidity, avoiding repeated patch repairs, and consulting professionals for widespread or soft, damp, or sagging floors.
Table of Contents
What Causes Hardwood Floors to Squeak?
A squeak is friction, plain and simple. Somewhere under your feet, two pieces of material that should be locked together are instead rubbing, flexing, or knocking loose against each other every time you shift your weight.
The American Hardwood Information Center points to four main culprits behind squeaky floor noise:
Subfloor panels rubbing against floor joists as they flex under weight
Nails or screws that have worked loose over years of foot traffic
Board-to-board friction where planks rub against each other at the seams
Seasonal humidity swings that shrink and expand wood, opening tiny gaps
Here’s the reassuring part: the vast majority of squeaks are mechanical, not structural. Wood moves. Fasteners loosen. That’s normal aging, not failure. The red flags worth watching for are soft or bouncy spots, visible sagging, or dampness near the noise, which point to something more serious under the surface. Keeping indoor humidity steady cuts down on how often the seasonal kind returns.
How Do You Find Exactly Where a Floor Squeaks?
Guessing where a squeak lives is how homeowners end up drilling a dozen holes for nothing. A tighter process saves your floor and your patience.
Walk slowly across the room in socks, pressing your weight into each board, and mark every spot that makes noise with a pencil or piece of tape.
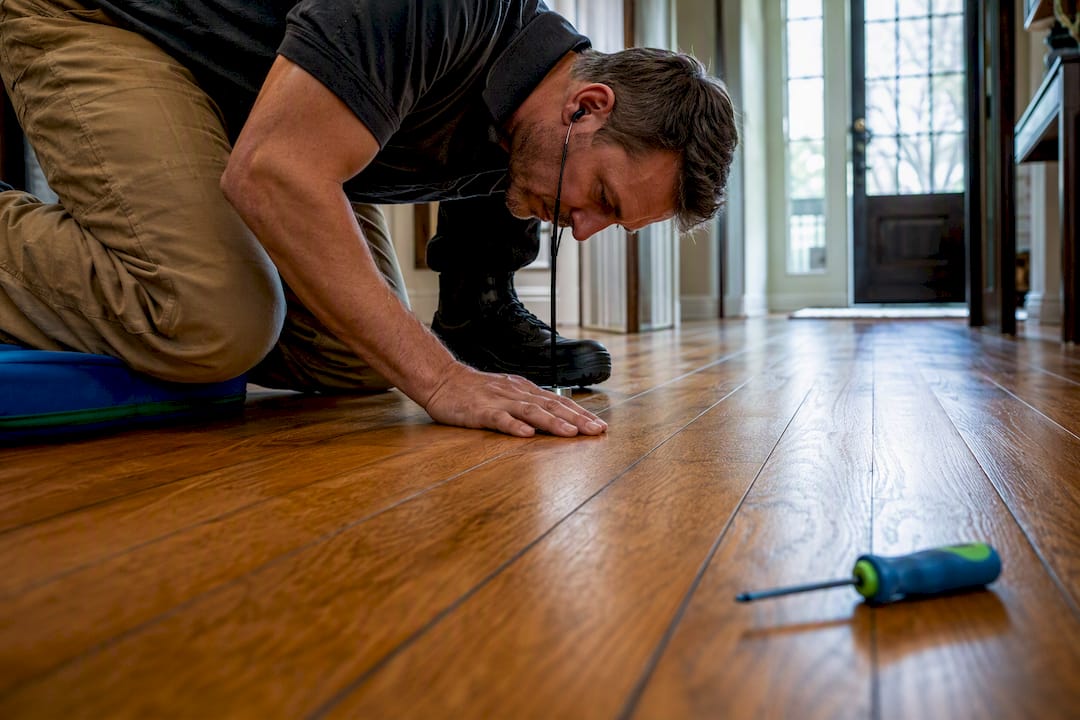
Recruit a helper to walk those marked spots while you go below into the basement or crawlspace and listen for exactly where the sound originates. This Old House calls this listen-from-below method one of the most reliable ways professionals localize a squeak instead of guessing.
Run a stud finder along the marked area to locate the joist beneath, then gently rap the subfloor near the mark to confirm where the movement is coming from.
Note whether the sound feels like two boards rubbing at a seam or more like the whole subfloor flexing. That distinction decides which repair you need next.
Quick, Above-Floor Fixes You Can Try First
If your notes point to board-edge friction rather than subfloor flex, start here. These are the lowest-risk repairs, and some homeowners never need to go further.
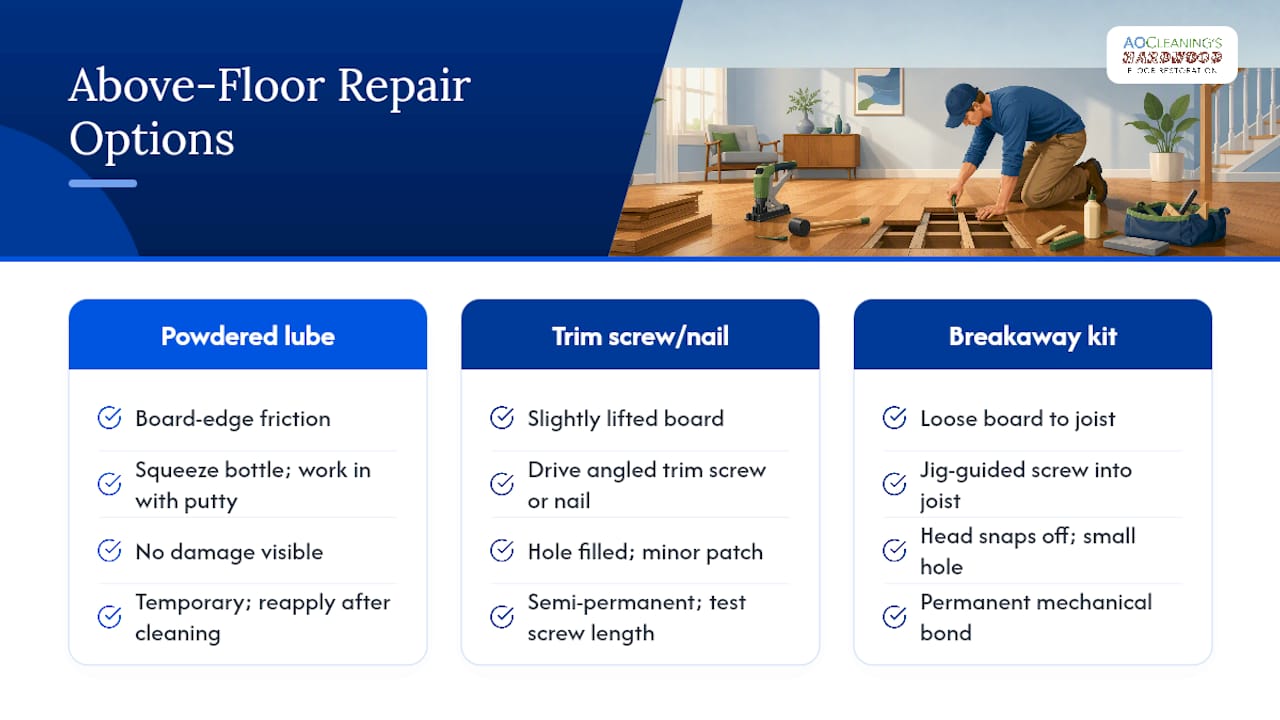
Powdered lubricant. Work powdered graphite or talcum powder into the gap between boards with a squeeze bottle for precision, then work it in with a putty knife and wipe away the excess. It’s cheap, fast, and genuinely effective on edge friction, but it’s a temporary measure. Foot traffic and mopping wash it out, so expect to reapply it every so often rather than treating it as a one-time cure.
Trim screws or finish nails. For a board that’s lifted slightly, drive a trim screw or finish nail at an angle through the plank into the subfloor below, countersink the head slightly beneath the surface, then fill the hole with matching wood filler or a wax stick.
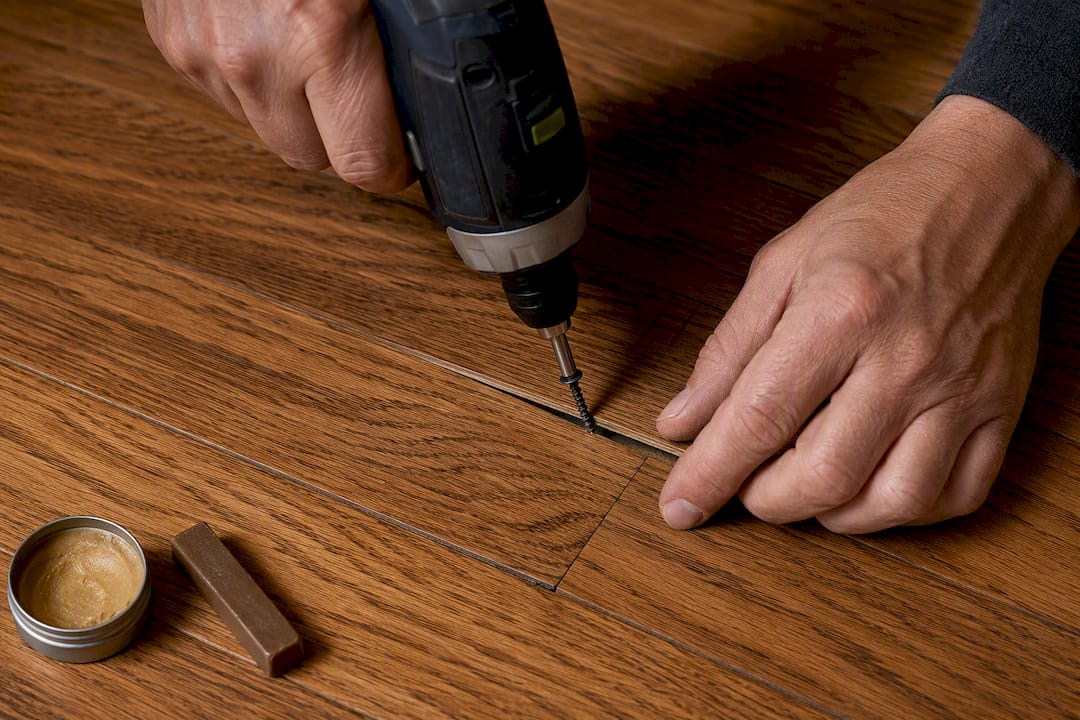
Breakaway screw kits. These specialty kits (sometimes called counter-snap systems) use a jig to guide a screw down through the flooring and subfloor into the joist, then snap the head off cleanly below the surface once it’s set. The result is a tight mechanical bond with barely any visible damage once you fill the small hole.
Pro Tip: Test any screw or nail length on a scrap piece of the same flooring first. Guessing at depth is how homeowners end up with a screw head poking through the finish or a crack running down a board.
Stop and step back if a board starts to split or the finish chips around the repair. Forcing a fastener into old, brittle wood does more harm than the squeak ever did.
Below-Floor Fixes for Lasting Repairs
When the noise is coming from subfloor flex rather than a single loose board, the more durable fix happens from underneath, in the basement or crawlspace.
Locate the exact joist causing the problem using your earlier diagnostic walk, and confirm you have clear access to that section from below.
For small gaps between the joist and subfloor, tap in a tapered exterior wood shim, such as a cedar siding shingle, coated with carpenter’s glue. Tapered exterior shims give you finer control than standard flat shims, since the gradual taper lets you snug the gap closed without lifting the subfloor too far and creating a new high spot.
For a wider or repeated problem area, add a block of lumber between joists or sister a second joist alongside the weak one for real structural support.
If you’re driving screws up through the subfloor into the hardwood from below, measure the total floor assembly depth first and steer clear of any wiring or plumbing runs nearby.
Pro Tip: Mark every pipe and wire run you can see before you drive a single screw upward. A puncture here costs a lot more than the squeak did.
If a joist is cracked, rotted, or visibly sagging, that’s no longer a weekend fix. It calls for a structural repair a contractor should handle.
Tools and Materials for a Squeaky Floor Repair
Most of this project comes down to a short list, and you likely have half of it in a drawer already.
Powdered graphite or talcum powder, plus a squeeze bottle for controlled application
Stud finder, an 1/8 inch drill bit, and tapered exterior siding shims with carpenter’s glue
A breakaway/counter-snap screw kit or trim screws, ideally with a depth-control jig
Wood filler or matching wax sticks to hide finished holes
Safety glasses, work gloves, and a tape measure for checking floor assembly depth before drilling
When Should You Call a Professional Instead?
DIY makes sense for one or two isolated squeaks. It stops making sense once the noise is everywhere, or once you find soft spots, dampness, or a floor that feels bouncy underfoot. Those signs deserve a real inspection before you touch a drill.
Soft or spongy spots, visible sagging, or moisture near the noise
Squeaking across most of a room rather than a couple of boards
No basement or crawlspace access to fix things from below
A professional typically re-secures the subfloor from underneath, sisters a weak joist, or replaces damaged subfloor sections outright. A basic DIY kit runs under $50, a targeted professional repair costs more depending on access and scope, and a full sand and refinish sits at the top end when many small repairs have left the surface uneven or scarred with filled holes. Before a visit, write down which rooms squeak, whether you have basement access, and how old the flooring is.
How to Stop Squeaky Hardwood From Coming Back
Prevention here is mostly about keeping wood from moving as much as it wants to. Wood swells in humid months and shrinks in dry winter air, and that constant push and pull is what loosens fasteners over time.
Run a humidifier in winter and a dehumidifier in summer to keep indoor humidity relatively stable year round
Add rugs and furniture pads in high-traffic paths, and skip hard-soled shoes on bare wood when you can
Check fasteners in older floors every few years rather than waiting for a squeak to reappear
Our luxury home hardwood floor maintenance guide covers humidity targets in more depth if you want to get specific about numbers for your climate. If you’ve patched the same room three or four times, a refinish is often the cleaner long-term answer, since it evens out the surface and hides old repair marks for good, a point worth weighing against our guide to signs your floors need refinishing.
What Professionals Actually See on the Job
Most of the squeaky floors flooring pros walk into aren’t structural disasters. They’re seasonal movement and a scattered handful of fasteners that gave up over the years, nothing more dramatic than that. Powdered lubricant earns its reputation because it’s fast and cheap, but it’s a patch, not a cure. It has to be reapplied, sometimes within months, because it washes out with mopping and foot traffic.
The floors that actually stay quiet are the ones where someone re-secured the layers mechanically, whether that’s shims and screws from below or a breakaway kit from above. Where I’d push back on the usual DIY advice: don’t drill from the surface until you’ve actually confirmed the source from underneath. A door with better sound insulation won’t help a squeak, but neither will a screw driven into the wrong joist. If your crawlspace is unreachable, or squeaks are showing up in six rooms instead of one, hiring someone with the right tools and a jig built for the job usually costs less in the end than a floor full of filled holes that don’t quite match.
— Jim
A Dustless Way to Deal With a Worn, Repaired Floor
If your floor has been patched more than once, or you’d rather skip the crawlspace entirely, hiring out makes sense. Some professional restoration services use dustless techniques and eco-friendly products to reduce mess and fumes during the work.

Many restoration jobs can be completed in a single day, with floors ready to walk on again in a few hours, which matters if squeaks have left you with a patchwork of filled holes and uneven sheen. For floors that need a light refresh after mechanical repairs, the clean and buff service restores an even look without a full sand. For floors with heavier wear or many repair points, the full sand and refinishing service strips everything back to bare wood and starts fresh. Professional hardwood floor restoration services are available in several communities across central Illinois and the St. Louis metro area. If your floor has outlasted a few too many patch jobs, request an estimate before deciding whether to refloor it.
Sources
FAQ
How do professionals fix squeaky floors?
Professionals typically diagnose the exact source by listening from below while a helper walks above, then re-secure the floor with shims, blocking, or breakaway screws rather than relying on surface lubricant alone.
Why do my hardwood floors squeak when I walk on them?
The most common causes are subfloor panels rubbing against joists, fasteners that have loosened over time, board-to-board friction at the seams, and seasonal humidity changes that shrink and expand the wood.
Do squeaky floors mean structural damage?
Usually not. Most squeaks are mechanical wear, but soft spots, visible sagging, or moisture near the noise are signs worth having a professional inspect.
What is the best lubricant to use on squeaky hardwood floors?
Powdered graphite or talcum powder worked into the seam between boards is the standard temporary fix for board-to-board squeaks, though it needs reapplying over time since foot traffic and cleaning wear it away.
Recommended

Comments