


Refinish Around Floor Vents Safely for Homeowners: 2–2.4 mm Rule

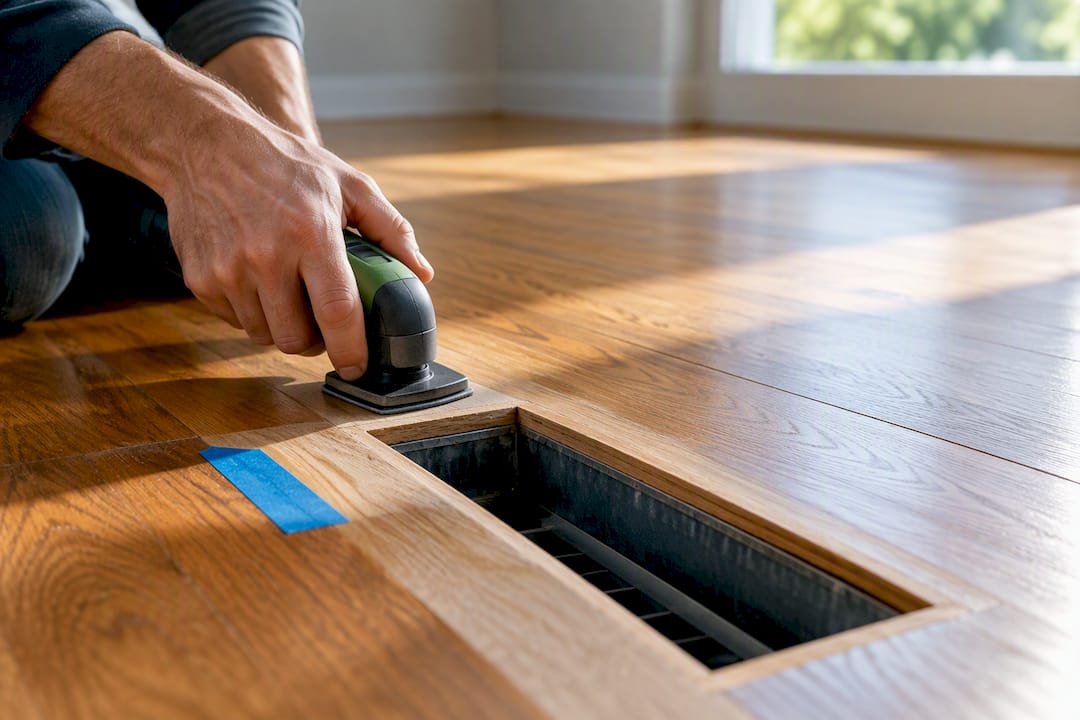
Remove any register you can lift out, and label the screws. If it’s a flush vent that’s fixed in place, mask it off and hand-sand it with the rest of the floor instead of running a drum sander over it. Before you sand anything, pull a register and check the wear layer at the plank edge; that single check tells you whether you’re safe to sand at all or need to screen-and-recoat instead.
TL;DR:
If the wear layer measures less than 2.4 millimeters, a full sand risks damage, and a screen-and-recoat or professional opinion is safer.
Drums sanders should never be used on flush-mounted vents, as they cause gouges and visible marks; hand-sanding around vents matches the finish better.
Sealing vents with foam plugs or craft paper before sanding prevents dust from entering ductwork and circulating through the home.
Check the wear layer thickness and test the finish with 80-grit sandpaper to determine if aggressive sanding is appropriate; engineered floors require extra caution.
For multiple vents, uneven wear, or irregular registers, hiring a professional with dustless equipment ensures consistent results and prevents costly mistakes.
Table of Contents
Prep Checklist Before You Sand Near a Vent
Ten minutes of prep here saves you a ruined register, a dust-choked furnace filter, or a call to a duct cleaner later.
Remove what comes out. Lift or unscrew every drop-in register you can. Drop them in a labeled bag with the screws, and tape the bag near the room’s door.
Mask what stays. If a vent is flush-mounted or fixed, cover it with low-residue painter’s tape and a layer of craft paper or foam plugs cut slightly larger than the opening. Skip duct tape. It leaves a gummy residue that fights your finish later.
Kill the HVAC. Shut the system down at the thermostat and, if you’re sanding a whole floor, flip the breaker for the blower motor too. If you’re worried about dust pulling through the return side, seal the furnace return grille the same way.
Stage your containment. Clear furniture out of the room, hang plastic sheeting or a zippered dust barrier across doorways, and set up a box fan or HEPA vacuum shroud before you start, not after the first pass with the sander.
Pro Tip: Write the room name on each vent-hardware bag with a marker, not just “screws.” After a full day of sanding three or four rooms, every baggie of hardware looks identical.
How Do You Measure the Wear Layer Before Sanding?
Pull one register near the trouble spot and look straight down at the exposed plank edge. That thin band of usable wood above the tongue and groove is your wear layer, and it decides everything about your method.
If that band measures under roughly 2 to 2.4 millimeters, treat the floor conservatively. Screen-and-recoat or a professional opinion beats a full sand.
If the wear layer looks noticeably thicker than that, full sanding is likely on the table, vent area included.
Run a quick spot test with 80-grit sandpaper by hand in an inconspicuous corner. If the finish barely scratches, you’re probably dealing with a factory aluminum-oxide coating, and a screen won’t touch it. That changes your plan.
If you’re staring at engineered flooring rather than solid hardwood, don’t guess. The veneer on engineered boards can be thin enough that one aggressive pass removes it for good, and a professional look before you commit is worth the phone call.
This is the one step homeowners skip most, and it’s the one that turns a $40 mistake into a full floor replacement.
The Right Way to Sand and Blend Around a Vent
Never run a drum sander across a flush-mounted vent. Drum sanders remove material fast and unevenly at the register’s edges, and on a flush vent that means gouges, chatter marks, or a visible dip that no amount of stain will hide. Hand-sanding or a random orbital handles the vent face and the few inches around it; save the drum for the open field of the room.
Work the vent area with a controlled grit progression, typically 100, then 150, then 220, matching whatever sequence you’re running on the rest of the floor.
Sand across multiple boards at once rather than isolating the vent, following the grain the whole time.
Feather the transition 2 to 3 inches beyond the vent edge so there’s no visible line where hand-sanding meets machine-sanded field.
Keep your sanding block dead flat against the wood. A block that rocks even slightly digs a low spot exactly where you don’t want one.
Use fresh abrasive at the vent face specifically. Worn grit burnishes the wood instead of cutting it, and burnished wood absorbs stain unevenly, which shows up as a lighter halo once you finish the floor.
Once you’ve finished a pass, check your work under raking light, a work light held low and angled across the floor. That angle exposes every low spot, swirl mark, and visible sanding ring that flat overhead light will hide from you until the finish is already dry. If you spot a low area, fill and re-level it before moving to the next grit rather than trying to sand it out later.
Sealing Vents and Keeping Dust Out of Your HVAC
Dust that gets into a duct system doesn’t just settle. It circulates through every register in the house for months, which is why sealing vents properly matters more than most homeowners expect.
Confirm the HVAC system is off, not just the thermostat set to “off,” but power to the blower cut at the breaker if you’re sanding for more than an afternoon.
Block every vent opening with a foam plug sized to the register, or tape craft paper flush over the opening. Label each one with painter’s tape so you don’t accidentally seal an intake and forget it before you fire the system back up.
Build negative pressure in the work area: a zippered dust barrier at the door, a box fan exhausting through a window, and a HEPA vacuum running off your sander’s shroud if it has one.
For a multi-room or whole-house job, stage the work one room at a time and cover any return-air plenums in the basement or attic, not just the visible floor registers.
If several vents run through the space, or ducts already show dust around the grille from a past project, HEPA extraction or a professional dustless setup is worth the extra cost over taped paper and a box fan.
Finishing and Reinstalling Vent Covers
If the vent face is flush and gets sanded along with the floor, stain and topcoat it in the same pass as everything else. Treat it as one continuous surface, not a separate project. Drop-in registers you removed earlier get finished on their own, after the floor has cured.
Work stain into the grille slats with a small artist’s brush, going with the direction of the slats so you don’t leave brush marks that catch light differently than the surrounding floor.
For metal registers, a durable spray enamel rated for the finish you’re using holds up better than brush-on paint, and it dries without visible strokes.
Whatever finish you use, respect its cure window before reinstalling anything. Water-based finishes generally need less time than oil-based, but rushing either one risks the register’s fresh paint sticking to the floor finish or leaving a color mismatch where they meet.
If your registers are old, warped, or just never matched the floor well, this is a natural point to upgrade to wood-faced or true flush-mounted covers for a cleaner long-term look.
Pro Tip: Reinstall vent screws by hand first, snug but not tight, then do a final tightening pass once you’re sure the register sits flat. Cross-threading a screw into a floor you just finished is not a mistake you want to make twice.
Common Mistakes That Ruin a Vent-Area Refinish
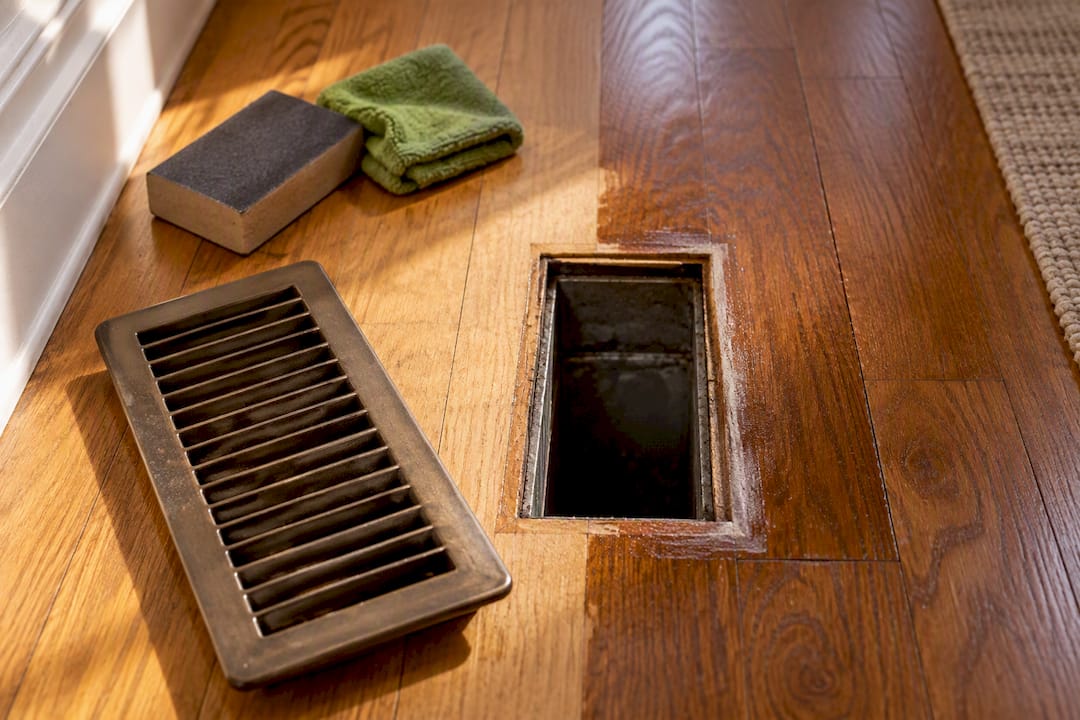
A drum sander on a flush vent is the single most common cause of visible damage in this kind of job. It gouges the edges where the register meets the wood, and once that happens you’re filling and re-leveling rather than finishing. If it’s already happened, sand the gouge out by hand with your grit progression, fill any remaining dip, and blend the stain carefully so the patch doesn’t stand out.
Skipping the wear-layer check is the second big one. Sand into thin veneer without checking first, and there’s often no fixing it beyond a board replacement or a professional refinish.
Check under raking light before you call the sanding done, not after the finish goes on.
Fill and re-level any low spot immediately; don’t wait and hope stain hides it.
If dust made it into a duct, get the system professionally cleaned before you run it again.
Before flipping the HVAC breaker back on, walk the room and confirm every register you sealed has been unblocked.
When Vent-Area Refinishing Calls for a Professional
Multiple vents in one room, a wear layer that’s already thin, or an irregular register that doesn’t sit flush all raise the risk of a visible mistake fast. Those are exactly the situations where a professional earns their fee. A crew running dustless equipment controls sanding pressure at the vent face precisely and matches stain and sheen across the whole floor, something a lot harder to pull off with a rented orbital on a Saturday. Experienced professionals have worked through these exact scenarios using dustless techniques that keep sanding debris out of ductwork entirely, which matters most in rooms with two or three registers close together, as explained in Refresh Your Space Without the Renovation Headache.
— Jim
Get a Professional Opinion Before You Commit to Sanding
Aosaveswoodfloors is the alternative to guessing your way through a vent-area sand, because a wrong call on wear layer or grit sequence around a register isn’t a $15 mistake, it’s a board replacement. If your registers turned up a thin wear layer during your own check, a Hardwood Floor Screen and Recoat refreshes the finish without the risk a full sand carries near flush vents. If the floor can safely handle it, Hardwood Floor Full Sand, Stain and Refinishing covers the sanding, vent blending, and finish matching in one visit, with most jobs done in a single day using dustless containment that keeps sawdust out of your HVAC entirely.

An in-home consultation gets a real answer on wear layer and method before any sanding starts, not a guess from a blog post. Request a consultation through Aosaveswoodfloors and get a straight recommendation on your specific vents before you touch a sander.
Sources
FAQ
When Can You Not Refinish Hardwood Floors?
You can’t safely sand a floor if the wear layer measured at a register is thinner than roughly 2 to 2.4 millimeters, since another sanding pass risks cutting through to the tongue and groove. Engineered flooring with a thin veneer often falls into this category, and a screen-and-recoat or a professional evaluation is the safer route.
How Do You Seal Around Floor Vents Before Sanding?
Shut off the HVAC system, then block each register with a foam plug or taped craft paper cut to fit the opening, and label it so it doesn’t get missed when the system goes back on. This approach prevents wood dust from entering the ductwork and circulating through the home when the blower restarts. See wood dust sealing advice.
What Are Common Mistakes When Refinishing Floors?
Running a drum sander over a flush-mounted vent is one of the most frequent errors, since it gouges the register edges unevenly. Skipping the wear-layer check before sanding is the other big one, and it’s the mistake most likely to end in an unrepairable board.
How Much Does It Cost to Refinish 2,000 Square Feet of Hardwood Floors?
Cost varies by wear layer, finish type, and how many vents or transitions complicate the job, so there’s no single flat rate that applies to every floor. Pricing for full sand and refinish jobs varies; an in-home consultation can provide an exact quote based on your floor’s condition.
Recommended

Comments