


Tested Picks That Hide Pink: Red Oak Stain Colors for Homeowners

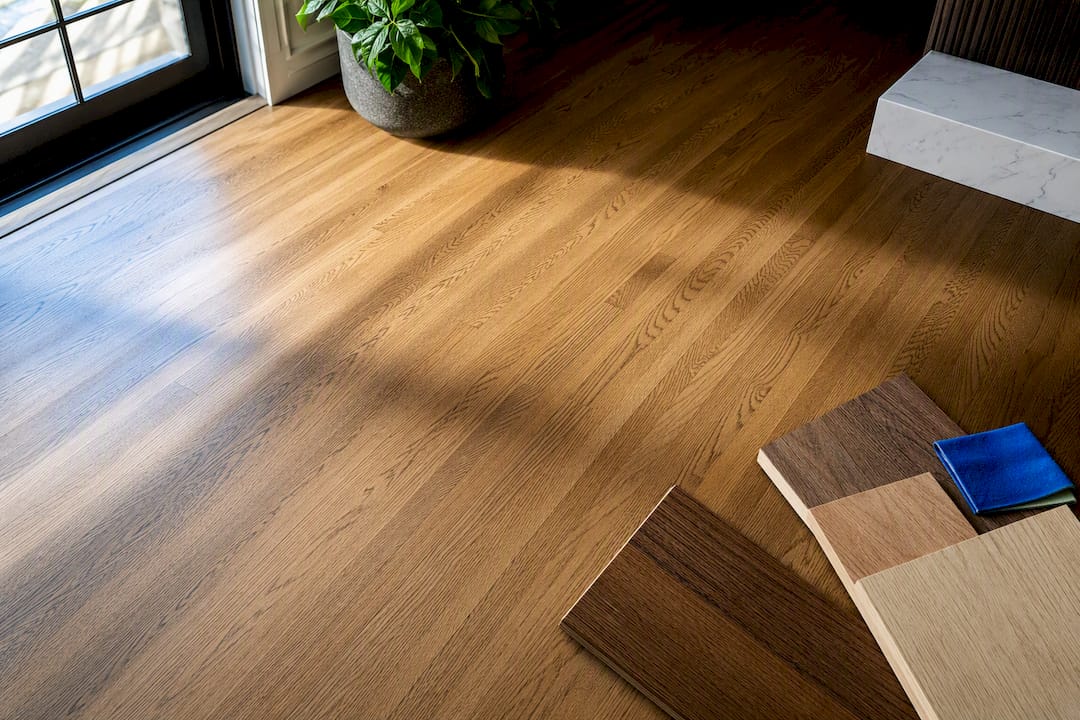
The two moves that actually beat red oak’s pink undertone are a dark, cool pigment like Minwax Jacobean or Bona DriFast Ebony, or a white-pigmented sealer like Bona Nordic Seal for a pale, whitewashed look. Everything in between risks going orange. Test any color on your actual floor first, and finish with a water-based topcoat so the shade you picked stays the shade you keep.
TL;DR:
Using a dark cool pigment stain or a white pigmented sealer can effectively neutralize the pink undertone in red oak.
Proper prep, including water popping and sanding to 80-100 grit, is crucial to achieving predictable and even stain results on red oak floors.
Testing stains on sample squares under different lighting conditions prevents surprises and ensures the chosen color works with the wood and room environment.
Water-based topcoats are recommended to preserve the color, as oil-based finishes tend to yellow over time, altering the intended look.
Whole-house staining projects are best handled by professionals to avoid uneven color, excessive downtime, and costly mistakes.
Table of Contents
Best Red Oak Stain Colors Compared
Red oak’s open grain grabs pigment fast, which is why some colors appear differently than expected. The stains below cover the range homeowners commonly use, from safe mid-tones to the darks and pale finishes that specifically fight the pink.
Minwax Wood Finish in the Red Oak or Provincial shades is the default for a reason: it’s cheap, sold at every hardware store, and behaves predictably on red oak’s grain. Provincial splits the difference between honey and brown, and it’s the color most flooring guides point to first for safe, mid-tone results.

Once you want to bury the pink instead of managing it, some dark, cool pigment stains like Minwax Jacobean and Bona DriFast Ebony are commonly used by professionals. These tend to override red oak’s undertone, though they may reduce visible grain contrast. Similarly, Varathane Dark Walnut and General Finishes Oil-Based Gel Stain in dark tones can achieve comparable effects, with the gel stain offering more control on vertical surfaces or furniture.
For a pale look, Bona Nordic Seal is the outlier on this list because it isn’t a stain at all. It’s a white-pigmented sealer that lightens the wood and mutes the pink instead of trying to out-color it, which is how homeowners get a Scandinavian, almost white-oak look out of red oak without bleaching it first.
Stain | Tone family | Best for | Cost/coverage signal | Handles red oak’s pink undertone |
Minwax Wood Finish (Red Oak/Provincial) | Warm mid-tone | Everyday floors and furniture | Budget, wide coverage per can | Lean into warmth; doesn’t neutralize pink |
Minwax Jacobean | Dark neutral/cool | Rooms wanting a deep, modern floor | Mid-range, one coat often enough | Strong, pigment density overrides pink |
Bona DriFast Ebony | Near-black cool | Maximum darkening, fast-dry jobs | Higher cost, professional-grade | Very strong suppression |
Varathane Dark Walnut | Dark brown | DIY dark floors on a budget | Budget to mid-range | Good, slightly warmer than Jacobean |
General Finishes Oil-Based Gel Stain | Dark, gel-bodied | Furniture, doors, vertical surfaces | Mid to higher cost, thick coverage | Good, gel controls blotching |
Bona Nordic Seal | White-pigmented sealer | Pale, whitewashed, white-oak look | Higher cost, specialty product | Best pale-look solution; mutes rather than masks |
How These Colors Actually Look on Red Oak
Red oak has a ring-porous, open grain structure that soaks up pigment unevenly, and underneath that grain sits a pink or salmon undertone that fights with warm stain colors. That combination is why a stain that looks perfectly brown on the can’s swatch can shift toward orange once it’s actually on your floor.
Here’s roughly what to expect from each color family once it hits red oak:
Warm mid-tones (Provincial, Golden Oak, Early American): amplify the existing warmth, often reading more orange than the sample chip suggests.
Dark neutrals (Jacobean, Dark Walnut, Espresso): pigment density wins, pink gets buried, grain contrast softens.
Reddish darks (Red Mahogany, English Chestnut): can intensify the pink into a rosy brown rather than neutralizing it.
Gray strategies (Classic Gray, gray-brown blends like Weathered Oak): risk a purple or mauve cast if the gray leans cool.
Whitewash/pale sealers (Bona Nordic Seal): mute the undertone instead of covering it, giving the most white-oak-like result.
Lighting changes all of this. Northern light (cooler, bluer) tends to expose gray or purple casts, while afternoon sun exaggerates warmth and can make a “neutral” stain look downright orange by evening. Photograph every sample square in morning light, midday light, and evening light before you commit, and shoot it next to your baseboards or existing trim so you can see how the tones actually sit together.
How to Pick a Stain Strategy for Your Floor
Before you open a can, decide what you’re actually trying to accomplish. Red oak gives you four realistic paths, and picking the wrong one after the fact means sanding it all off and starting over.
Decide your target look first. Ask whether you want to lean into red oak’s natural warmth, actively neutralize the pink, go dramatically dark, or whitewash toward a white-oak aesthetic. Each answer points to a completely different can.
Match the room’s fixed elements. Walk through with your existing trim, cabinetry, and any wood furniture that’s staying. A stain that looks great alone can clash badly next to cool-toned gray cabinets or warm cherry trim; this is where mixing wood tones intentionally rather than accidentally makes a real difference.
Consider maintenance realities. Darker stains show dust, pet hair, and scratches more visibly than mid-tones. Pale, whitewashed floors show dirt differently and often need more frequent cleaning to stay looking fresh.
Test a custom mix if the off-the-shelf colors miss. Pros routinely blend rather than use a single color straight from the can. A 1:1 mix of Provincial and Special Walnut lands in a balanced medium brown that resists the pink better than either alone. A 3:1 ratio of Early American to Jacobean keeps some warmth while pulling the color toward neutral.
Test before you buy in bulk. Apply your shortlisted colors, and any custom blends, to two or three adjacent sample squares on an inconspicuous part of the actual floor or a leftover offcut. Photograph them at different times of day before ordering a full can.
Pro Tip: Keep every sample square labeled with the exact product name and any mix ratio, and photograph them next to a piece of paper with that info written on it. Two weeks later, you will not remember which square was which.
Getting Predictable Results: Prep and Application
Most bad red oak stain jobs trace back to skipped prep, not a bad color choice. The sequence below keeps results consistent from sample square to finished floor.
Sand to the right grit and stop there. Floors should stop at 80 to 100 grit; furniture pieces can go finer, to 120 or 150 grit. Oversanding flattens the grain and reduces how evenly the wood accepts pigment.
Water pop the wood before staining. Wipe the sanded surface with a damp rag and let it dry for 20 to 45 minutes. This reopens the grain, darkens the final stain color by roughly one shade, and evens out pigment absorption across the pores.
Choose your application method by the piece. Wipe-on application works well for floors and gives you time to control depth of color. Brushing suits large vertical surfaces. Gel stains, being thicker, sit on the surface rather than soaking in unevenly, which makes them the better call for doors, trim, or furniture where drips and blotching are a real risk.
Apply to your test squares exactly as you’ll apply to the real surface, same tool, same wait time, same number of coats, and let it cure fully before judging the color.
Photograph and label every sample before moving to the full application, keeping notes on water popping and coat count for each one.
Choosing a Topcoat That Won’t Wreck Your Color
The stain color you pick on day one is not necessarily the color you’ll have in five years. Topcoat choice decides that.
Oil-based polyurethane ambers over time, and that yellowing can pull a carefully neutralized stain right back toward the orange you were trying to avoid.
Water-based topcoats are now the standard recommendation for preserving whatever color you land on, precisely because they don’t yellow the way oil-based finishes do, and they dry faster, which matters if you’re trying to get a room back into use.
Bona Nordic Seal earns its place here specifically for pale looks. If your goal is a white-oak-style finish, a water-based topcoat is the only sensible pairing, since an oil-based coat over a white-pigmented sealer will fight the entire point of using it. For more background on how finish chemistry changes appearance long-term, this breakdown of hardwood floor finish types is worth a look before you buy.
Sheen level changes perceived color too. A high-gloss finish makes any stain look darker and more saturated, while a matte or low-sheen finish reads lighter and more muted, even with the exact same stain underneath.
Maintenance plays into this as well. Satin and matte finishes hide scuffs better over years of foot traffic, while glossier finishes show wear faster and can need recoating sooner to keep the color looking even.
Advanced Color Strategies for Experienced DIYers
Gray stains are the riskiest color family on red oak, because gray plus a pink undertone can shift toward purple or mauve rather than the cool, driftwood look you’re picturing. Blending gray with a brown base, or reaching for a warmer gray-brown like Minwax Weathered Oak instead of a straight gray, reduces that risk considerably.
Ebonizing (an iron and tannin reaction that chemically darkens the wood) is a low-cost, historically used technique that works well on tannin-rich woods like red oak, but it demands testing because results vary batch to batch and over-application can leave the surface brittle or blotchy.
Dyes penetrate more evenly than pigmented stains and suit fine furniture detail, while pigmented stains and gels remain the better choice for floors and vertical surfaces where you need more forgiveness during application.
A Simple Testing Method You Can Actually Reproduce
Cut or find three sample squares of the same red oak, sand them to your target grit, and water pop at least one so you can compare popped versus unpopped results side by side.
Apply your shortlisted stain colors to each square using the exact method (wipe, brush, or gel) you plan to use on the real surface.
Photograph every square in morning, midday, and evening light before making a final call.
Prep matters as much as color: 80 to 100 grit for floors, water popping with a 20 to 45 minute dry window, then stain.
For whole rooms or matching to existing red oak elsewhere in your house, a professional color-matching process removes most of the guesswork this method is designed to reduce.
A company specializing in hardwood floor restoration has been performing this kind of work in central Illinois and the St. Louis metro area since 2003, using dustless techniques that get most restoration jobs finished in a single day, with floors walkable in about three hours. That kind of turnaround is exactly why homeowners tackling a whole-house color change often skip the DIY sample-square process entirely and call a pro instead.
Common Mistakes That Ruin a Red Oak Stain Job
The single most common mistake is skipping the sample square entirely and trusting the color chip on the can. Red oak’s grain and undertone change how a color reads enough that this shortcut causes the majority of “why does my floor look orange” complaints.
Rushing the water pop, or skipping it altogether, is another frequent culprit. Without it, stain absorbs unevenly across the open pores, leaving blotchy patches that show up worst under raking light from a window. Oversanding past 100 grit on a floor has the opposite problem: it closes off the grain’s ability to grab pigment, so the stain sits lighter and patchier than expected, especially with darker colors like Jacobean or Espresso.
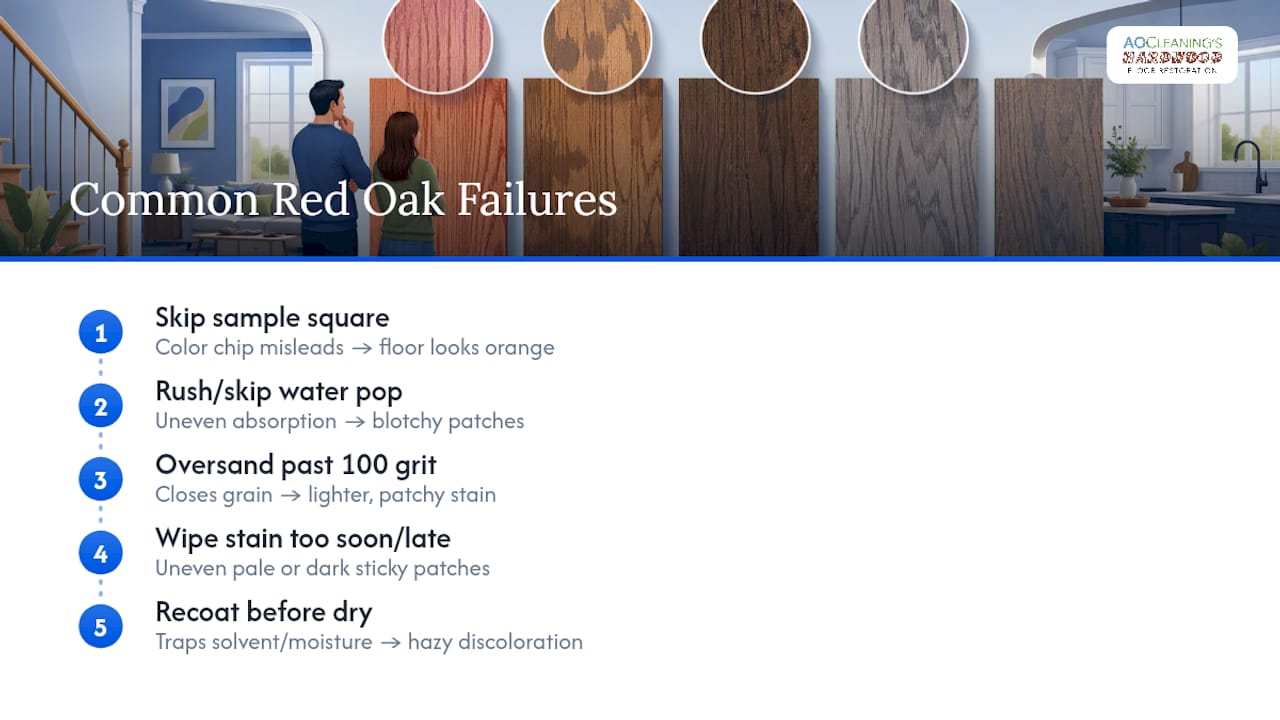
Wiping off stain too fast or too slow both cause trouble. Wipe too soon and the color comes out uneven and pale; leave it too long and you get dark, sticky patches that never fully cure. Gel stains forgive this more than liquid stains, which is part of why they’re popular for tricky vertical surfaces.
Recoating too early is a quieter mistake. If the stain hasn’t fully dried before the topcoat goes on, you can trap solvent underneath, leading to a hazy or uneven finish that shows up weeks later. If you spot dark discoloration after the fact, it’s worth checking whether moisture got trapped during this stage rather than assuming it’s a wood defect.
Temperature, Humidity, and How They Change Your Result
Stain dries and cures differently depending on the room, and red oak’s open grain makes it more sensitive to these swings than tighter-grained woods.
Cold rooms slow drying dramatically, which can leave stain sitting on the surface longer than intended and pulling color deeper into already-open pores, sometimes darkening the result more than you planned. Warm rooms speed drying, which can cause uneven wipe-off if you’re working a large area, since the leading edge starts setting before you’ve finished wiping the far side.
Humidity matters just as much. High humidity slows both stain and topcoat curing, extending the window where dust and debris can settle into a wet finish. Low humidity speeds curing but can cause the topcoat to skin over before solvents underneath fully evaporate, occasionally trapping a slightly hazy look in the finish.
Direct sunlight during application is worth avoiding entirely. UV exposure while a stain is wet can cause uneven curing and, over the following weeks, accelerate the amber shift in oil-based topcoats specifically. If you’re staining near a large window, close the blinds during application and for the first day of cure time.
Should You DIY or Call a Pro for Your Red Oak Floor?
A single room, a set of stairs, or a piece of furniture is a reasonable DIY project. Test squares and patience get you most of the way there. Whole-house jobs, or matching new red oak to flooring that already exists elsewhere in the house, are a different animal entirely. A pro removes the risk of an orange surprise spreading across 800 square feet, cuts the dust and downtime dramatically, and floors are typically walkable again within about three hours in this service area.
— Jim
Getting Your Red Oak Color Right the First Time
In-home color tests can be run before starting work, so stain decisions get made on the actual wood, under actual lighting, not on a paint chip in a store aisle. Dustless refinishing and clean-and-buff services are offered to handle the sanding, water popping, and topcoat sequencing described above without the dust cloud or the week of downtime a full DIY sand job usually costs.

Homeowners across these counties may choose a local hardwood restoration service because many jobs wrap in a single day, with floors ready to walk on in about three hours, not three days. If your red oak floors are already showing signs of the wrong stain choice, or you’d rather skip the sample-square guesswork altogether, start with a color correction and clean and buff consult and get a firm answer on what your floors can actually look like before committing to a full refinish.
Where to Verify These Colors and Techniques
Before buying any stain, check the manufacturer’s technical data sheet for coverage rates and dry times specific to your climate. The sources below cover the product comparisons, technique explanations, and testing methods referenced throughout this guide:
Best Red Oak Floor Stains Compared by Cost & Undertone, for product-level cost and coverage detail.
Minwax stain color chart guidance, for how specific colors behave across wood species.
The Art of Finishing Red Oak, for ebonizing and advanced technique cautions.
Sources
Best Red Oak Floor Stains: 7 Compared by Cost & Undertone (2026)
Best Red Oak Floor Stains And How To Choose A Color — Four Generations One Roof
Minwax stain color chart guidance and stain behavior on different species — DG Floors
Recommended

Comments