


Questions to Ask a Floor Restoration Pro: Homeowner Checklist

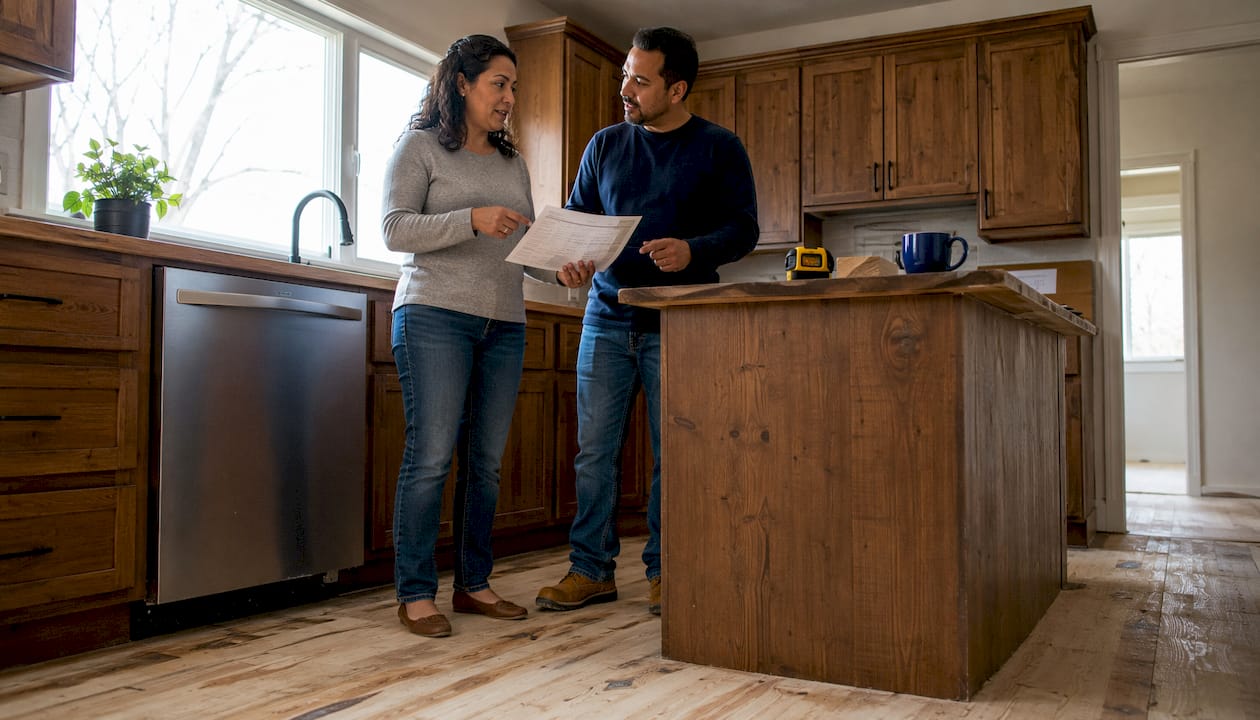
Before you hire anyone to touch your hardwood floors, six questions will tell you almost everything you need to know: (1) Are you licensed, insured with general liability coverage, and do you carry worker’s comp? (2) Do you recommend a buff-and-coat or a full refinish for my floors, and why? (3) What is your dust-control plan, and do you use a HEPA-connected dustless system? (4) What finish products do you use, and what are their VOC levels? (5) What exactly does your written estimate include, line by line? (6) What warranty do you offer, and what does your payment schedule look like?
Those six questions are your opening script. The trust signals to verify immediately: proof of at least $1 million in general liability coverage, a state contractor license number you can look up yourself, references with before-and-after photos, and a detailed written work order. Aosaveswoodfloors (AO Cleaning) is a concrete local example of a provider that documents all of these items, and their workflow is used throughout this guide as a best-practice reference.
Table of Contents
What questions should you ask a floor restoration contractor?
What’s the difference between a buff-and-coat and a full refinish?
How do you choose the right finish and protect indoor air quality?
How long does floor restoration take, and how do you prepare?
What should a professional floor restoration estimate include?
Aosaveswoodfloors: get a free estimate and skip the guesswork
What questions should you ask a floor restoration contractor?
The most useful interview format groups your questions by theme. That way, a vague answer in one category tells you exactly where the contractor is weak, and you can disqualify quickly instead of discovering problems mid-job.
Credentials
“Can you give me your state contractor license number so I can verify it online?”
“Can you provide a certificate of insurance showing at least $1 million in general liability per occurrence?”
“Do you carry worker’s compensation, and can I see proof of that coverage?”
“Are you or any of your crew members NWFA-certified or affiliated?”
A strong answer: the contractor hands you a certificate of insurance on the spot, gives you a license number without hesitation, and can name their insurer and policy effective dates.
Methods and repairs
“Will you do a buff-and-coat or a full sand-and-refinish on my floors, and what makes you recommend one over the other?”
“What sanding grit progression do you plan to use?”
“Will you inspect for loose boards, squeaks, water damage, or subfloor moisture before you start?”
“How do you handle board replacement if we find damage during prep?”
A strong answer names specific grits (for example, starting at 36 or 60 grit and finishing at 100 or 120), explains the inspection process, and gives a clear repair allowance or line-item price for board work.
Finishes and air quality
“What finish product do you plan to use, and can you share the technical data sheet?”
“What is the VOC level of that finish, and do you offer a low-VOC or waterborne option?”
“How many coats do you apply, and what is the sheen level?”
“What is the walk-on time after the final coat, and when is full cure?”
A strong answer names the product by brand and product line, not just “polyurethane,” and can tell you the cure time in hours and days.
Timeline and logistics
“How many days will the job take from prep through final coat?”
“What do you need me to do before you arrive, and what do you handle on-site?”
“How do you protect vents, adjacent rooms, and HVAC systems from dust?”
Cost and estimates
“Can you give me a written estimate that breaks out square footage, sanding, repairs, finish coats, containment, and cleanup separately?”
“Are repair costs included as an allowance or priced per board?”
“What is your payment schedule, and do you require a deposit?”
Contract and warranty
“What workmanship warranty do you provide, and is it in writing?”
“Does the finish manufacturer offer a separate product warranty?”
“What is your process if I’m not satisfied with the final result?”
Pro Tip: If a contractor cannot name their sanding grit progression or explain their dust-containment plan in specific terms, that is a disqualifier. Vague answers on process almost always mean vague execution.

How do you verify a contractor’s license and insurance?
Credentials are the first filter, and they take less than ten minutes to check. Most homeowners skip this step and pay for it later.

The industry standard for U.S. residential contractors is general liability coverage of at least $1 million per occurrence. That figure covers property damage or bodily injury that occurs during the job. Ask for the certificate of insurance, not just a verbal confirmation, and check that the policy is current by confirming the effective and expiration dates with the insurer’s name on the document.
Worker’s compensation is a separate requirement. If an uninsured worker is injured on your property, you can be held liable for medical costs and lost wages. Some sole-operator contractors carry a written waiver instead of a full policy; ask for that documentation in writing either way.
For the license, ask for the number and verify it yourself through your state’s contractor licensing board portal. Most states maintain a public lookup tool. In states with mandatory flooring contractor licensing (California, Florida, and Louisiana are examples), a licensed contractor has passed a trade exam and carries bonding. In states without a specific flooring license, the relevant credential is typically a general contractor or home improvement contractor license.
Verification checklist:
Request the certificate of insurance and note the insurer name and policy dates
Ask for the license number and look it up on the state licensing board portal
Request proof of worker’s comp or a written waiver
Ask whether any subcontractors will be on-site, and confirm they carry independent coverage
Look for NWFA (National Wood Flooring Association) membership or certification at woodfloors.org as an additional trust signal
Record the license number and insurance carrier name before any work begins. You will need both if a dispute or claim arises.
What’s the difference between a buff-and-coat and a full refinish?
The method a contractor recommends tells you a lot about their honesty. A reputable pro will explain when a buff-and-coat is appropriate and when it is not, and they will refuse to oversell sanding.
Method | What it fixes | Typical on-site time | When it’s the right choice |
Screen and recoat (buff-and-coat) | Light surface scratches, dull finish, minor wear | 1 day | Finish is intact, no bare wood, no wax contamination |
Full sand and refinish | Deep scratches, stains, worn-through finish, color change | 2–4 days | Finish has failed, bare wood is visible, or floor needs new color |
Single-day restoration | Surface refresh, light damage, interim maintenance | 1 day | Floor is structurally sound and finish has not fully failed |
Before any sanding begins, a thorough contractor inspects for loose boards, squeaks, splits, water or pet stains, board replacement needs, and subfloor moisture. These items should appear in the estimate as either a repair allowance or individual line items. Skipping this inspection is one of the most common causes of finish failure after the job.
Dustless or low-dust sanding systems use machines connected to HEPA-filter vacuums that capture the vast majority of airborne particles at the source. Ask specifically whether the contractor uses this equipment and how they contain dust from vents and adjacent rooms. Tape-and-plastic containment of HVAC vents and doorways is standard practice with a quality crew.
Pro Tip: A contractor who tells you a buff-and-coat is fine when your floor has bare wood showing, wax contamination, or peeling finish is either cutting corners or doesn’t know what they’re looking at. A willingness to recommend the more disruptive full refinish when it’s genuinely needed is a sign of a trustworthy pro, not an upsell.
How do you choose the right finish and protect indoor air quality?
The finish conversation is where a lot of homeowners get lost in jargon. Here is what actually matters.
The four finish families you will hear about most often are waterborne polyurethane, oil-based polyurethane, aluminum-oxide factory finishes (typically on pre-finished boards), and penetrating oils. Waterborne finishes dry faster, have lower VOC levels, and dry to a clearer tone. Oil-based finishes take longer to cure, have higher VOC output, and add a warm amber tone that many homeowners prefer. Penetrating oils soak into the wood rather than forming a surface film; they are easier to spot-repair but require more frequent maintenance. Aluminum-oxide finishes are factory-applied and extremely durable, but they cannot be recoated in the field the same way site-applied finishes can.
Key questions to ask about any finish:
“What is the product name and manufacturer, and can you share the technical data sheet?”
“How many coats do you apply, and what sheen level do you recommend for my traffic level?”
“What is the VOC content, and do you offer a low-VOC alternative?”
“What is the walk-on time after the final coat, and when can I put rugs and furniture back?”
“Does the manufacturer offer a warranty on this finish product?”
For sensitive occupants, including children, elderly family members, or anyone with respiratory conditions, low-VOC waterborne finishes and thorough ventilation during and after application are worth the extra conversation. Ask the contractor to leave windows open and run exhaust fans during and after application. Temporary relocation for 24–48 hours after oil-based finish application is a reasonable precaution.
Pro Tip: Ask for the finish product’s technical data sheet before the job starts. A contractor who cannot produce it is either using an unknown product or hasn’t thought through the spec. The TDS tells you cure time, recoat window, VOC content, and application temperature range, all of which affect the final result.
For long-term hardwood floor maintenance after the finish cures, the product choice also determines what cleaning products are safe to use going forward.
How long does floor restoration take, and how do you prepare?
Realistic timelines depend on the method. Here is a practical reference:
Method | On-site days | Walk-on time after final coat | Wait before rugs/furniture |
Screen and recoat | 1 day | 4–8 hours | 24–48 hours |
Single-day restoration | 1 day | ~3 hours | 24 hours |
Full sand and refinish | 2–4 days | 24 hours | 5–7 days |
Contractors should provide a realistic timeline that includes each phase: prep, sanding, staining (if applicable), finish coats, and cure. If a contractor gives you a single-day estimate for a full sand-and-refinish on a large area, ask them to walk you through how that is possible.
Homeowner prep checklist for the day before:
Remove all furniture from the work area (or confirm the contractor handles this and at what cost)
Clear closets and shelving near the floor if sanding dust could reach them
Make arrangements for pets, as fumes and equipment are hazardous to animals
Cover or remove items in adjacent rooms that could collect dust
Confirm HVAC shutoff or filter protection with the contractor
After the job:
Wait the full walk-on time before re-entering with shoes
Keep windows open for ventilation during the cure period
Avoid wet mopping for at least a week after oil-based finishes
Follow the contractor’s specific post-care instructions in writing
Pro Tip: If disruption is your biggest concern, ask about single-day restoration options or staging the job room by room. Aosaveswoodfloors completes most restoration services in a single day, with floors ready to walk on in about three hours, which makes scheduling around a busy household far more manageable.
What should a professional floor restoration estimate include?
A one-line quote is a red flag. A professional estimate functions as a detailed work order that protects both parties and eliminates surprise charges.
Every written estimate should include:
Square footage measured on-site, not estimated over the phone
Prep tasks: nail setting, minor crack filling, board inspection
Repair allowance or line-item pricing for board replacement or subfloor work
Sanding grit progression: starting grit, intermediate grits, and final grit
Stain steps: whether stain is included, how many samples are provided, and the approval process
Finish product name, number of coats, and sheen level
Containment and cleanup: dust containment method, vent protection, and post-job cleanup scope
Disposal: how sanding dust and waste materials are removed
Timeline: start date, estimated completion date, and key milestones
Payment schedule: deposit amount, progress payments, and final payment trigger
On pricing context: restoration is typically far more cost-effective than replacement because it avoids material procurement, demolition, and disposal costs. A 40% price gap between two bids almost always signals a scope difference, not a pricing efficiency. One contractor may have excluded subfloor inspection, moisture assessment, or finish coats that the higher bidder included.
How to request a comparable estimate from every bidder:
Send each contractor the same written scope request before they visit.
Ask each one to break out labor, materials, repairs, and cleanup separately.
Compare line by line, not total price.
Ask each contractor to explain any line item that differs significantly from the others.
Request a signed work order before any deposit changes hands.
What must be in the written contract before you sign?
The contract is where vague conversations become enforceable commitments. Insist on these elements in writing before any deposit is paid.
Must-have contract elements:
Exact scope of work: which rooms, which method, which products
Product names and brands for finish, stain, and any fillers
Number of coats and sheen level
Color or stain approval process: written sign-off before application
Start date and estimated completion date
Cleanup responsibilities and disposal method
Payment schedule with specific triggers (deposit, progress payment, final payment on punch-list completion)
Workmanship warranty: duration and what it covers
Manufacturer finish warranty: product name and warranty terms
Process for disputes or unsatisfactory results
Payment schedule red flags:
Demand for full payment upfront before work begins
Cash-only payment with no receipt
No final payment tied to a walkthrough or punch-list sign-off
A sensible payment structure is a deposit of roughly 10–30% depending on material costs, a progress payment at a defined milestone (such as after sanding is complete), and a final payment after the homeowner approves the finished result. Never release the final payment before walking the job with the contractor.
Warranty types to understand:
Workmanship warranty: covers the contractor’s labor, typically one to several years
Manufacturer finish warranty: covers the finish product itself, separate from labor
Document any warranty claim in writing and photograph the issue before contacting the contractor
What contractor red flags should you watch for?
Some problems announce themselves before the job starts. Others show up in the first coat. Here is what to watch for at each stage.
During vetting:
Refuses to provide proof of insurance or gives a verbal-only assurance
Cannot produce a license number or deflects the question
Provides a one-line estimate with no breakdown
Cannot explain their dust-containment plan in specific terms
Refuses to provide references or before-and-after photos from similar projects
Demands a large cash deposit before any work is scoped
During the job:
Crew arrives without HEPA-connected equipment despite promising dustless sanding
Skips the pre-sanding inspection for loose boards or moisture
Applies finish without allowing adequate dry time between coats
Cannot name the finish product being applied
The long-term cost of choosing the lowest bid is almost always higher than the short-term savings. Contractors who underbid typically cut corners on prep, materials, or containment, which leads to premature finish failure, uneven sanding, or hidden charges that surface mid-job. A slightly higher bid with a detailed scope and verifiable credentials saves money over the life of the floor.
When should you hire a pro versus doing it yourself?
The honest answer depends on your floor’s condition, not your confidence level.
DIY is reasonable for:
Basic buff-and-coat on a floor with intact finish and no bare wood
Minor spot repairs on surface scratches
Routine cleaning and maintenance between professional services
Hire a pro for:
Full sanding of historic or thin-wear-layer floors
Moisture or subfloor issues
Board replacement or structural repairs
Stair work, which requires specialized equipment and technique
Any floor where the wear layer is close to exhausted
Follow this decision sequence:
Inspect the floor for bare wood, peeling finish, or visible stains. If any are present, call a pro.
Ask whether the floor has been sanded before and how many times. Most solid hardwood floors can be sanded 4–6 times over their life; engineered floors have a much thinner wear layer.
Assess your tool access. Drum sanders and edgers are rentable, but operating them incorrectly causes permanent damage in minutes.
Consider your dust tolerance and ventilation options. A full refinish generates significant airborne particles even with containment.
If in doubt, request a pre-restoration inspection from a professional before committing to either path.
Pro Tip: The single most important diagnostic question is whether your floor has “one sand left.” A pro can measure the wear layer above the tongue-and-groove joint. If it’s less than 1/16 inch, sanding is off the table and your options narrow fast. Ask this before you rent any equipment or sign any contract.
How do you vet references, reviews, and portfolio photos?
A contractor’s portfolio is only as useful as your ability to verify it. Here is how to do that quickly.
Reference-check questions to ask past homeowners:
Did the job finish on time and on budget?
Was the site clean during and after the work?
Did the final cost match the written estimate?
Were there any issues after completion, and how did the contractor respond?
Would you hire them again for a larger project?
For portfolio photos, ask the contractor to connect you with the homeowner from that specific job. Photos without a contactable reference are unverifiable. Ask to see photos of edges, stairs, and transitions, not just the center of a room, because those are where shortcuts show up.
Online reviews: look for recent, detailed reviews that describe the process, not just the outcome. A cluster of five-star reviews posted within a short window with no specifics is a pattern worth questioning. Also check how the contractor responds to negative reviews. A professional response to a complaint tells you more about their accountability than a wall of five-star ratings.
A quick validation call script: introduce yourself, confirm the project type and approximate date, ask one specific question about the process (for example, “Did they use dustless equipment?”), and ask whether the final cost matched the estimate. The whole call takes three minutes and confirms whether the reference is genuine.
Ask whether the contractor performs the work in-house or uses subcontractors. A heavily subcontracted crew with no direct accountability is a risk factor, especially for warranty claims after the job.
How Aosaveswoodfloors handles these questions in practice
Aosaveswoodfloors (AO Cleaning) has been serving homeowners across central Illinois and the St. Louis metro area since 2003. With 450+ Google reviews, they offer a concrete example of what documented best practices look like in a real local provider.
Their standard workflow addresses the checklist items above directly:
Dustless sanding on every job, using equipment that keeps airborne particles contained rather than redistributed through the home
Single-day restoration options for most projects, with floors ready to walk on in about three hours
Eco-friendly, low-odor products that reduce the indoor air quality concerns that come with traditional oil-based finishes
Clear written work orders that document scope, products, and timeline before any work begins
Service area coverage across St. Louis, Monroe, and Madison Counties, including St. Louis, Columbia, Belleville, Fairview Heights, Waterloo, and O’Fallon
Services available include clean and buff, 1-day hardwood floor restoration, full sand and refinish, screen and recoat, and wax removal.
“Before you REFLOOR it, let us RESTORE it.” Aosaveswoodfloors’s tagline captures the core argument of this entire guide: restoration is almost always worth evaluating before replacement, and a well-documented estimate from a credible provider is the tool that makes that evaluation possible.
Use AO Cleaning’s written estimate format as a template when comparing other bids. If a competing estimate is missing the sanding grit progression, the finish product name, or the containment plan, you now know exactly what to ask for.
Key Takeaways
Asking the right questions before hiring a floor restoration contractor is the single most effective way to avoid costly mistakes, protect your floors, and get a result that lasts.
Point | Details |
Verify credentials first | Request proof of ≥$1M general liability, worker’s comp, and a verifiable state license number before any other conversation. |
Method choice reveals honesty | A contractor who explains when a buff-and-coat is wrong and insists on a full refinish when needed is more trustworthy than one who agrees with everything. |
Estimates must be line-item | Any estimate missing sanding grit progression, finish product name, or containment plan is incomplete and should be sent back for revision. |
Lowest bid usually costs more | Underbid contractors cut corners on prep or materials, leading to premature finish failure and follow-up costs that exceed the original savings. |
Aosaveswoodfloors as a benchmark | AO Cleaning’s documented workflow (dustless sanding, single-day options, 450+ Google reviews) shows what a well-documented local provider looks like. |
What most homeowners get wrong when hiring a floor pro
The mistake I see most often is treating the estimate as a formality rather than a diagnostic tool. A vague one-line quote is not just an incomplete document. It tells you the contractor did not do a thorough site assessment, which means the scope is guesswork and the price will shift once they are on-site.
The second mistake is skipping the stain approval step. A contractor who applies stain without a written sign-off from the homeowner is one misunderstanding away from a dispute. Ask for a sample board or a small test area, approve it in writing, and make that approval a condition of the contract. This takes ten minutes and prevents a common source of post-job conflict.
The third thing people underestimate is the cure timeline. Walk-on time and full cure are not the same thing. You can walk on a waterborne finish in four to eight hours, but putting a rug down at hour nine can trap moisture and ruin the finish. Ask for both numbers in writing, and follow them. For post-restoration care specifically, the first two weeks after a refinish are when most homeowner-caused damage happens.
One practical tip you can use immediately: before the contractor leaves after the final coat, ask them to walk the floor with you under raking light (a flashlight held low and parallel to the surface). That angle reveals lap marks, missed edges, and uneven sheen that are invisible under overhead lighting. If there is a problem, you want to catch it before the finish fully cures, not three weeks later.
Aosaveswoodfloors: get a free estimate and skip the guesswork
If your floors need attention and you want a provider who shows up with the documentation this guide describes, Aosaveswoodfloors is worth a call before you commit to anything else.

AO Cleaning offers hardwood floor clean and buff for lighter refreshes and full sand and refinish for floors that need a complete overhaul. Dustless equipment on every job, eco-friendly products, and most services completed in a single day with floors walkable in about three hours. They serve homeowners across St. Louis, Monroe, and Madison Counties, including Columbia, Belleville, Fairview Heights, Waterloo, and O’Fallon.
Request a free in-home estimate and bring your written estimate from another contractor if you have one. AO Cleaning will walk you through the scope line by line so you can compare bids on equal terms. Call or contact them through aosaveswoodfloors.com to schedule.
Sources and verification resources
Use these to confirm credentials, check standards, and dig deeper on any topic in this guide.
The Hartford: General liability insurance for contractors — Confirms the $1 million per occurrence industry standard for residential contractor coverage.
Landes Blosch: Hiring a contractor without insurance — Explains homeowner liability exposure when a contractor lacks worker’s compensation.
National Wood Flooring Association (NWFA) — The primary industry body for hardwood flooring standards and contractor certifications; use the member directory to verify NWFA affiliation.
Expert Flooring Repair: Questions to ask a floor repair contractor — Structured pre-hire question framework covering licensing, experience, materials, and warranty terms.
Signature Custom Flooring: Questions to ask before hiring a refinisher — Practical question sets covering dustless sanding, estimate detail, and finish specifications.
BuildDirect: Questions to ask before hardwood flooring installation — Timeline and contractor communication guidance.
Art Stone Restoration — A restoration firm that emphasizes comprehensive written estimates and work orders; useful as a reference point for what detailed contractor documentation looks like.
Aosaveswoodfloors: Full sand and refinishing service — AO Cleaning’s primary service page; use to understand what a documented local provider’s scope looks like.
To verify a license: search “[your state] contractor license lookup” and enter the license number the contractor provides. Most state portals return the license status, expiration date, and any disciplinary history within seconds.
To confirm insurance: call the insurer named on the certificate of insurance and ask them to confirm the policy is active and the coverage amount matches what is listed on the certificate.
To find manufacturer data sheets: search the finish product name plus “TDS” or “technical data sheet.” Most major finish manufacturers (Bona, Loba, Pallmann, and others) publish these documents publicly on their websites.
Recommended

Comments