


3 Hours to Walkable Floors: Move Furniture for Refinishing, Homeowners

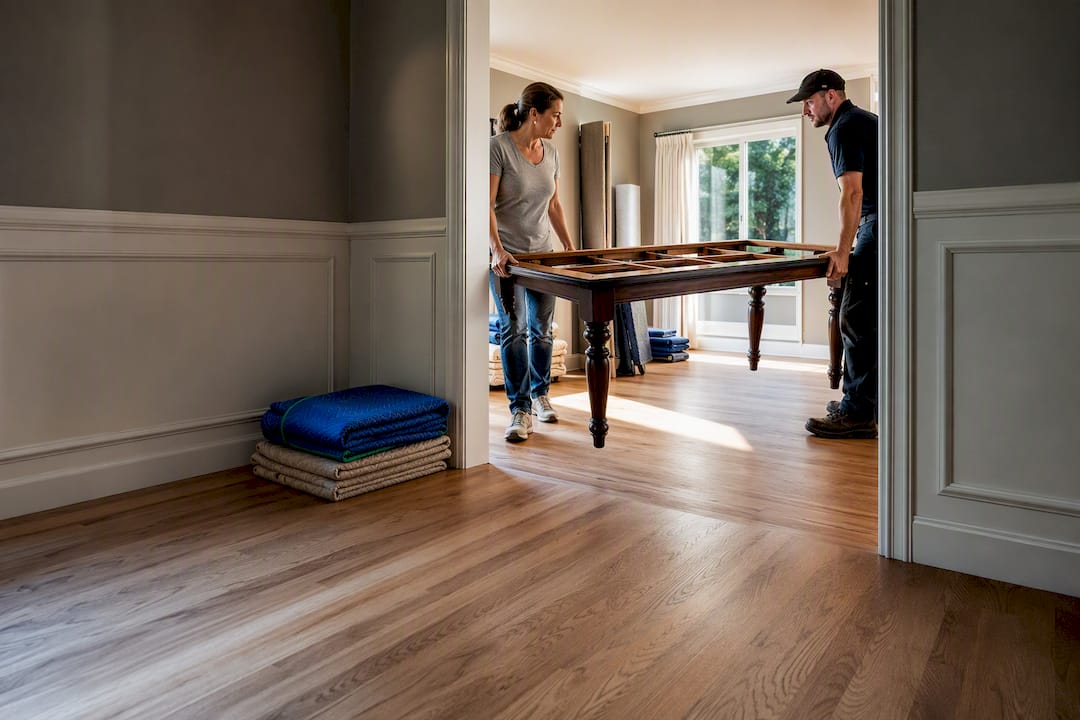
Clear every room down to the bare floor, then decide fast: stage furniture in an adjacent space or book short-term storage. Light pieces and dressers you can move yourself with sliders and blankets. Pianos, safes, pool tables, and anything requiring stairs work belong with professionals. Timing matters too, since reentry windows depend on the finish and how the job is done.
TL;DR:
Moving large or heavy furniture, such as pianos and safes, requires professional assistance to prevent damage or injury.
Stage furniture inside the house for small jobs and use external storage like pods for large, whole-house refinishing projects.
Disassemble large furniture and label hardware at least two days before refinish work to make moving easier and safer.
Protect hardwood floors from scratches by using felt pads, sliders, and plywood runners during furniture transport.
Wait at least several days, often up to a week, before moving furniture back onto floors finished with polyurethane, depending on the curing time.
Table of Contents
How Do You Prepare a Room to Move Furniture for Floor Refinishing?
Most refinishing delays trace back to one thing: nobody planned the move until the crew was already parked outside. Working backward from the job date fixes that.
One week out, walk the route furniture will travel and measure it. Doorways, hallway turns, and stairwell landings all matter, especially for sofas, dressers, and dining tables that need clearance to move through corners. This is also when you decide which rooms become staging areas and which stay as walkways for the crew.
Three days out, start emptying. Pull everything out of drawers, cabinets, and closets in the rooms getting refinished. Loose items, breakables, lamps, and anything on shelves needs to come down. A loaded drawer significantly increases the weight of furniture and can make lifting it unsafe.
Two days out, disassemble what you can. Bed frames, table leaves, and modular furniture come apart faster than most people expect, and a disassembled piece is dramatically easier to carry through a doorway. Label hardware with masking tape and a marker, or drop screws into a labeled sandwich bag taped to the piece itself. You will not remember which bolts go where three weeks from now.
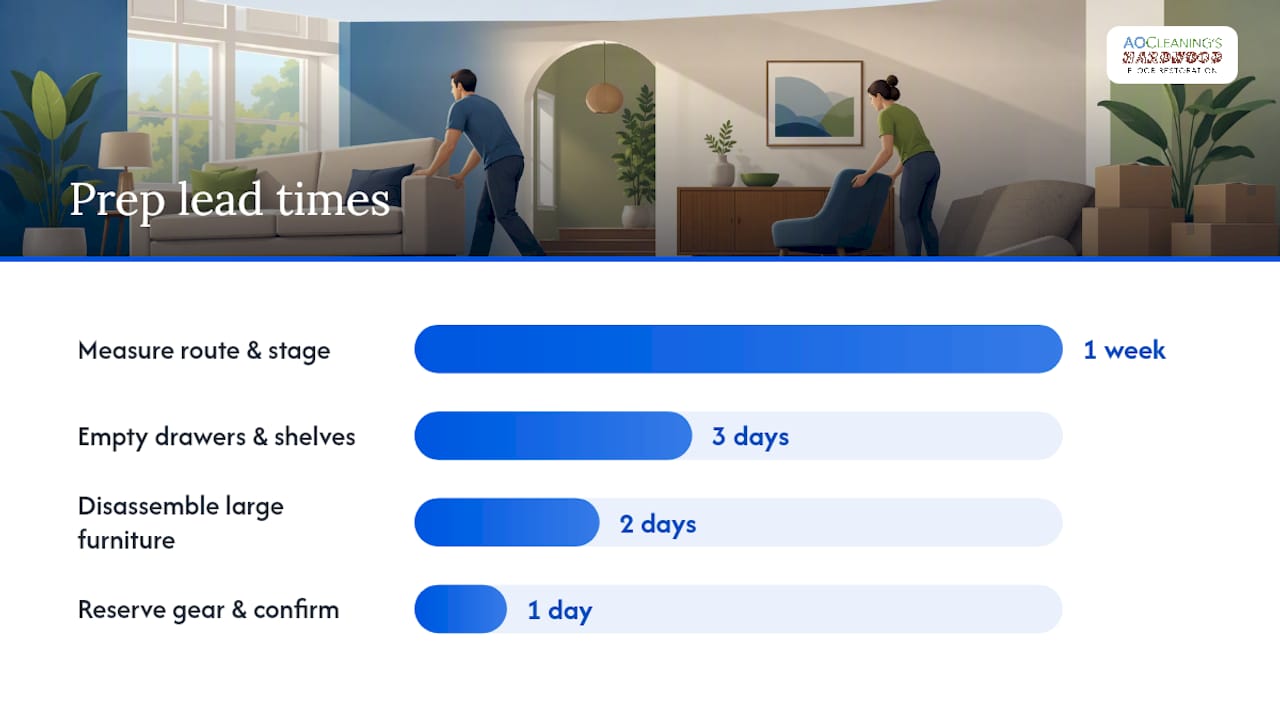
Day before, lock in your equipment and confirm the schedule. If you’re renting a dolly or booking a storage pod, reserve it in advance to ensure availability, as last-minute rentals may not be possible. This is also the moment to call your contractor and confirm arrival time, which rooms they need clear first, and whether they expect furniture gone entirely or just staged out of the work zone.
Here’s the sequence in order:
Measure doorways, hallways, and stairwells along the moving route.
Choose which rooms will hold staged furniture and which stay clear as walkways.
Empty drawers, cabinets, and shelves; remove breakables and loose items.
Disassemble large furniture where possible and label all hardware.
Reserve dollies, sliders, or a storage pod, and confirm the contractor’s schedule and access needs.
Skipping steps rarely saves time. It just moves the chaos to the day the crew shows up, which is the worst possible day for it.
Should You Store Furniture Off-Site or Stage It in Another Room?
The answer depends almost entirely on job size. A one-room refresh rarely justifies renting a pod. A whole-house sand-and-refinish usually does.
Staging furniture inside the house makes sense for smaller jobs, quick touch-ups, or single-room refinishing where you have a spare bedroom, garage, or basement with room to spare. It costs nothing extra and keeps everything within reach. The tradeoff is dust. Refinishing work, even with dustless equipment, still kicks fine particles into the air, and furniture staged too close to the work zone can pick up a film that’s annoying to clean off fabric and finished wood.
External storage earns its cost when the whole main floor is getting refinished, when you’re short on interior space, or when the job stretches multiple days and you don’t want furniture sitting in a garage exposed to temperature swings. Short-term storage pods reduce the in-home staging problem entirely, which matters most on jobs where every room is in play at once.
A workable staging layout usually looks like this:
Push dining furniture into the garage if it’s dry, level, and not doubling as a work zone.
Move bedroom furniture to a spare room or a portion of the basement that’s staying untouched.
Stack smaller items (lamps, decor, rugs) in a closet or corner that won’t block the crew’s path.
Keep at least one clear walkway from the front door to the work area at all times.
Avoid stacking furniture directly against walls in rooms getting refinished. Baseboards sometimes get sanded or recoated too.
The mistake homeowners make most often is treating staging as an afterthought and shoving furniture wherever it fits. That works until someone needs to walk through with a floor sander and can’t, or until a piece staged too close to the work area gets a fine dust coating that takes an afternoon to wipe down.
What Equipment Do You Need to Move Furniture Safely?
You don’t need a moving company’s warehouse of gear, but a few tools make the difference between a controlled move and a scraped floor or a strained back.
Furniture sliders: Flat discs, usually felt or plastic, that go under each leg so heavy pieces glide instead of drag. Best for couches, dressers, and tables moving short distances across a flat surface.
Moving blankets: Wrap sharp corners, glass fronts, and finished wood surfaces to prevent scuffs during transport or staging.
Furniture dolly: A flat platform on wheels for stacking boxes or rolling a single heavy item like a bookshelf or dresser.
Appliance dolly: Built with straps and a stair-climbing frame, meant for refrigerators, washers, and anything tall and top-heavy.
Moving straps: Shoulder-style straps that redistribute weight off your back and arms, useful for two-person carries on stairs.
Removing legs, doors, or drawers from a piece before moving it isn’t just about clearing doorways. It genuinely lightens the load, and a lighter load means less strain and less risk of dropping something on a finished floor. Reserving the right dollies, sliders, and straps ahead of time and disassembling what you can are two of the most repeated pieces of advice from professional movers, and for good reason.
On technique: lift with your legs, not your back, and never twist while carrying weight. Communicate constantly with whoever’s helping you, especially on stairs or blind corners, where one person can’t see what’s ahead. If you’re removing a door to widen a hallway route, a straightforward guide on removing interior doors walks through the hinge-pin process without damaging the frame.
Pro Tip: Slide a moving blanket under sliders on carpet transitions. The blanket catches where the slider would otherwise snag, and it keeps you from having to lift the piece again halfway through the move.
How Do You Protect Hardwood Floors While Moving Furniture Out?
Dragging is the single most common cause of gouges during a move, and it happens fast. A dresser dragged six feet across a hardwood floor can leave a scratch that outlasts the move itself by years.
Felt pads, furniture sliders, and moving blankets are the baseline defense, and they cost almost nothing compared to the price of a floor repair. Beyond that, a few extra layers of protection help on the move itself:
Lay plywood runners or heavy-duty floor paper like Ram Board along the main traffic path for large or repeated moves.
Sweep and vacuum the floor before you start. Grit and small debris under a slider act like sandpaper.
Check furniture legs and slider bottoms for embedded grit before every pass across the floor.
Keep the moving path separate from where the crew plans to sand, stage materials, or run equipment cords.
Coordinate directly with your contractor before moving day. Ask where they want furniture staged, what dust control method they’re using, and whether they need certain rooms completely clear versus just walkable. A contractor coordination checklist helps make sure nobody’s guessing about access on the morning the crew arrives. For a deeper look at scratch prevention specifically, this guide on protecting hardwood floors during a move covers the felt pad and slider setup step by step.
Which Furniture Should You Leave to the Professionals?
Some items simply are not a homeowner-and-a-friend job, no matter how many sliders you own.
Pianos: Upright and grand pianos are dense, oddly balanced, and expensive to repair if dropped. Piano movers use specialized boards and dollies built for that exact weight distribution.
Safes: A home safe can weigh several hundred pounds in a compact footprint, which makes it one of the hardest items to move without proper rigging equipment.
Pool tables: These come apart in sections, including a slate bed that cracks if handled wrong, and reassembly requires releveling.
Oversized antiques: Age and structural fragility mean a wrong grip can crack a joint that took a craftsman weeks to build.
Large appliances on stairs: A refrigerator or washer on a staircase turns a manageable move into a controlled fall risk.
Run this quick checklist before deciding: How much does it weigh? Does the route include stairs or a tight turn? What’s it worth to replace or repair if it’s damaged? Do you have insurance coverage if something goes wrong? If two or more of those raise red flags, hiring professionals costs less than the alternative.
When you call a mover for these items, ask about their insurance limits, their specific experience with stairs or rigging, and what prep they need from you beforehand. A mover who can’t answer those clearly is not the one to trust with a grand piano.
Pods, Garage, or Spare Room: Which Storage Fits Your Job?
Each option trades convenience for cost or risk in a different way.
Storage pods are the most convenient for whole-house jobs since they sit in the driveway and require zero coordination with other rooms in your home, but they expose furniture to temperature and humidity swings unless climate-controlled.
Garage staging costs nothing extra and keeps items close, though concrete floors can scuff wood furniture, so lay down moving blankets or cardboard first.
Spare room or basement staging works well for partial jobs and keeps everything under one roof, as long as the space stays free of the dust the work generates.
Book pods and any hired labor at least a week ahead, since availability tightens fast during busy renovation seasons. If you’re storing anything for more than a few days, check for moisture control and confirm whether your homeowner’s insurance covers items in short-term storage.
When Is It Safe to Move Furniture Back After Refinishing?
Reentry timing depends entirely on the finish. Water-based polyurethane typically allows light foot traffic within hours, while full furniture placement should wait longer for the coating to cure hard enough to resist dents and pad marks. Oil-based polyurethane cures more slowly across the board and generally needs more patience before you load weight back onto it.
One-day restoration jobs are typically walkable in about 3 hours, which is dramatically faster than a full sand-and-refinish. Heavier furniture still needs additional cure time before it goes back, even on a fast-turnaround job, because surface dry and full cure are two different things.
For a full sand-and-refinish using three coats of polyurethane, some guides recommend waiting up to 7 days before returning furniture to guarantee the finish has fully hardened. When you do move furniture back, use felt pads under every leg, hold off on laying rugs for at least a few days so the floor can keep breathing, and avoid adhesive-backed pads until the finish has fully cured. Adhesive on a soft finish can pull it right up.
Why AO Cleaning Cuts Down the Moving and Storage Headache
Most of the friction homeowners describe with refinishing isn’t the sanding or the smell. It’s the logistics: where does the couch go, how long does it sit there, and when can life go back to normal.
That’s the part worth asking a contractor about directly, because the answer varies wildly between companies. A company with over 20 years of experience runs dustless techniques and eco-friendly products on every job, and most restoration work wraps in a single day, with floors walkable in about three hours.
That speed changes the math on staging. A homeowner facing a multi-day sand-and-refinish often reserves a pod or clears a spare room for a week. A one-day restoration frequently means furniture staged in the garage overnight, not boxed up in storage for a week straight. Before booking any refinisher, ask three questions: do they help with furniture moving or is that entirely on you, what’s their dust control method, and what’s the realistic reentry window for the specific service you’re booking. The answers tell you more about the actual disruption to your week than any brochure will.
— Jim
Where to Learn More About Moving Furniture and Refinishing Timelines
For deeper equipment guidance, Home Depot’s furniture-moving resource covers sliders and blankets in detail. For project timing and prep, see Aosaveswoodfloors’ refinishing project checklist.
If your project is closer to a full restoration than a quick refresh, Aosaveswoodfloors’ clean and buff service is worth a look before you commit to a longer sand-and-refinish timeline, since it often delivers a like-new floor with a much shorter furniture-out window. Homeowners juggling stone or tile counters alongside their floor project can also check the countertop cleaning and sealing service to knock out both jobs in one visit.
Sources
FAQ
What Should You Do With Furniture When Refinishing Floors?
Empty the room completely, disassemble large pieces where possible, and either stage furniture in an unaffected room or garage, or book short-term storage for whole-house jobs. Heavy or specialty items like pianos and safes should go to professional movers.
Do You Have to Move All Your Furniture for Floor Refinishing?
Yes, for any room getting sanded or recoated, furniture needs to come out completely so the crew can access the full floor and apply an even finish. Adjacent rooms not being worked on can often stay furnished as long as they’re not blocking the work path.
What’s the Best Way to Move Furniture Without Damaging Floors?
Use felt pads, furniture sliders, and moving blankets rather than dragging pieces directly across the floor, and clear the path of grit and debris first. For heavy or awkward items, a dolly and a second person distributes the weight and cuts the risk of scratches or dropped furniture.
How Long Before I Can Move Furniture Back After Refinishing?
It depends on the finish and process. AO Cleaning’s one-day restorations are typically walkable in about 3 hours, though heavier furniture needs extra cure time even then. A full sand-and-refinish with polyurethane can call for up to 7 days before furniture goes back safely.
Does Home Depot Move Furniture for Flooring Installation?
Home Depot’s flooring installation services generally expect the homeowner to clear furniture from the work area beforehand rather than moving it for you. Their how-to resource on moving heavy furniture offers guidance for handling that prep yourself.
Recommended

Comments