


Hardwood Floor Scratch Repair Options: A DIY Guide
- Kim M.

- 17 hours ago
- 9 min read
Hardwood floor scratch repair is the process of matching the correct fix to the depth of the damage. The right method depends entirely on whether the scratch sits in the finish layer, the stain layer, or the wood itself. Surface scratches take under 10 minutes to fix with a touch-up marker. Deep gouges require wood filler, multi-stage sanding, and a full finish coat. Knowing which category your scratch falls into saves you time, money, and the frustration of a repair that makes things look worse. This guide covers every method, from quick DIY fixes to professional recoating, so you can make a confident call.
1. What are the easiest quick fixes for light surface scratches?
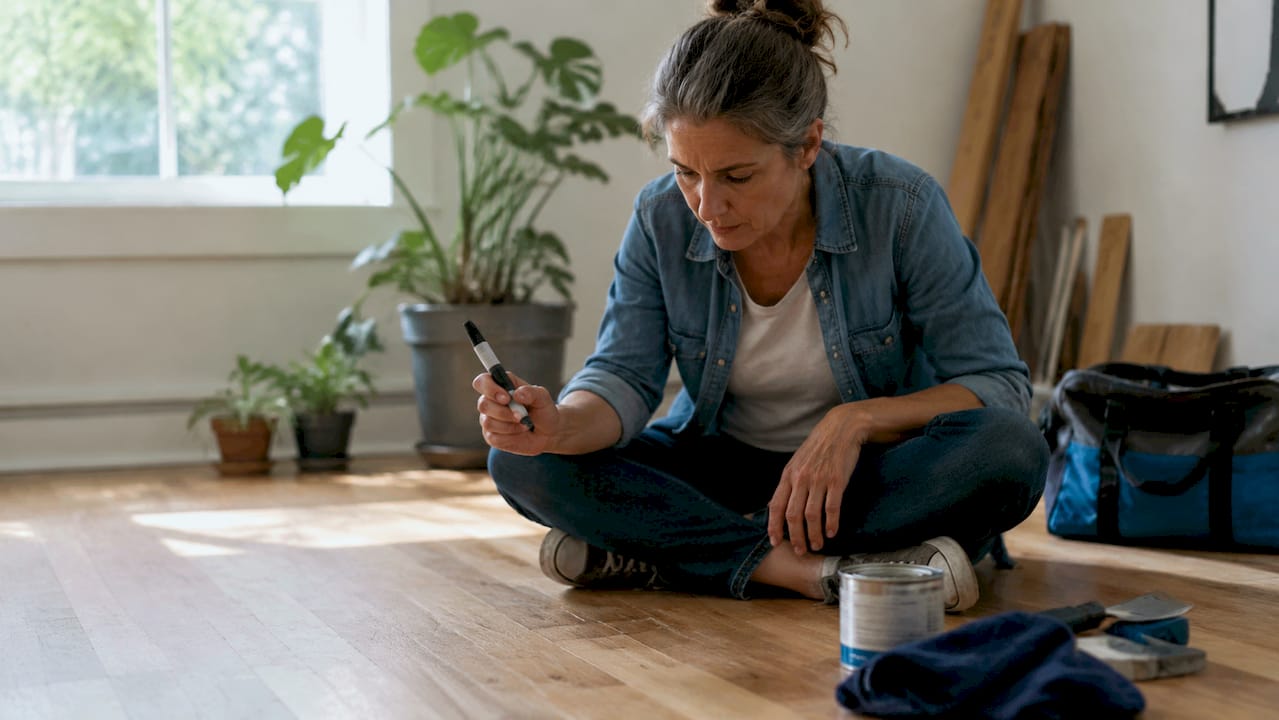
Light surface scratches sit only in the finish layer and take under 10 minutes to fix. These are the white or faint lines you see when light hits the floor at an angle. They have not touched the stain or the wood underneath.
The two best tools for this job are hardwood touch-up markers and wax sticks. Touch-up markers work like a felt-tip pen and deposit color directly into the scratch. Wax sticks fill the groove and harden, smoothing the surface so light no longer catches the damage.
What you need:
A color-matched touch-up marker or wax stick
A clean, dry cloth
Fine steel wool (0000 grade) for light buffing after wax application
Good lighting to check your work
Color matching is the step most homeowners rush. Hold the marker or wax stick against an inconspicuous area of the floor before committing. If the color looks close but not exact, blend two shades by layering lightly.
Pro Tip: Test the finish sheen on a hidden spot before applying any product. A matte touch-up marker on a gloss floor will stand out more than the original scratch.
Natural hacks like walnut oil or vinegar mixtures can temporarily mask minor marks but do not structurally repair the finish. Use them only as a stopgap while you gather the right materials.
2. How to repair medium scratches that penetrate the stain
Medium scratches cut through the finish and into the stain layer but stop before reaching the wood fibers. The fingernail test tells you which category you are dealing with. Run your fingernail across the scratch. If it catches, the damage has reached the wood. If it glides over, you are working with a medium scratch.
A flashlight held at a low angle also helps. White lines mean finish damage only. Brown or tan fibers showing through mean wood penetration. Getting this diagnosis right before you start saves a half-day of wasted effort.
Step-by-step repair process:
Clean the scratched area with a dry cloth to remove all dust and grit.
Sand lightly with 220-grit sandpaper, moving with the wood grain only.
Wipe away all sanding dust with a tack cloth.
Apply a small amount of stain using a cotton swab or fine brush.
Start with a shade lighter than your target color and layer until you reach the right depth.
Let the stain dry fully according to the product label, typically 1–2 hours.
Apply a thin coat of matching finish (polyurethane, oil, or wax) over the repaired area.
Allow the finish to cure before walking on it.
Medium repairs take roughly half a day from start to finish. That estimate includes drying time, so plan the repair for a morning when you can leave the area undisturbed.
Pro Tip: Layer stain lighter to darker rather than applying a dark shade first. Removing excess stain once it has soaked in is nearly impossible, and over-darkening creates a blotchy patch that draws the eye.
Sheen matching matters as much as color. A satin finish coat over a gloss floor will look like a dull spot. Buy a small sample of finish in the correct sheen before you start.
3. What methods work for deep gouges and severe scratches?
Deep gouges cut into the wood fibers themselves. You can see raw wood, and your fingernail catches hard when you drag it across the damage. These repairs require wood filler or two-part epoxy, a sanding progression, and a full finish application.
Deep gouge repairs cure for 24–48 hours before the area can handle foot traffic. Plan accordingly.
Tools and materials checklist:
Item | Purpose |
Wood filler or two-part epoxy | Fills the gouge and bonds to wood fibers |
80-grit sandpaper | Levels the filled area aggressively |
120-grit sandpaper | Smooths the surface after rough sanding |
220-grit sandpaper | Final smoothing before stain application |
Stain in matching color | Restores color to the repaired area |
Finish coat (polyurethane or oil) | Seals and protects the repair |
Tack cloth | Removes all sanding dust between stages |
Step-by-step repair process:
Remove all debris from the gouge with a dry brush or vacuum.
Apply wood filler slightly above the surface level. Overfilling is intentional because filler shrinks as it dries.
Let the filler cure fully per the product instructions, usually 2–4 hours.
Sand with 80-grit paper to level the filler flush with the surrounding floor.
Progress to 120-grit, then finish with 220-grit, always moving with the grain.
Wipe clean with a tack cloth between each grit stage.
Apply stain, starting lighter and layering to match the surrounding color.
Apply finish coats and allow 24–48 hours before walking on the area.
Sanding deep repairs from 80 to 220 grit produces the smoothest surface before staining. Skipping grits leaves visible scratch marks that show through the finish.
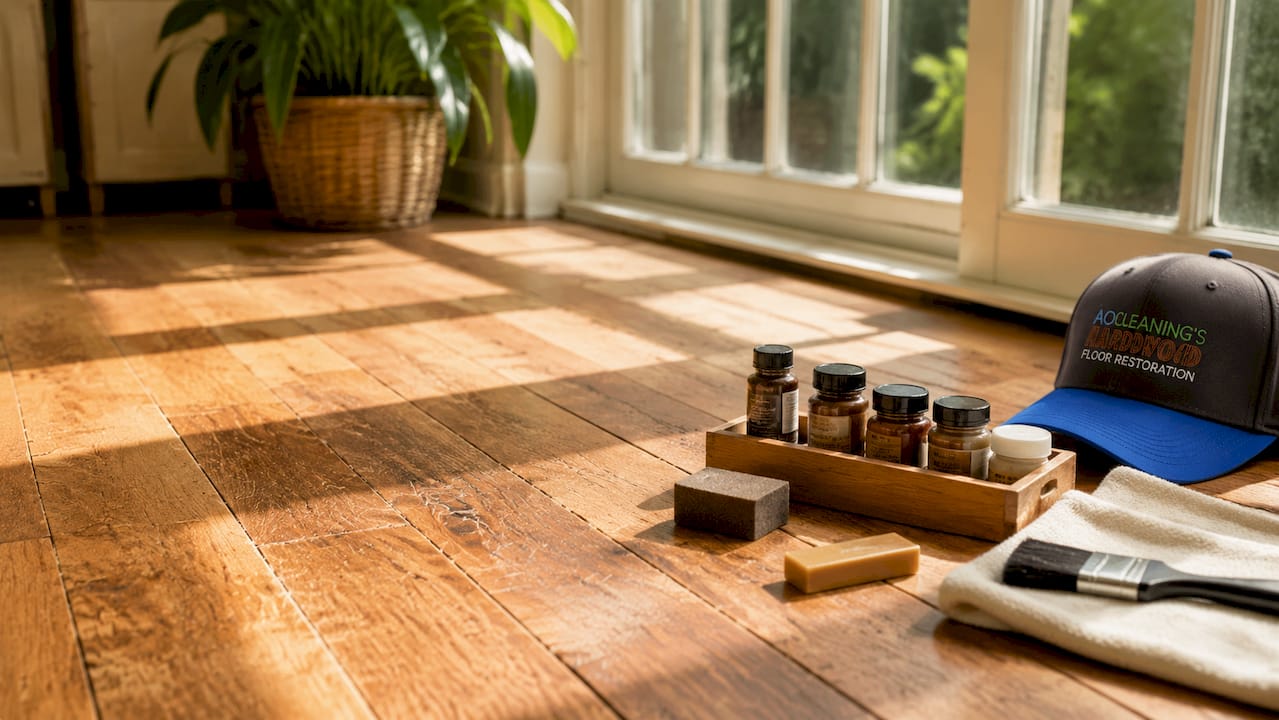
When the damage covers a large area or the floor has been repaired multiple times, professional refinishing is the better call. Aosaveswoodfloors offers full sand and refinishing for floors that are beyond practical DIY scope.
4. How does professional recoating fit into scratch repair options?
Buff and coat, also called screen and recoat, is the middle ground between spot repairs and full sanding. It is the right choice when your floor has widespread fine scratches, dull finish, and light surface wear but the wood itself is still in good shape.
Buff and coat restores sheen and protection with far less disruption than full sanding. No raw wood is exposed, no heavy dust is generated, and the floor is typically walkable within a few hours.
When buff and coat is the right choice:
The finish looks dull or hazy across most of the floor
Fine scratches are widespread but shallow
The wood surface is flat and even with no deep gouges
Previous finish coats are compatible with a new topcoat
You want to extend the floor’s life without the cost of full refinishing
Buff and coat is a cost-effective option that homeowners frequently overlook when weighing repair choices. Many floors that look like they need full refinishing actually only need a recoat.
Full sanding is necessary when damage penetrates the wood, when old coatings are uneven or peeling, or when the floor has been recoated so many times that the finish has built up unevenly. The clean and buff vs. screen and recoat comparison breaks down exactly which service fits which situation.
“Before you REFLOOR it, let us RESTORE it.” Aosaveswoodfloors has applied that principle to thousands of floors across St. Louis, Monroe, and Madison Counties since 2003.
Timing matters for recoating. Schedule it before the finish wears through to bare wood. Once the wood is exposed, recoating alone will not bond properly and full sanding becomes unavoidable.
5. What preventive maintenance strategies reduce hardwood floor scratches?
Prevention is the most cost-effective hardwood floor repair strategy available. Proactive maintenance can prevent roughly 90% of household floor scratches. That number reflects how much damage comes from grit, furniture movement, and foot traffic rather than accidents.
The most effective prevention habits:
Place felt pads under every furniture leg, including chairs that move frequently
Lay area rugs in high-traffic zones like hallways, entryways, and in front of the kitchen sink
Vacuum or dust mop at least twice a week to remove grit before it grinds into the finish
Never drag furniture across the floor, even short distances
Keep indoor humidity between 35% and 55% to prevent wood expansion and contraction that weakens finish bonds
Use a pH-neutral hardwood floor cleaner rather than water or vinegar-based solutions
Pro Tip: Trim pet nails regularly. Dog nails are one of the top causes of finish scratches in homes with hardwood floors, and the damage accumulates faster than most homeowners expect.
Grit is the silent enemy of hardwood floors. A single grain of sand tracked in from outside acts like sandpaper under every footstep. A consistent hardwood floor maintenance routine removes that grit before it does lasting damage.
Humidity control is the prevention step most homeowners skip. Wood expands and contracts with seasonal humidity changes. That movement stresses the finish and creates micro-cracks that grow into visible scratches over time. A whole-home humidifier or dehumidifier keeps the wood stable year-round.
Key Takeaways
The correct hardwood floor scratch repair method is determined by scratch depth, and matching both color and sheen finish is as critical as the repair technique itself.
Point | Details |
Diagnose depth first | Use the fingernail test and a flashlight to confirm whether damage is in the finish, stain, or wood. |
Light scratches: under 10 minutes | Touch-up markers and wax sticks fix finish-only scratches fast with no sanding required. |
Medium repairs take half a day | Sand with 220-grit, layer stain light to dark, and match finish sheen before applying the topcoat. |
Deep gouges need filler and sanding progression | Use wood filler, sand from 80 to 220 grit, and allow 24–48 hours of curing before foot traffic. |
Prevention eliminates most damage | Felt pads, area rugs, and regular grit removal prevent roughly 90% of household floor scratches. |
What 20 years of floor repairs taught me about DIY scratch fixes
The single biggest mistake I see homeowners make is skipping the depth diagnosis and going straight to the nearest product on the shelf. A wax stick on a deep gouge looks worse after the repair than before. A full sanding job on a finish-only scratch wastes a weekend and money. Accurate diagnosis takes two minutes and changes everything.
The second mistake is treating sheen as an afterthought. Color matching gets all the attention, but a gloss finish patch on a satin floor is immediately obvious to anyone who walks in the room. I have seen beautiful color matches completely ruined by the wrong sheen. Always buy a small sample of finish and test it on a hidden spot before committing.
My honest advice on DIY versus professional service: handle light and medium scratches yourself with confidence. The tools are inexpensive and the process is forgiving. For deep gouges covering more than a few boards, or for floors with widespread dullness and fine scratches across the whole surface, a professional buff and coat is the smarter investment. It costs less than full refinishing, takes one day, and restores the floor to a condition that makes spot repairs blend in properly.
Schedule maintenance before the floor looks bad, not after. Floors that get a buff and coat every few years rarely need full sanding. Floors that get ignored until the finish is gone almost always do.
— Jim
Floors that need more than a DIY fix

Some scratches go beyond what a marker or wax stick can handle. When the damage is widespread or the finish has worn through in multiple areas, Aosaveswoodfloors has two services built for exactly that situation. The hardwood floor clean and buff service restores sheen and protection to lightly worn floors in a single day, with floors ready to walk on in about three hours. For floors with deep gouges or finish that has broken down entirely, the full sand and refinishing service brings them back to like-new condition using dustless techniques and eco-friendly products. Aosaveswoodfloors has served homeowners across St. Louis, Monroe, and Madison Counties since 2003, with over 450 Google reviews to back it up.
FAQ
How do I know if a scratch needs filler or just a marker?
Run your fingernail across the scratch. If it catches, the damage has reached the wood and needs filler. If it glides over, a touch-up marker or wax stick is enough.
Can I recoat my floor without sanding it down completely?
Yes. Buff and coat works when the finish is dull but the wood is still protected. Full sanding is only necessary when damage penetrates the wood or old coatings are uneven.
How long before I can walk on a repaired deep gouge?
Deep repairs need 24–48 hours of curing time before the area can handle foot traffic. Walking on it too soon compresses the filler before it fully hardens.
Do natural remedies like walnut oil actually fix scratches?
Walnut oil and similar home remedies temporarily mask minor marks but do not repair the finish or wood. They are a short-term visual fix only.
Why does my repair look more obvious than the original scratch?
Sheen mismatch is the most common cause. A mismatched finish sheen makes repairs more visible than the original scratch. Always test the sheen on a hidden spot before applying any finish product.
Recommended

Comments