


How Hardwood Floor Staining Works: A Homeowner's Guide
- Kim M.

- Jun 5
- 8 min read
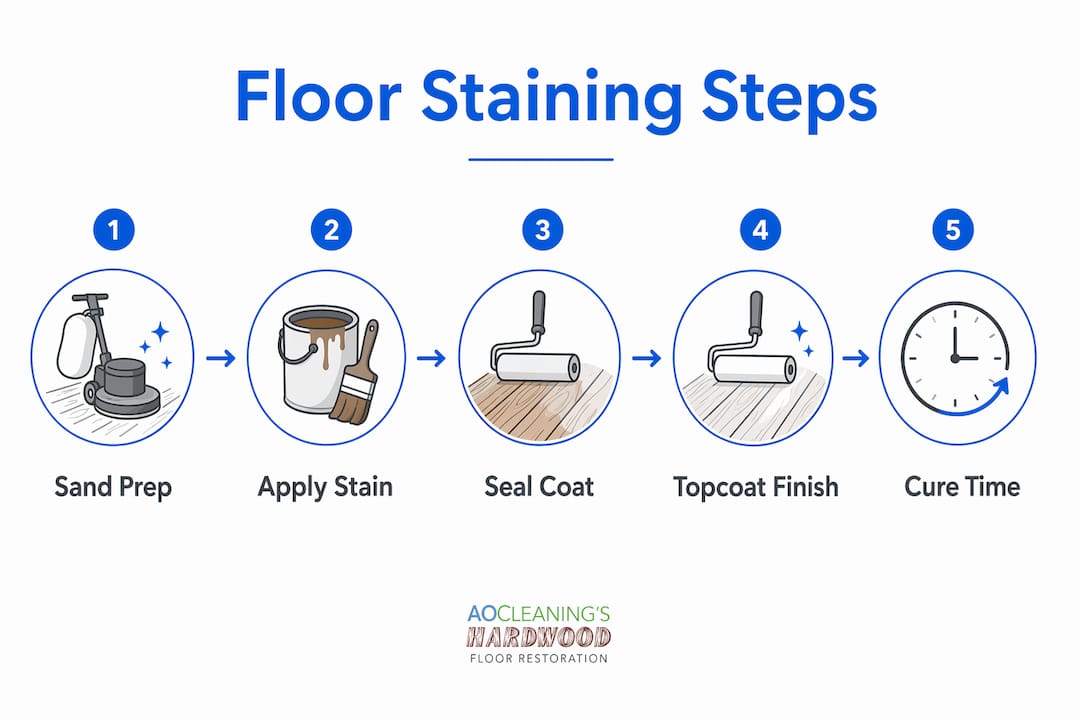
Hardwood floor staining is defined as the process of depositing colorant into wood pores to change the floor’s appearance, and it provides zero surface protection on its own. Understanding how hardwood floor staining works separates homeowners who get lasting results from those who end up with peeling finishes and blotchy color. The stain changes the look. A sealer and topcoat protect the investment. These are three separate layers, each with a distinct job, and skipping or rushing any one of them causes problems that are expensive to fix.
How does hardwood floor staining work chemically?
Stain penetrates wood pores and deposits colorant inside the cellular structure of the wood rather than sitting on top of it. This is what makes stained floors look natural instead of painted. The pigment or dye locks into the open grain, and the depth of color depends on how long the stain soaks before you wipe it off, not on how thick a coat you apply. Applying a second heavy coat without wiping the first one properly just creates a sticky, uneven mess.
The layered system matters because each layer bonds chemically to the one beneath it. Stain goes in first, then a sealer fills the remaining pores and creates a uniform surface, and then a clear topcoat like polyurethane goes over the sealer to handle foot traffic, moisture, and daily wear. Pull any one layer out of that sequence and the finish fails faster than it should.
How do oil-based and water-based stains differ?
Choosing between oil-based and water-based stain affects your timeline, your tools, and your final color. Oil-based stains penetrate deeper because non-polar solvents carry the pigment further into the wood grain, and they give you a working window of 5 to 15 minutes before you need to wipe. Water-based stains dry in 1 to 3 hours and raise the wood grain, which means you need to sand lightly after the first coat or apply a pre-stain conditioner. The chemistry of the stain you choose should match the wood species and your workflow, not just the color you want.
Feature | Oil-based stain | Water-based stain |
Penetration depth | Deeper, due to non-polar solvents | Shallower, stays closer to surface |
Open/working time | 5 to 15 minutes | 1 to 3 hours drying time |
Grain raise | Minimal | Yes, requires sanding or conditioning |
Dry time before topcoat | 6 to 24 hours | 2 to 4 hours |
Cleanup | Mineral spirits or paint thinner | Soap and water |
Best for | Dense hardwoods, longer work sessions | Lighter species, faster project timelines |
Pro Tip: Stain color depth is controlled by penetration time, not by applying thick layers. Let the stain soak the full recommended time and wipe cleanly rather than applying multiple heavy coats.
What preparation steps does staining hardwood floors require?
Preparation is where most DIY staining projects succeed or fail. A floor that is not sanded to bare wood will absorb stain unevenly because old finish acts as a barrier in some spots and not others. The result is a blotchy, patchy color that no amount of additional stain will fix. Getting the surface right before you open the can is the entire job.
Here are the preparation steps that produce a surface ready for even stain absorption:
Sand to bare wood. Start with a coarser grit to remove the old finish completely, then work through progressive grits. A final grit around 100 to 120 exposes clean wood without burnishing the pores shut. Stopping at 80 grit leaves scratches that show through the stain. Going finer than 120 closes the pores and blocks pigment from penetrating evenly.
Remove all dust. Vacuum the entire floor thoroughly, then wipe with a tack cloth. Dust left between sanding stages contaminates the surface and disrupts both stain penetration and topcoat adhesion. This step takes ten minutes and prevents hours of rework.
Apply wood conditioner if needed. Species like maple, cherry, and pine have uneven grain density between earlywood and latewood. Pre-stain conditioner applied within 2 hours before staining partially seals the larger pores and limits how much pigment soaks into the softer grain bands, which reduces blotchiness. Oak and walnut are more forgiving and often do not need conditioning.
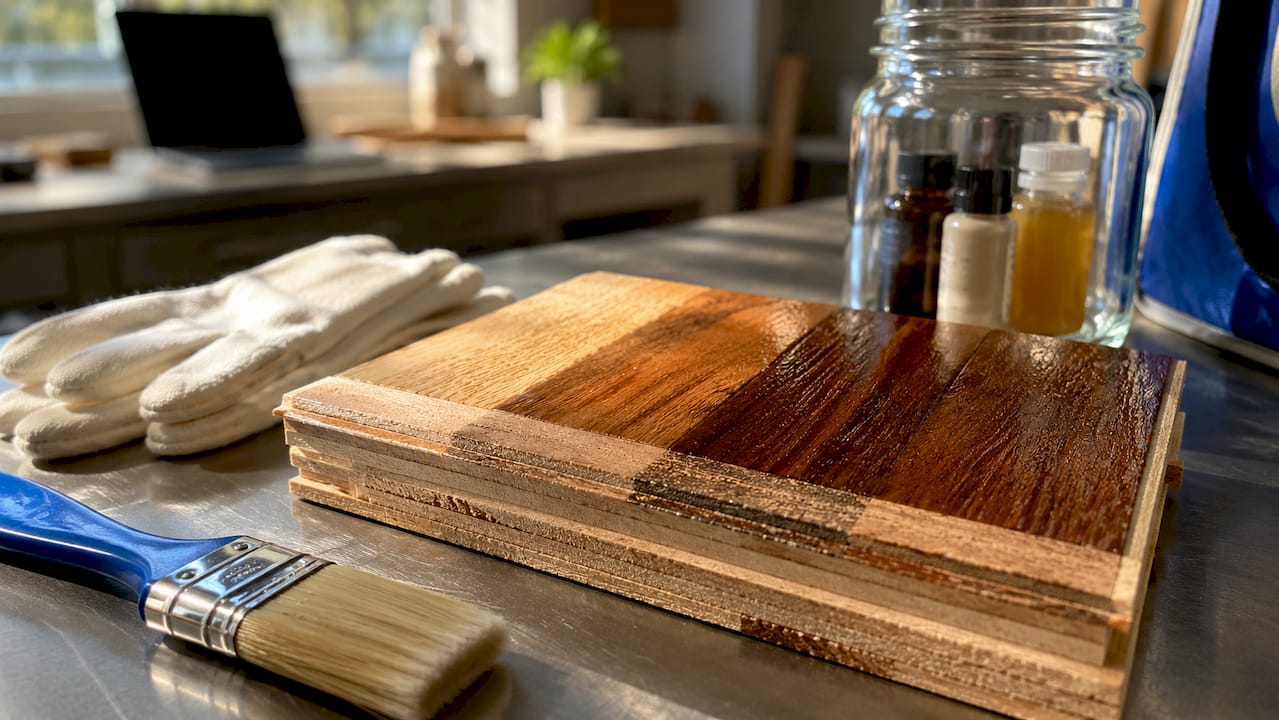
Test on scrap wood or an inconspicuous area. Stain color on the can looks nothing like stain color on your specific species and cut of wood. A test patch shows you the actual result before you commit to the whole floor.
Pro Tip: Never sand hardwood floors past 120 grit before staining. Finer grits like 150 or 180 burnish the wood surface and close the pores, which prevents the stain from absorbing evenly and produces a lighter, washed-out color.
How to apply hardwood floor stain for even, lasting color
Application technique controls whether the color comes out rich and consistent or streaky and uneven. The tools you use matter, but timing matters more. Leaving stain too long causes tackiness and uneven color because the solvent evaporates and the pigment starts to cure on the surface rather than inside the wood. Wiping too early pulls out pigment before it has soaked in and produces a weak, washed-out result.
Key application practices that produce consistent results:
Choose the right applicator. A lambswool applicator or a natural-bristle brush works well for oil-based stains because they hold product and release it evenly. Foam brushes and synthetic applicators are better suited to water-based stains. A paint roller with a short nap can cover large areas quickly but requires careful back-brushing to work the stain into the grain.
Work in manageable sections. Apply stain in the direction of the wood grain and keep a wet edge at all times. If the leading edge dries before you connect the next section, you get a visible lap mark. Water-based stains dry fast enough that lap marks are a real risk if you work too slowly.
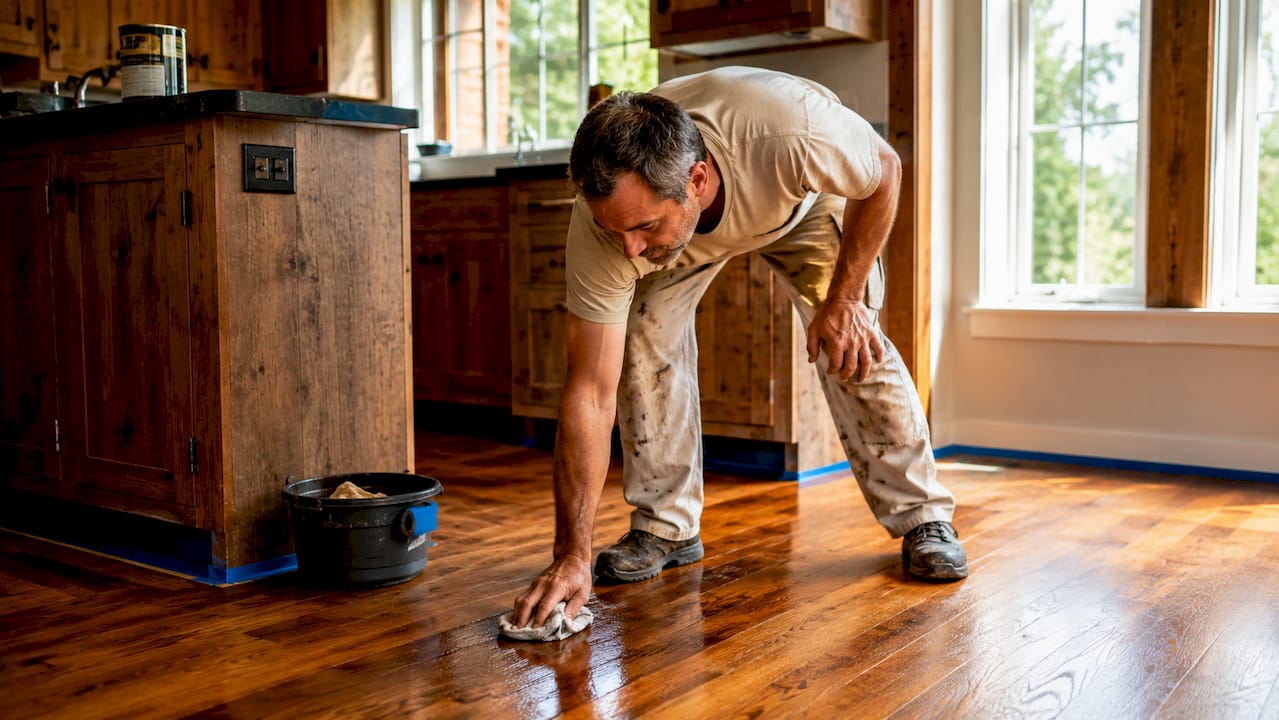
Wipe excess stain within 5 to 10 minutes. Use clean lint-free rags and wipe in the direction of the grain. Wiping excess quickly prevents the surface from becoming tacky and locks in a uniform color. Change rags frequently so you are not redistributing stain you already wiped off.
Build color with multiple thin coats. If the first coat is lighter than you wanted, let it dry fully and apply a second coat rather than applying more product at once. Each coat adds depth without creating the surface buildup that causes peeling.
Pro Tip: Always work from the farthest corner of the room toward the door. Staining yourself into a corner is not just a figure of speech. It forces you to walk across wet stain and ruins the work you just finished.
Why sealing stained hardwood floors is non-negotiable
Stain alone leaves wood completely unprotected. Stain only colors wood. A clear polyurethane or other topcoat is what creates the hard, protective layer that handles foot traffic, spills, and daily wear. Skipping the sealer because the color looks good is the single most common mistake homeowners make, and it results in a floor that scuffs, stains, and deteriorates within months.
Curing time is where most projects go wrong. Oil-based stain cures by oxidation inside the wood pores, and that chemical process takes longer than the surface feels dry to the touch. Applying polyurethane over oil-based stain that is dry on top but still curing underneath causes adhesion failure. The topcoat peels or bubbles because it never properly bonded to the stain layer.
Layer | Dry to touch | Ready for next coat | Full cure |
Oil-based stain | 6 to 12 hours | 24 hours minimum | 72 hours or more |
Water-based stain | 1 to 2 hours | 2 to 4 hours | 24 to 48 hours |
Oil-based polyurethane | 6 to 8 hours | 24 hours | 30 days |
Water-based polyurethane | 2 to 4 hours | 6 hours | 14 to 21 days |
Most professional refinishing jobs apply two to three coats of polyurethane, with a light screen sanding between coats using 220-grit paper. This sanding removes dust nibs and gives each new coat a mechanical surface to grip. The full refinishing process from sanding through final topcoat typically runs three to five days when you respect the drying windows between each layer.
Pro Tip: Do not judge cure time by how the floor feels. A polyurethane finish can feel hard and dry within 24 hours but still be chemically soft enough to scratch or dent. Wait the full cure period before moving furniture back.
Key takeaways
Hardwood floor staining works as a three-layer system: stain deposits color into wood pores, sealer fills and bonds the surface, and topcoat provides all the protection.
Point | Details |
Stain colors, topcoat protects | Stain alone provides no wear or moisture protection; polyurethane topcoat is required. |
Preparation determines outcome | Sanding to bare wood with 100 to 120 grit and removing all dust prevents blotching. |
Timing controls color depth | Wipe excess stain within 5 to 10 minutes; soaking time sets color depth, not coat thickness. |
Cure time beats dry time | Oil-based stain must fully cure by oxidation before topcoat; dry-to-touch is not enough. |
Species affects stain choice | Blotch-prone woods like maple and cherry need pre-stain conditioner for even color. |
What I’ve learned after watching homeowners rush the staining process
The mistake I see most often is treating stain like paint. Homeowners assume that more product means more color and more protection. It means neither. Thick, unwiped stain sits on the surface, gets tacky, and creates a finish that peels within a year. The wood staining process rewards patience and punishes shortcuts.
The second most common mistake is skipping the cure window before sealing. I have seen beautiful stain jobs ruined because someone applied polyurethane 12 hours after an oil-based stain and the whole finish lifted within a month. The floor looked fine for a few weeks. Then it did not. Respecting the chemical cure requirement is not optional.
What actually works is testing your stain on a scrap piece of the same species before touching the floor. The color on the can is a suggestion. The color on your specific oak or hickory is the reality. Spending 20 minutes on a test patch saves you from committing to a color you did not expect across 800 square feet. I also tell every homeowner to review a refinishing project checklist before starting so nothing gets skipped in the excitement of getting the project done.
The floors that look best five years later are the ones where someone slowed down, sanded properly, conditioned when needed, wiped on schedule, and waited the full cure time. There is no trick that replaces that sequence.
— Jim
Get flawless results with professional hardwood floor refinishing
Getting the stain, sealer, and topcoat sequence right requires the right equipment and real experience with different wood species. Aosaveswoodfloors has been handling full sand and refinishing projects across St. Louis, Columbia, Belleville, and surrounding communities since 2003, with dustless sanding equipment and eco-friendly products on every job.

If your floors need a color refresh or a complete overhaul, Aosaveswoodfloors delivers consistent, professional results with most projects completed in a single day. Their clean and buff service is a great starting point for floors that need attention without a full sand-down. Before you replace your floors, let them restore them first.
FAQ
What does hardwood floor stain actually do?
Hardwood floor stain deposits colorant into the wood’s open pores to change its appearance. It does not protect the surface. A separate sealer and polyurethane topcoat provide all wear and moisture protection.
How long should stain dry before applying polyurethane?
Oil-based stain needs at least 24 hours before topcoat and must be fully cured by oxidation, not just dry to the touch. Water-based stain is typically topcoat-ready in 2 to 4 hours.
Why does my hardwood floor stain look blotchy?
Blotchy stain results from incomplete sanding, leftover old finish, dust contamination, or wiping the stain too late. Species with uneven grain density, like maple and cherry, also require pre-stain conditioner to absorb color evenly.
How many coats of stain does a hardwood floor need?
Most hardwood floors reach the desired color in one to two coats of stain. Color depth is controlled by soak time, not by applying additional coats. Each coat should be wiped clean within 5 to 10 minutes of application.
Can you stain hardwood floors without sanding them first?
No. Staining over an existing finish produces uneven, patchy color because the old finish blocks stain penetration in some areas. Sanding to bare wood is required for the stain to absorb consistently across the entire floor.
Recommended


Comments