


Hardwood Floor Color Matching: A Homeowner's Guide
- Kim M.

- 2 days ago
- 9 min read
Hardwood floor color matching is the process of blending new wood flooring with existing floors to create a cohesive, visually unified look throughout your home. In the industry, professionals call this “floor color blending” or “stain matching,” and it goes far beyond picking a similar shade from a color chart. The process involves identifying wood species, grain patterns, undertones, and finish sheen, then applying custom stain formulas tested on-site under your actual home lighting. Get it right, and the repair or addition disappears. Get it wrong, and every guest notices the seam.
What is hardwood floor color matching and why does it matter?
Hardwood floor color matching is defined as the technical process of blending new wood with older floors for visual continuity, accounting for species, grain, and aging traits. This matters because floors are the largest continuous surface in most rooms. A visible mismatch between a repaired section and the original floor draws the eye immediately and can make an otherwise beautiful room feel unfinished.
The process typically requires 1–3 days for custom staining and on-site testing to achieve a seamless transition. That timeline reflects the real complexity involved. You are not just matching a color. You are matching how a specific wood species absorbs stain, how its grain reflects light, and how its finish sheen interacts with the room’s natural and artificial lighting at different times of day.
Most homeowners underestimate this complexity until they attempt a DIY patch and end up with a floor that looks like a patchwork quilt. Professional floor color blending treats the floor as a single visual system, not a collection of individual boards.
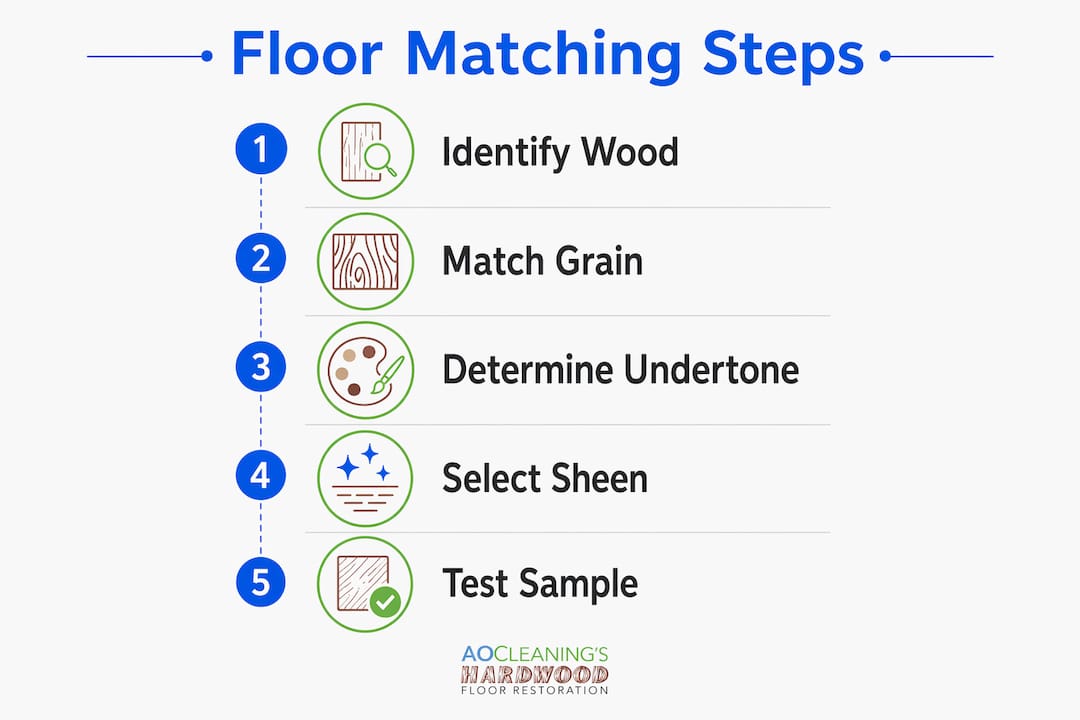
What are the key components when matching floor colors?
Four variables determine whether a color match succeeds or fails: wood species, grain pattern, undertones, and finish sheen. Miss any one of them, and the result will look off even if the stain color appears identical in the can.
Wood species controls how stain absorbs into the floor. Oak, maple, and hickory each have different porosity levels, which means the same stain formula produces different final colors on each species. Stain names on charts are unreliable because the final color depends entirely on the wood’s porosity and grain density.
Grain pattern affects visual texture. Matching grain keeps the floor believable. A straight-grained board placed next to a heavily figured original will look wrong even with a perfect stain match. Matching grain patterns is as important as matching color for seamless flooring transitions.
Undertones are the warm, cool, or neutral tints embedded in the wood’s base color. Ignoring undertones causes 90% of visual mismatches in hardwood floor color matching. A floor with warm amber undertones will clash with a repair stained in a cool gray tone, even if both look “brown” in isolation.
Finish sheen is the most overlooked variable of all. Mismatched sheens, such as satin placed next to gloss, create mirror effects that highlight seams even when the stain color is perfect.
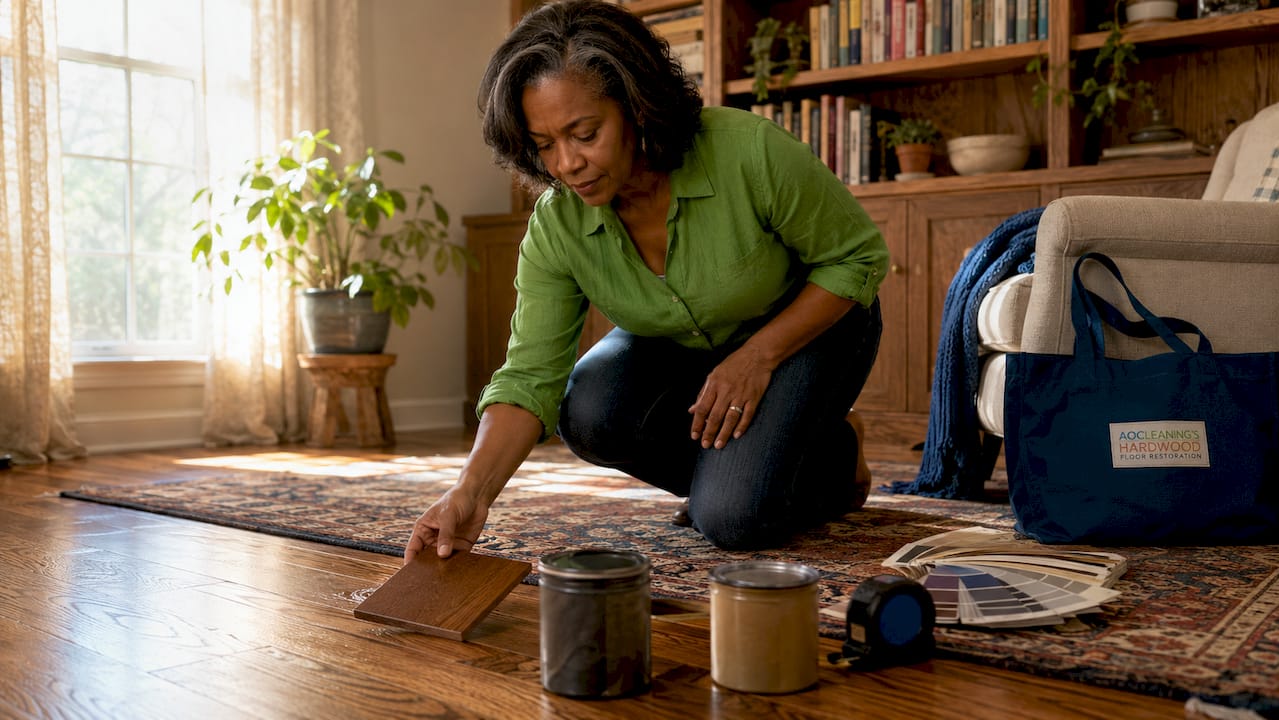
Pro Tip: Bring a physical sample of your existing floor to the flooring supplier, not just a photo. Phone cameras distort undertones and sheen levels, which leads to poor stain selections before you even start testing.
Lighting compounds all four variables. Lighting conditions dramatically affect perceived hardwood floor color and undertones throughout the day. A sample that looks like a perfect match at noon under natural light may read as noticeably different under warm incandescent bulbs in the evening.
How is custom stain color matching performed?
Professional custom stain color matching follows a structured process. Skipping steps is the primary reason DIY attempts fail.
Light sanding. The new or repaired area receives a light sand to expose fresh wood fiber. Fresh wood absorbs stain evenly. Unsanded surfaces have oxidized layers that block penetration and produce inconsistent color.
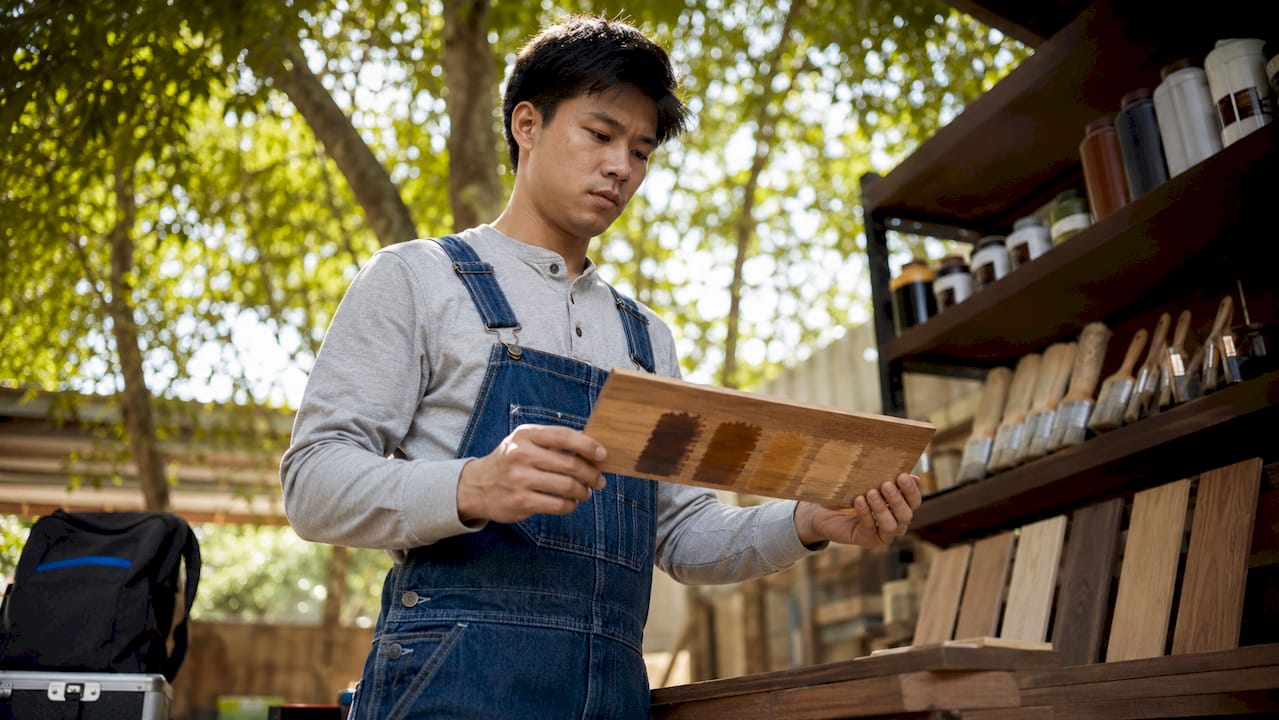
Custom stain mixing. A professional mixes a stain formula tailored to the specific wood species and its current aging. Custom stain matching often requires several iterations, and professionals keep detailed notes on stain proportions for consistent application across the full job.
Test board application. The formula goes onto a spare board of the same species before touching the floor. This reveals how the stain absorbs and dries without risking the actual surface.
On-site sample testing. The test board is placed directly on the existing floor and viewed in multiple lighting conditions. Samples should be viewed morning, afternoon, and evening under home lighting for an accurate match assessment.
Edge feathering. Once the formula is confirmed, the stain is applied with feathered edges to blend the new stain into the surrounding old floor. This technique prevents harsh transition lines at the repair boundary.
Finish matching. The final step is applying a protective finish that matches the existing floor’s sheen level exactly. Matching sheen is often more critical than exact stain color for preventing visible seams. Satin is the most common choice because it balances reflectivity and durability, while matte hides scratches and gloss shows wear more prominently.
Pro Tip: Never evaluate a stain sample while it is still wet. Wet stain always looks darker and richer than the dried result. Wait the full dry time specified on the product label before comparing to the existing floor.
What common challenges arise in floor color matching?
Even experienced professionals encounter obstacles. Knowing the most common pitfalls helps you avoid them before they cost you time and money.
The table below compares the most frequent challenges with their practical solutions.
Challenge | Why It Happens | How to Avoid It |
Undertone clash | Warm and cool tones mixed without testing | Test samples against existing floor under home lighting before committing |
Sheen mismatch | New finish applied without checking existing sheen level | Identify existing sheen (matte, satin, gloss) before purchasing finish product |
Species absorption difference | Different wood species absorb stain at different rates | Always test stain on the actual species being matched, not a generic test board |
Lighting distortion | Color evaluated only in one lighting condition | View samples morning, afternoon, and evening in the room being matched |
Batch color variation | Different production batches of the same flooring product vary slightly | Buy all replacement boards from a single batch when possible |
One of the most common mistakes homeowners make is forcing an exact shade match when the existing floor has aged significantly. Attempting an exact shade match often causes frustration. Aligning undertones instead of forcing identical color reduces visual disruption and produces more natural results.
When a perfect match is genuinely impossible, the better strategy is intentional contrast. Identifying a dominant wood tone and using it as the anchor for the room creates cohesion. Secondary tones then read as deliberate design choices rather than failed repairs.
How to apply color matching in real home projects
Practical floor color matching starts before you buy a single board or open a can of stain. These steps apply whether you are repairing a damaged section, adding a room addition, or replacing flooring in a connected space.
Inventory your existing floor. Pull up a floor vent cover or remove a threshold strip to expose the original wood. This gives you an unfinished sample that shows the true species and grain without the aging layer on top.
Identify the undertone first. Hold the sample next to a white piece of paper. The color shift you see against white reveals whether your floor runs warm (amber, orange, red), cool (gray, blue), or neutral. This single step prevents the most common matching errors.
Test multiple stain samples on-site. Never select a stain based on a store display. Apply at least three candidate formulas directly to an inconspicuous area of the actual floor or a spare board of the same species, then evaluate under your home’s lighting at different times of day.
Coordinate with cabinetry, trim, and furniture. Floor color does not exist in isolation. A floor that matches perfectly in an empty room may clash with dark walnut cabinets or white painted trim once the room is furnished. Pull samples of your major fixed elements before finalizing the stain formula.
Decide on your acceptable contrast level. A perfect match and an intentional contrast are both valid outcomes. What you want to avoid is an accidental mismatch that reads as a mistake. Set your target before you start, and communicate it clearly to any professional you hire.
Protect the matched floor after completion. Use felt pads under furniture, avoid rubber-backed rugs that trap moisture, and follow the finish manufacturer’s cleaning guidelines. A matched floor that wears unevenly will develop color differences over time that undo the original work.
For a deeper look at restoration service options, including when a screen and recoat makes more sense than a full sand, it is worth reviewing what each service actually does to the floor surface before deciding.
Key takeaways
Hardwood floor color matching succeeds when undertones, grain, and sheen are aligned, not just when stain colors look similar in the can.
Point | Details |
Undertones drive match success | Identify warm, cool, or neutral undertones before selecting any stain formula. |
Sheen matters more than shade | Mismatched finish sheen creates visible seams even when stain color is correct. |
Test on-site, not in the store | Apply stain samples to the actual floor and evaluate under home lighting at multiple times of day. |
Grain matching is non-negotiable | Pairing mismatched grain patterns with a correct stain color still produces a visible seam. |
Contrast beats a failed exact match | When aging prevents a perfect match, align undertones and embrace intentional contrast instead. |
What most guides get wrong about floor color matching
Most articles on this topic spend 80% of their space on stain color selection and almost nothing on sheen. That is backwards. In my experience working with floors across central Illinois and the St. Louis metro area, the seams that homeowners call me about are almost never caused by a wrong stain color. They are caused by a gloss finish sitting next to a satin finish, or a fresh matte coat applied over an aged semi-gloss.
Human eyes detect seams more from sheen and reflection differences than from small differences in stain color intensity. A floor that is slightly lighter in one section but matches in sheen reads as natural aging. A floor with identical stain color but different sheen reads as a repair. That distinction changes how you should prioritize your time and testing.
The second thing most guides miss is the patience required for lighting evaluation. I have seen professionals commit to a stain formula after viewing it once at midday, then get a callback two weeks later from a homeowner who notices the mismatch every evening under their dining room chandelier. Lighting is the most overlooked variable. Testing floor samples multiple times a day is the only way to confirm a harmonious match before you commit.
My honest recommendation: do not fear a slight color contrast between rooms or sections. Visual cohesion comes from consistent undertones and matching sheen, not from identical color values. A floor that flows naturally through a home is worth far more than a technically “matched” repair that draws attention to itself every time the afternoon sun hits it.
— Jim
Get a seamless match with professional help
Hardwood floor color matching is one of those projects where the gap between a good result and a great result comes down to experience with custom stain formulas and finish systems.

Aosaveswoodfloors has been helping homeowners across St. Louis, Columbia, Belleville, and surrounding communities achieve seamless floor transitions since 2003. Whether your floors need a clean and buff service to restore finish consistency or a full professional refinishing with custom stain matching, the team brings over 20 years of hands-on experience to every job. Most services are completed in a single day, with floors ready to walk on in about three hours. Before you replace your floors, let Aosaveswoodfloors restore them.
FAQ
What does hardwood floor color matching involve?
Hardwood floor color matching involves aligning the wood species, grain pattern, undertones, and finish sheen of new or repaired flooring with the existing floor. The process typically requires custom stain mixing and on-site testing over 1–3 days.
Why do undertones matter so much in floor matching?
Undertones are the warm, cool, or neutral tints embedded in the wood’s base color. Ignoring undertones causes the majority of visible mismatches, even when the overall shade appears similar.
How do i choose the right stain for my hardwood floors?
Never rely on stain color names or store displays. Apply at least three candidate stain formulas directly to the actual floor or a matching spare board, then evaluate the dried results under your home’s lighting at different times of day.
Can i match old hardwood floors that have aged significantly?
An exact match on heavily aged floors is rarely achievable. The better approach is to align undertones and match the finish sheen, then allow a slight color contrast that reads as natural aging rather than a failed repair.
When should i call a professional for floor color matching?
Call a professional when the repair area is visible from a main living space, when the existing floor has an unknown species or custom stain, or when previous DIY attempts have produced visible seams. Custom stain mixing and feathering techniques require experience that significantly reduces the risk of a costly mismatch.
Recommended


Comments