


What Is Full Sand Refinishing for Hardwood Floors?
- Kim M.

- May 20
- 8 min read
If your hardwood floors look dull, scratched, or discolored no matter how much you clean them, a light buff or quick coat of finish probably won’t fix the problem. That’s exactly where full sand refinishing comes in. Full sand refinishing is the most thorough restoration process available for hardwood floors. It strips everything down to bare wood, removes years of damage, and rebuilds the floor’s finish from scratch. This guide walks you through what the process involves, how it compares to lighter options, and how to know whether it’s the right call for your home.
Table of Contents
Key takeaways
Point | Details |
Full sanding goes to bare wood | The process removes all old finish, scratches, and discoloration by sanding down to raw hardwood. |
Not every floor needs it | Floors with only light surface wear may be better served by screen and recoat or clean and buff. |
Customization is possible | Staining during the process lets you change your floor color while restoring it. |
Professional results beat DIY | Skipping grits or poor finish application causes lasting problems that are costly to fix. |
Maintenance extends the results | Routine cleaning and scheduled upkeep after refinishing can add years to your floor’s life. |
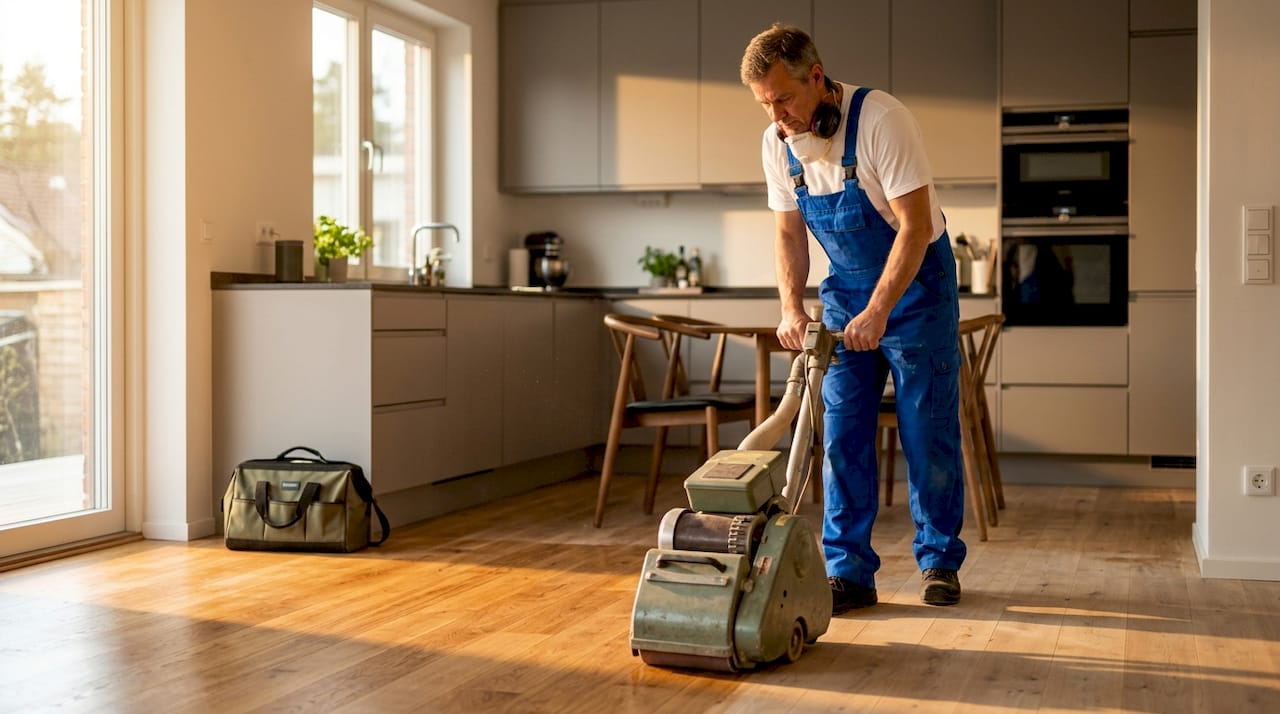
What full sand refinishing actually involves
Full sand and refinishing removes old finish, scratches, and imperfections by sanding the floor down to bare wood, then rebuilding it with repairs, optional stain, and multiple coats of fresh finish. It’s the most labor-intensive hardwood floor service you can get, and for good reason. When a floor has deep scratches, black stains from pet accidents, cupping, or finish that’s peeling and flaking, nothing less will actually fix it.
Here’s how the full sand finishing process works from start to finish:
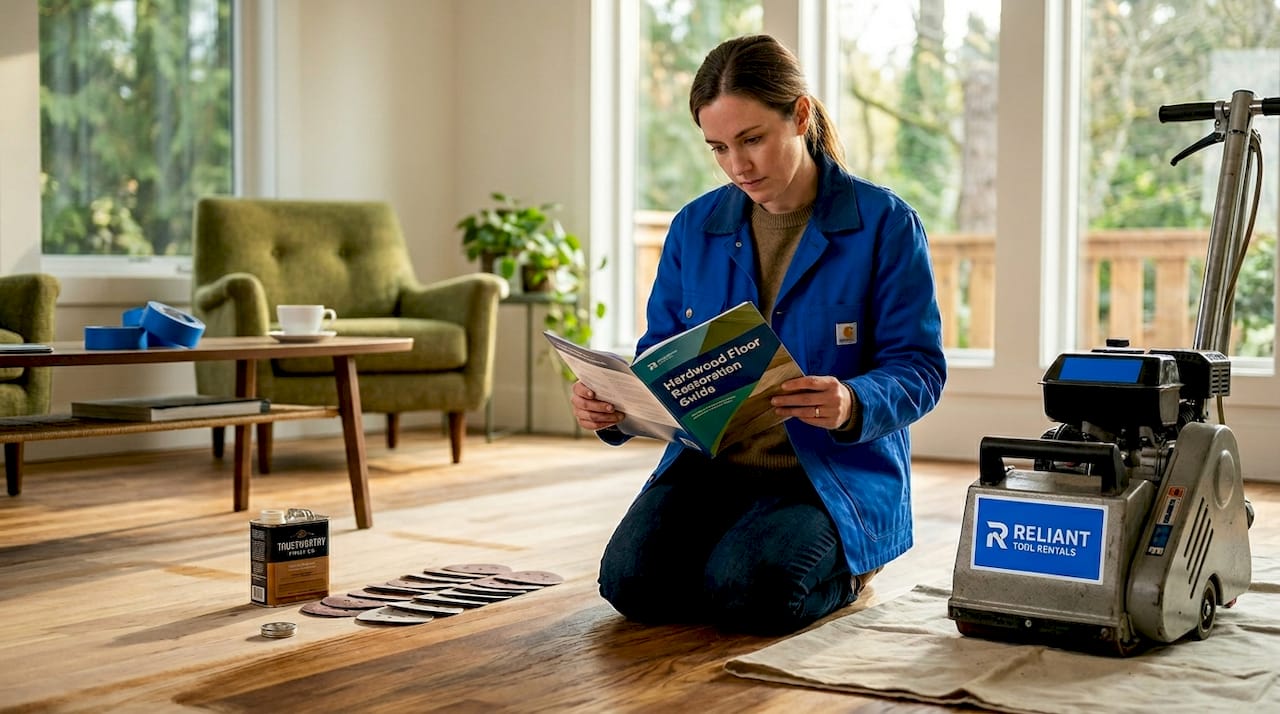
Floor assessment. A professional inspects the floor for structural issues, moisture damage, loose boards, and the depth of existing damage. This determines which sanding equipment and grit sequence to use.
Furniture removal and prep. The room is cleared, baseboards may be removed or protected, and the space is prepared for dustless sanding equipment.
Coarse sanding. The first sanding pass uses a drum or belt sander with coarse grit paper to strip the old finish and level the surface. This is where deep scratches and stains get removed.
Progressive sanding through grits. The floor is sanded again with medium grit, then fine grit. Each pass smooths out the marks left by the previous one. Skipping grits is one of the most common mistakes in refinishing and leads to visible scratch patterns under the final finish.
Edge sanding and detail work. A smaller edge sander handles the perimeter of the room, and hand scrapers or detail sanders address corners and tight spots the large machine can’t reach.
Repairs. Deep gouges, gaps between boards, and any remaining uneven areas are filled and repaired before finishing begins.
Staining (optional). Staining is done after sanding and before the finish coats go down. This is your opportunity to change the color of your floors entirely, whether you want a darker walnut tone or a lighter natural look.
Finish application. Multiple coats of polyurethane or another protective finish are applied, with light sanding between coats. Each coat needs to cure before the next goes on.
Final cure and walkability. Dustless sanding equipment and fast-drying finishes mean floors are often walkable within hours, though full cure takes longer.
Pro Tip: Ask your refinishing professional about water-based finishes. They dry faster, have lower odor, and are now durable enough for high-traffic areas in most homes.
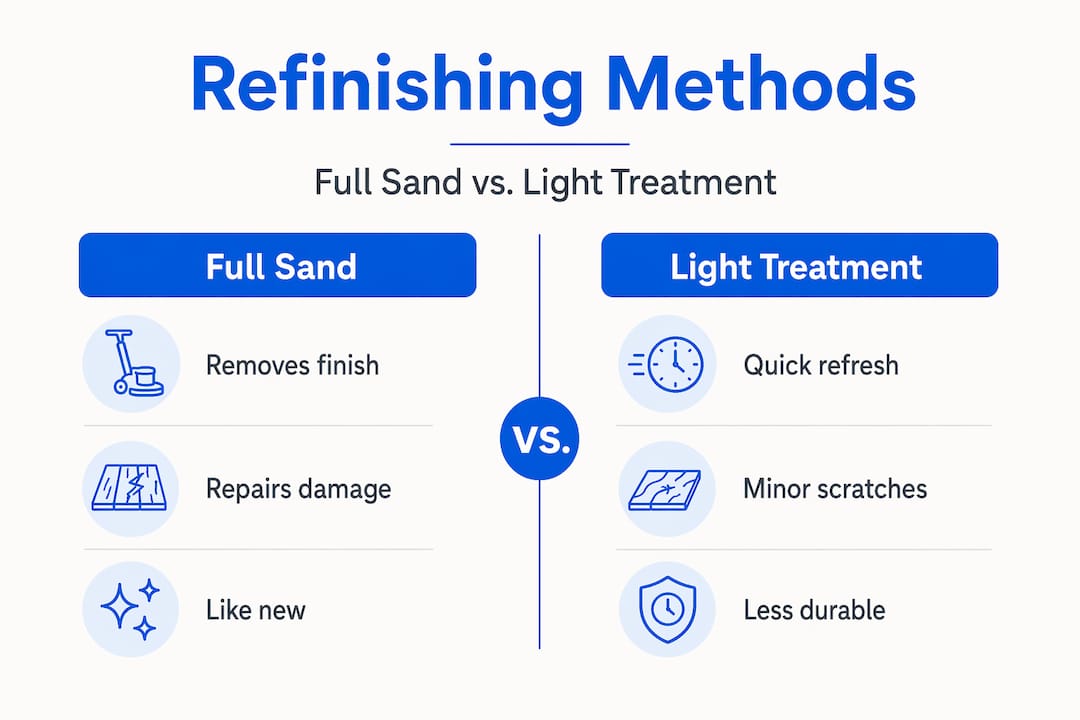
How full sanding compares to other methods
Not every floor needs a full sand and refinish. Understanding the difference between your options helps you avoid overpaying for work you don’t need, or worse, choosing a lighter treatment that won’t actually solve the problem.
Here’s a side-by-side look at the most common hardwood floor maintenance methods:
Method | What it does | Best for | Durability boost | Relative cost |
Clean and buff | Cleans and polishes existing finish | Light dullness, no damage | Minimal | Lowest |
Screen and recoat | Scuffs existing finish, adds new topcoat | Minor wear, surface scratches | Moderate | Low to mid |
Sandless refinishing | Chemical prep and new finish coat, no sanding | Floors without deep damage | Moderate | Mid |
Full sand and refinish | Sands to bare wood, full rebuild | Deep damage, stains, old floors | Maximum | Highest |
Screen and recoat is a lighter maintenance option that applies a new finish over the existing one. It works well for minor scratches and surface wear, but it can’t fix what’s already in the wood itself. If your floor has deep scratches, black pet stains, or finish that has failed in patches, screen and recoat will just seal the problem under a new layer.
Sandless refinishing doesn’t remove deep scratches or level uneven surfaces. The finish may also not bond as well as it would on a properly sanded floor. It’s a viable option for floors in good structural shape that just need a refresh.
The key questions to ask yourself:
Are the scratches surface-level, or do they go into the wood grain?
Is the finish peeling, flaking, or worn through to bare wood in spots?
Are there stains that cleaning hasn’t touched?
Has the floor been screen and recoated before without lasting results?
If you answered yes to any of those, you’re likely looking at a full sand and refinish. You can also explore the differences between clean and buff and screen and recoat to get a clearer picture of where your floor falls on the spectrum.
Benefits and drawbacks worth knowing
Full sand refinishing delivers results that no other method can match. But it also comes with real commitments. Here’s an honest look at both sides.
What you gain:
Deep damage is fully removed, not hidden. Scratches, stains, and worn-through finish disappear completely.
You can change the color of your floors during the process through staining.
The new finish is applied to bare, properly prepared wood, so it bonds better and lasts longer.
Refinishing prevents costly replacements and addresses safety risks from wear damage, saving money long term.
A well-done full sand and refinish can add 10 or more years to a floor’s lifespan.
What to plan for:
Full sand and refinish takes several days and is more labor-intensive than lighter options.
You’ll need to vacate the area during the process and for some time after.
Refinishing costs vary depending on floor size, damage extent, and finish type. Larger rooms with significant damage cost more.
DIY attempts often go wrong. Renting sanding equipment without experience leads to gouges, uneven surfaces, and finish failures that cost more to fix than hiring a professional from the start.
Pro Tip: Schedule your refinishing project during mild weather. Low humidity helps finish coats dry evenly and reduces the risk of raised grain or bubbling.
The true cost of DIY versus professional refinishing is often misunderstood. Equipment rental, product costs, and the time required add up quickly, and mistakes are expensive to correct.
Caring for your floors after refinishing
Getting a full sand and refinish is an investment. How you treat the floor afterward determines how long those results last.
Here’s what actually makes a difference in the long run:
Wait before placing rugs or furniture. Give the finish at least 24 to 48 hours before putting anything back. Full cure takes up to two weeks, so avoid dragging furniture across the floor during that time.
Use the right cleaning products. Avoid steam mops, oil-based soaps, and anything with wax. These break down polyurethane finishes faster than normal wear. A pH-neutral hardwood floor cleaner is your best option.
Add felt pads to furniture legs. This single habit prevents the majority of scratches that accumulate over time.
Control moisture. Wipe up spills immediately. Hardwood and standing water are not compatible, and moisture damage can undo a refinish faster than foot traffic.
Schedule routine maintenance. A thorough cleaning and buffing schedule after refinishing extends floor life and keeps the finish looking its best.
Plan for screen and recoat down the road. Most floors benefit from a screen and recoat every three to five years between full sand refinishing cycles. It adds a fresh protective layer before wear becomes serious. Learning when to schedule each service takes the guesswork out of floor care.
Watch for these signs that your floor may need attention again: finish looking dull even after cleaning, visible scratches that don’t buff out, or bare wood showing through in high-traffic areas.
My honest take on the value of full sand refinishing
I’ve worked with hardwood floors long enough to say this with confidence: full sand refinishing is one of the most undervalued home investments a homeowner can make. People spend thousands on new appliances or bathroom updates, then hesitate when they hear the cost of refinishing floors that could look brand new with the right treatment.
The misconception I see most often is that refinishing is just cosmetic. It isn’t. When finish wears through to bare wood, moisture gets in. Boards swell, cup, and eventually crack. What starts as a cosmetic problem becomes a structural one. Catching it with a full sand and refinish at the right time is almost always cheaper than what comes next if you wait.
I’ve also seen homeowners try to save money by choosing screen and recoat on floors that genuinely needed a full sand. The result looks better for a few months, then the underlying damage shows through again. They end up paying for the lighter service and then paying for the full job anyway.
The short-term disruption of a full sand and refinish is real. You’re out of the room for a day or two. But the results last for years, and when it’s done right by experienced professionals, the floor looks like it was just installed.
— Jim
Ready to restore your hardwood floors?
If your floors have reached the point where lighter treatments aren’t cutting it, Aosaveswoodfloors has been doing this work since 2003 across central Illinois and the St. Louis metro area. With over 20 years of experience and 450+ Google reviews, they know exactly what each floor needs.

Their full sand and refinishing service uses dustless equipment and eco-friendly finishes, so there’s no mess left behind and floors are walkable in about three hours. For floors that don’t need a full sand yet, their screen and recoat service keeps your finish protected between major refinishing cycles. Before you start pricing out new flooring, give Aosaveswoodfloors a call. The tagline says it best: “Before you REFLOOR it, let us RESTORE it.”
FAQ
What does full sand refinishing include?
Full sand refinishing includes sanding the floor down to bare wood, repairing damage, optional staining, and applying multiple coats of protective finish. It addresses deep scratches, stains, and worn-through finish that lighter methods cannot fix.
How long does the full sand refinishing process take?
The process typically takes one to several days depending on floor size and damage level. With dustless equipment and fast-drying finishes, floors are often walkable within a few hours of the final coat.
Is full sand refinishing worth it compared to replacement?
Yes, in most cases. Refinishing restores floors to like-new condition at a fraction of replacement cost, and it prevents further structural damage from moisture and wear that exposed wood attracts.
How often do hardwood floors need full sand refinishing?
Most hardwood floors can be fully sanded and refinished five to ten times over their lifetime, depending on wood thickness. With proper maintenance and periodic screen and recoat services, full refinishing is typically needed every 10 to 15 years.
Can I change my floor color during full sand refinishing?
Yes. Staining is an optional step done after sanding and before the finish coats are applied, giving you full control over the final color of your floors.
Recommended

Comments