


2–72 Hours to Use Countertops After Sealing for Homeowners

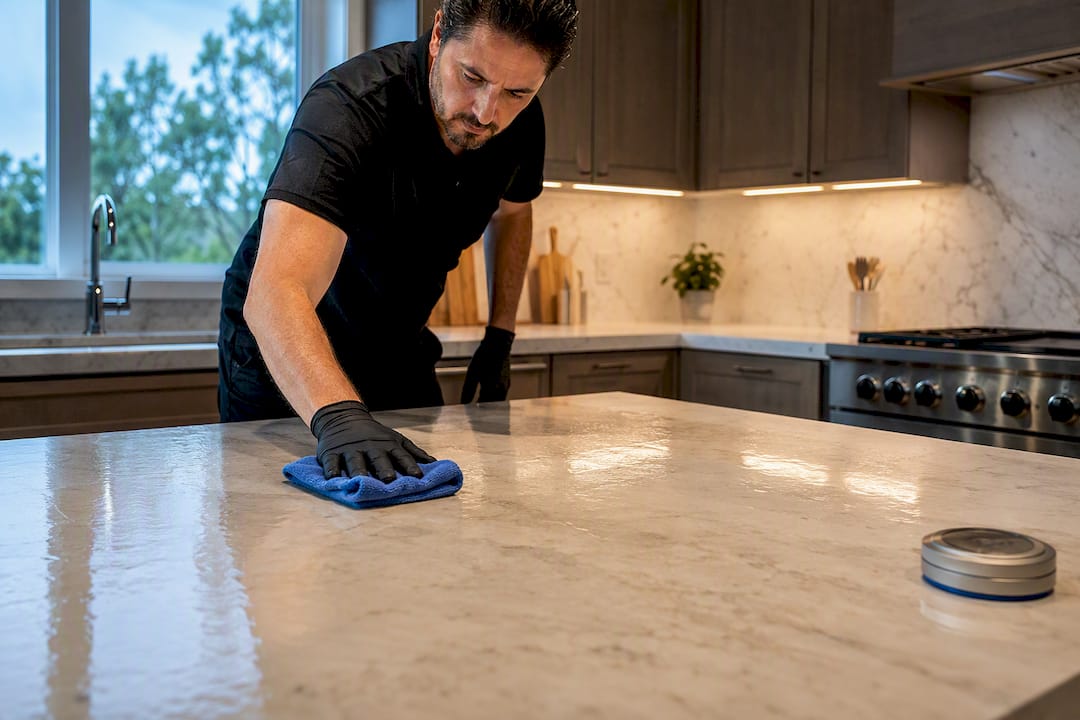
Light contact with a freshly sealed countertop is usually safe after two to six hours, but you should wait 24 to 72 hours before heavy daily use like hot pans, cutting, or heavy appliances, depending on the sealer and stone. Dry to the touch does not mean fully cured. The exact window depends on your product label and stone type, which the sections below help you pin down and verify.
TL;DR:
Wait at least 24 to 72 hours before placing heavy objects or using heat on the sealed surface, depending on your sealer and stone type.
Conduct the water-drop test after curing to ensure the sealer is effective and only reseal areas that absorb water.
Penetrating sealers typically cure within 24 to 48 hours, while topical sealers may require longer, sometimes beyond three days.
Light contact is safe from two to six hours after sealing, but avoid liquids, acids, and abrasives during the first 24 hours.
Seek professional sealing or repair if persistent haze, uneven absorption, or significant damage occurs, especially on older or repaired slabs.
Table of Contents
How Long to Wait Before Using Countertops After Sealing
The first few hours after sealing matter most. What you do (or avoid) during this window decides whether your seal holds evenly or turns into a haze problem you’re scrubbing at next weekend.
Here’s what protects the work you just did:
Ventilate the room. Sealer fumes need airflow to cure properly, and stuffy kitchens slow the process.
Keep the surface bone dry. Any liquid contact before cure completes can dilute or streak the sealer.
Wipe every trace of excess sealer before it dries. This is the single biggest factor in whether you get a clean finish or a hazy film.
Pad appliance feet with felt or remove small appliances entirely until the surface cures.
Use painter’s tape along backsplashes or sink edges if you’re worried about drips.
Now the don’ts: no liquids, no acidic cleaners, no abrasive pads, and no polishing during the cure window. Skip placing heavy pots, cutting boards, or mixers on the surface, too. Applying sealer in even coats and wiping off all excess before it dries is the step most DIYers rush, and it’s exactly why haze shows up on otherwise well-sealed counters.
Pro Tip: Set a timer the moment you finish wiping excess sealer. It’s easy to get distracted and let a few extra minutes turn into an hour, which is more than enough time for a thin film to set into permanent haze.
What Can You Do at Each Stage of the Cure?
Cure time isn’t a single line you cross. It’s a series of gates, and each one opens up a little more freedom.
0 to 2 hours: Hands off. Don’t set anything on the surface, wet or dry. This is the most fragile window.
2 to 6 hours: Light, dry contact is generally fine. Setting a dry cutting board down or resting a bowl of fruit is usually low risk.
24 hours: Most liquid contact and light food prep become safe. You can typically wipe up spills, prep vegetables, and use the sink area normally.
48 to 72 hours: Heavy appliances go back, hot pots and pans are fine, and you can resume full daily use, including polishing.
Real-world examples help here. Putting the toaster back after two hours is low risk if the feet are dry and the surface isn’t tacky. Cutting directly on the stone (not recommended long term, but sometimes done) should wait until at least 24 hours. Setting a hot pan straight from the stove is safer after 48 to 72 hours, once the sealer has fully hardened against heat. Granite Gold’s guidance suggests waiting 24 hours before polishing and at least a couple of hours before placing objects back down. Always check your product’s label first. Some specialty sealers demand longer waits than the general rule suggests.
Why Cure Time Depends on Sealer and Stone Type
Not all sealers behave the same way, and neither does every slab of stone.
Penetrating sealers, the type most commonly used on natural stone countertops, soak into the pores of the stone rather than sitting on top like a coating. They’re the standard choice because they protect from the inside without changing the surface feel or gloss. Topical sealers form a film on top and generally take longer to cure fully, sometimes well beyond the typical range.
Penetrating sealers: Most reach full protection within 24 to 48 hours, though labels sometimes list up to 72 hours.
Topical or specialty coatings: These can require longer cure windows, sometimes multiple days, before they’re fully hardened.
Engineered quartz: This material is non-porous and generally doesn’t need sealing at all, so cure-time questions rarely apply here. If you’re curious how quartz care differs, our guide on cleaning quartz countertops daily breaks that down.
Granite, marble, and quartzite: Porosity varies widely between slabs, which is why reseal frequency differs even among stones that look similar side by side.
How to Test Whether Your Seal Actually Worked
Skip the guesswork. The water-drop test is simple and takes less than half an hour.
Pour a small amount of water onto the surface in several spots, including near the sink and main prep areas.
Let it sit for 20 to 30 minutes without touching it.
Wipe the water away and look closely at the stone underneath.
If the spot darkened, the sealer isn’t holding there and needs another coat.
If it looks unchanged, that zone is protected.
Testing multiple zones matters because sealer absorption isn’t always uniform across a slab, especially near seams or repaired areas. If one spot fails, reseal just that area and retest 24 hours later rather than assuming the whole counter needs another full application.
Fixing Haze, Streaks, and Appliance Marks
Haze is the complaint that sends most people searching for help after a sealing job, and it almost always traces back to one cause: sealer that dried before it was wiped off. Once that thin film hardens, it clings to the stone’s texture and reflects light unevenly.
The fix depends on how long it’s been sitting. Rehydrating the dried sealer with a compatible solvent and buffing it out works for haze caught early. Older, hardened residue is tougher, and in stubborn cases, only a professional with the right chemicals and polishing pads can remove it safely.
Appliance rubber feet are the other common headache.
Use felt pads or thin mats under toasters, mixers, and coffee makers until the cure window closes.
Practitioners recommend this protection specifically to prevent ring marks that can become permanent if appliances sit on soft, uncured sealer too long.
Call a pro if you see widespread haze across large sections, uneven absorption you can’t explain, or a film that won’t budge no matter what you try.
Pro Tip: If haze shows up in a small, isolated patch, try a stone-safe cleaner and a soft cloth before assuming you need a full pro visit. Small spots often buff out with patience.
Daily Care and Reseal Schedule Once the Seal Cures
Once your countertop is fully cured, maintenance is where most of the seal’s lifespan gets decided. Small daily habits either extend that protection or quietly wear it away.
Stick to a pH-neutral stone cleaner or plain mild soap and water. Vinegar, many glass cleaners, and dish-soap residue can etch stone or leave films that interfere with the sealer, which undoes the work you just did. Wipe spills immediately, especially anything acidic like citrus or wine, and always use trivets and cutting boards instead of setting hot or sharp items directly on the stone.
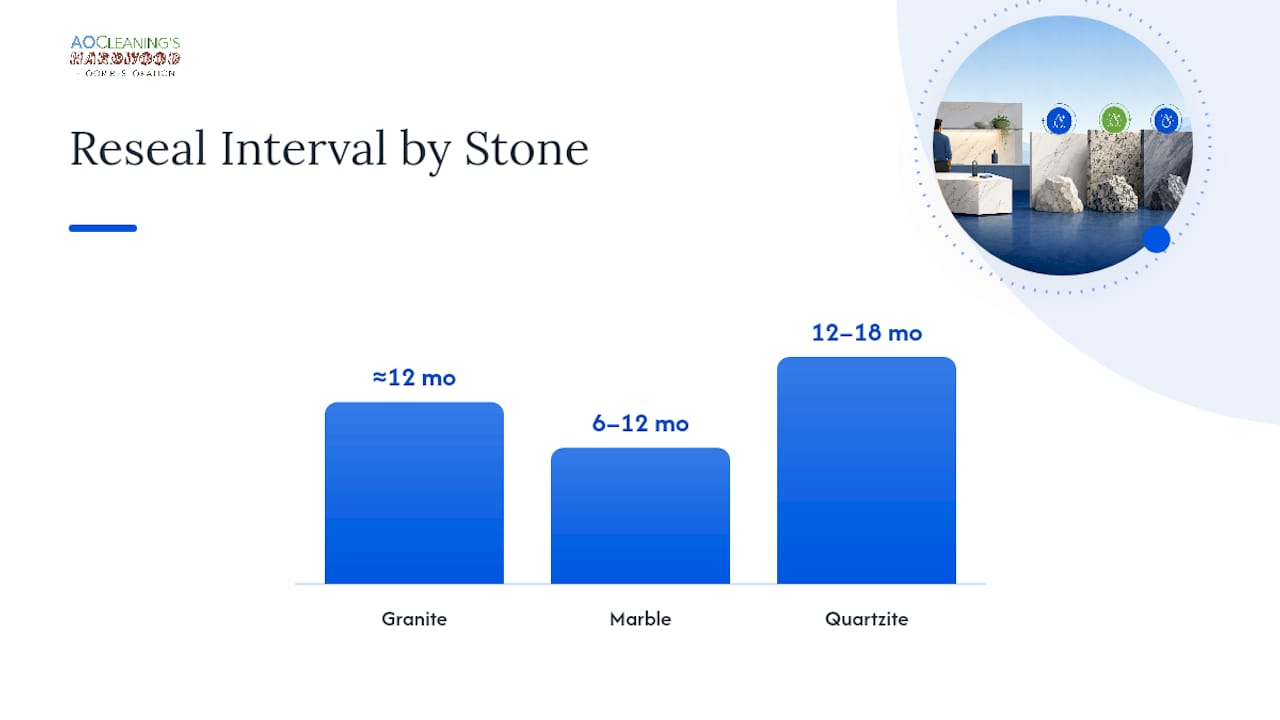
Granite: reseal approximately every year.
Marble: reseal every several months to a year, since it’s more porous.
Quartzite: reseal roughly every year to year and a half in most cases.
Run the water-drop test once a year before committing to a full reseal. It tells you exactly which zones need attention instead of resealing the whole surface out of habit.
When to Call a Pro for Countertop Sealing
Some situations are worth handing off, even for a confident DIYer. Widespread haze that won’t buff out, uneven seal absorption across a large slab, older or repaired stone with unpredictable porosity, or simply wanting a guaranteed clean result are all good reasons to bring in a professional.
Professional countertop cleaning, polishing, and sealing services often use eco-friendly products and dustless techniques, which can help avoid fumes or fine dust settling across your kitchen for days. Booking typically starts with an in-home inspection to identify your stone type and its current condition, followed by a product recommendation suited to that stone’s porosity.
A professional evaluates whether your existing seal has failed in specific zones or across the whole surface.
Application happens the same visit in most cases, with attention to even coverage and proper excess removal.
You get clear aftercare instructions afterward, so you know exactly when it’s safe to resume normal use.
If your countertop has resisted sealing attempts before, or you’re dealing with older repaired stone, professional testing catches issues a water-drop test at home might miss.
What Homeowners Get Wrong About Sealing Timelines
Most of the confusion around sealing comes from treating “dry” and “cured” as the same thing. They’re not. A countertop can feel completely dry to the touch within an hour while the sealer underneath is still hardening at a molecular level for another two or three days. That gap is where most DIY mistakes happen: people see a dry surface, assume it’s done, and immediately put a hot pan on it or start scrubbing with the wrong cleaner.
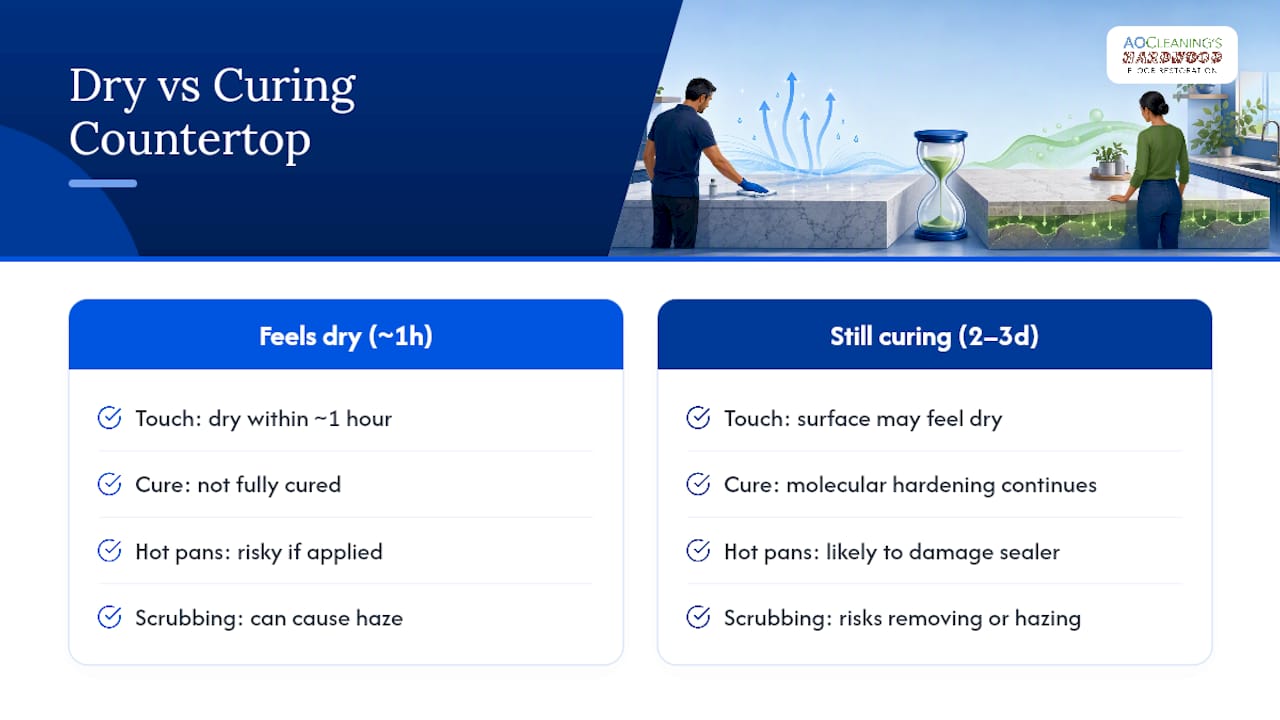
The conventional advice of “wait 24 hours” isn’t wrong, but it’s incomplete. It treats every sealer and every stone the same, when porosity and product formulation actually drive the timeline more than any calendar rule. A dense, tight-grained granite might tolerate contact sooner than a porous, honed marble sealed with the same product.
If there’s one thing worth prioritizing, it’s the water-drop test over any fixed number of hours. It tells you what’s actually happening on your specific slab instead of trusting a label average. Sealing correctly the first time, with patient wipe-off and proper testing, saves far more effort than fixing haze later.
— Jim
Get Professional Help With Countertop Sealing
If haze has already set in, or you’d rather skip the guesswork entirely, Some companies offer countertop cleaning, polishing, and sealing services using dustless, eco-friendly approaches similar to those used in hardwood floor restoration. You get a correctly sealed surface without the trial-and-error of matching sealer to stone type yourself.

Bookings can include an in-home inspection, product selection suited to your stone, professional application, and aftercare instructions so you can know when your counters are ready for full use. If you’re mid-remodel, a kitchen remodeling contractor can coordinate the timing so sealing happens at the right point in the project. And if your hardwood floors could use the same kind of attention, check out the hardwood floor clean and buff service while you’re getting your countertops sorted. Reach out to schedule an inspection and get your countertops sealed right the first time.
Sources
Recommended

Comments