


Homeowners: Don’t Sand Engineered Hardwood Under 2mm Wear Layer

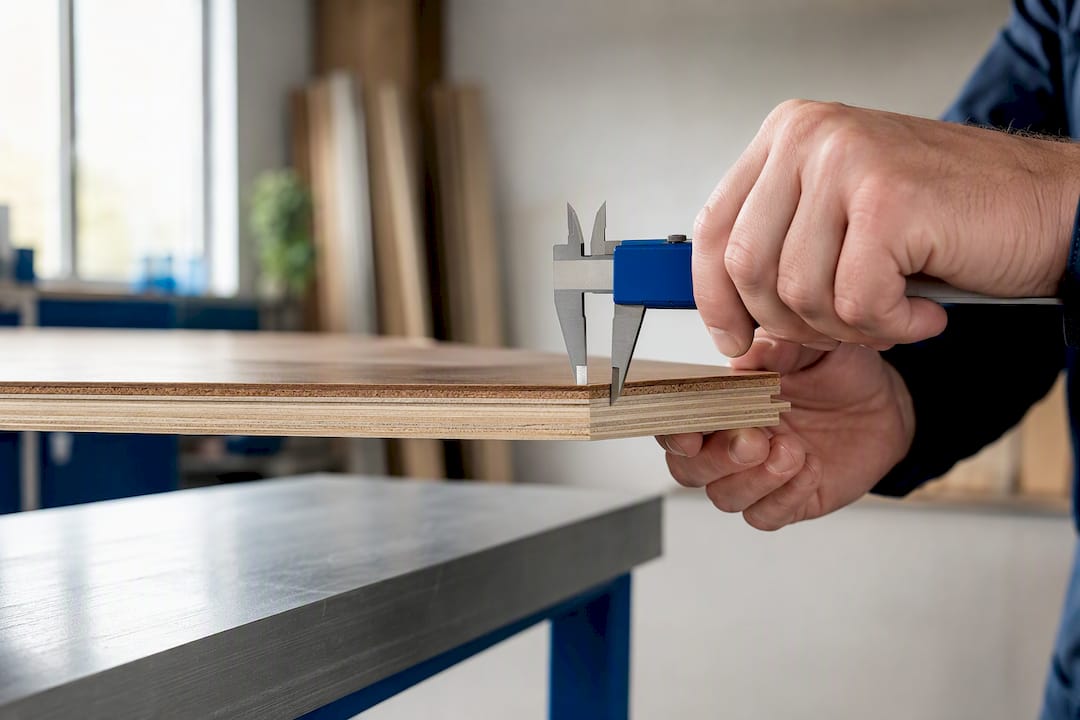
Whether you can refinish engineered hardwood comes down to one measurement: the wear layer, not the total plank thickness. Below 2mm, sanding isn’t safe and a screen-and-recoat is your move. At 2mm you get roughly one light refinish. A 3mm veneer buys 1 to 2 cycles, and 4 to 6mm can handle multiple sandings over the life of the floor. Measure before you touch a sander.
TL;DR:
Floors with wear layers under 2mm should only be recoated, as sanding risks penetrating to the core and damaging the integrity of the floor.
A 2mm wear layer typically allows for just one light refinish, while 3mm supports one to two sanding cycles over the floor’s lifespan.
Floors with 4mm to 6mm wear layers can handle multiple sanding cycles, similar to solid hardwood, extending their refinishing potential for decades.
Accurate measurement of the wear layer, through manufacturer info or exposing an edge, is essential before sanding to prevent irreversible damage.
Professional assessment is recommended if the veneer thickness is uncertain or if previous heavy sanding has likely depleted the wear layer.
Table of Contents
Understanding Refinish Engineered Hardwood Thickness Thresholds
Engineered hardwood is built in layers: a plywood or composite core topped with a thin slice of real hardwood called the wear layer, or veneer. That top layer is the only part a sander ever touches, and it’s the only number that matters when you’re asking whether a floor can survive another refinish. Total plank thickness, which might be 3/8 inch or 3/4 inch, tells you almost nothing about sanding safety on its own.
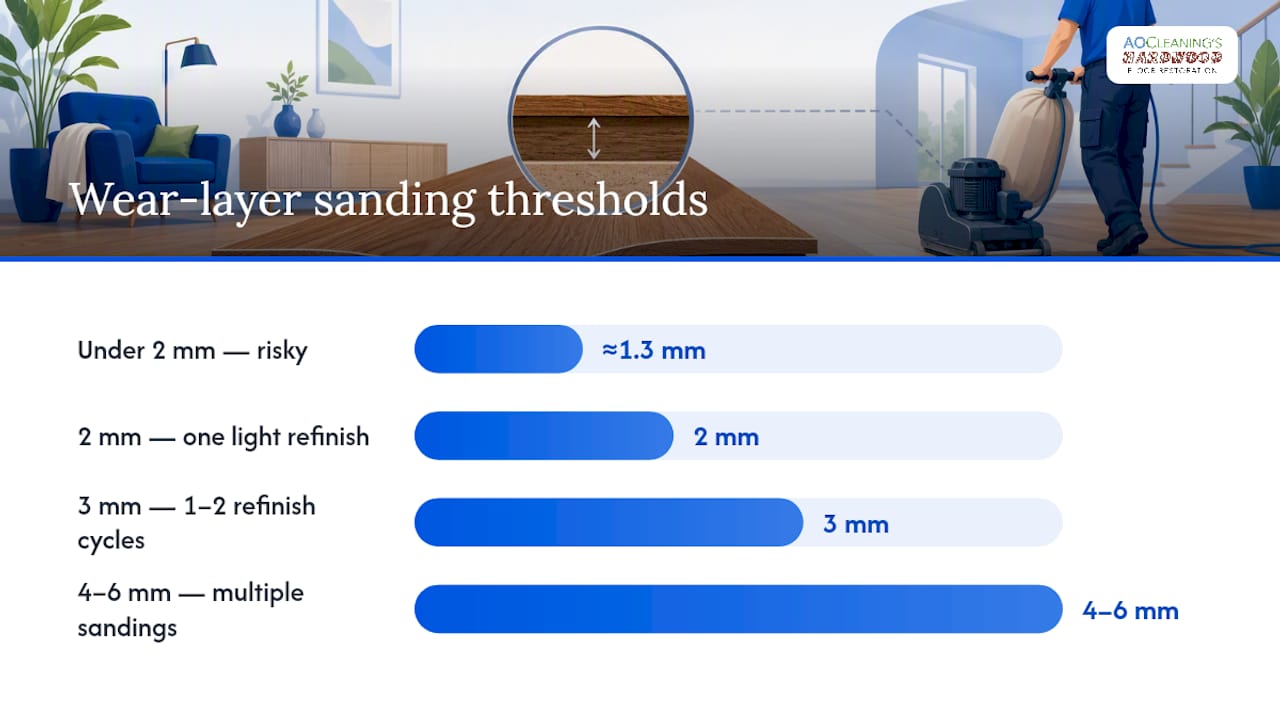
The wear layer on most engineered floors ranges from about 0.6mm to 6mm, and that range is why two floors that look identical can have completely different refinishing futures. A budget floor with a 0.75mm veneer and a premium floor with a 4mm veneer are not the same product once a drum sander gets involved.
Here’s how the thresholds break down in practice:
Under 2mm: Sanding risks cutting straight through to the core. Screen-and-recoat is the safer path.
2mm: Enough margin for about one careful, light refinish.
3mm: Typically supports 1 to 2 full refinish cycles over the floor’s lifetime.
4mm to 6mm: Behaves much like solid hardwood, often handling multiple sandings.
That math is built on a simple industry assumption: a full sand-and-refinish removes roughly 1mm of the wear layer per pass. Every cycle spends a chunk of a resource that doesn’t grow back, so the safety margin you leave matters as much as the sanding itself.
How to Check Your Engineered Hardwood’s Wear Layer
You don’t need a moisture meter or a flooring degree to figure out what you’re working with. You need to find the right spot and look closely.
Find the spec sheet first. Manufacturer documentation, a leftover box in the garage, or even the product listing online will usually state veneer thickness directly. This beats guessing every time.
Inspect an exposed edge. Pull a floor vent register, check a doorway threshold, or look at a stair nose where the plank edge is visible. You’ll see a clear line where the hardwood veneer ends and the core begins. Measuring that line with a small ruler gives you a real number.
Pull a sample plank if you have one. Leftover flooring from the original installation shows the cross-section without you having to disturb anything.
Skip the coin-scratch or thumbnail tests you’ll see suggested online. They tell you the floor has a finish coat, not how many millimeters of hardwood sit under it, which is the only figure that actually matters here.
Pro Tip: Take a photo of the exposed edge with a ruler in frame and save it to your phone. Ten years from now, when you or a future owner is trying to decide whether the floor can take another refinish, that photo is worth more than memory.
Screen-and-Recoat vs Full Sand: Picking the Right Method
Not every tired floor needs a sander. Two very different repair methods exist, and matching the right one to your wear layer keeps you from spending money, or wood, you didn’t need to spend.
Screen-and-recoat buffs the existing finish and applies a fresh topcoat without removing any wood. It’s fast, inexpensive relative to a full refinish, and it leaves the stain color untouched. This is the right call for floors under 2mm, for surface scuffs and dulling, and for any floor where the finish has worn thin but the wood itself is intact.
Full sand-and-refinish strips the finish and a thin layer of wood down to bare hardwood, then reseals and retains. It fixes deeper scratches, water rings trapped in the finish, and uneven coloring, and it lets you change stain color entirely. It’s also the option that actually consumes wear-layer thickness, which is why it’s reserved for veneers of 3mm and up in most cases.
The decision tree is short:
Surface-level dullness, minor scuffs, veneer under 2mm → screen-and-recoat
Deep gouges, discoloration, stain change desired, veneer 3mm or thicker → full sand-and-refinish
Uncertain veneer thickness or any sign of prior heavy sanding → pro assessment before either
If you want a closer look at what the sanding process actually involves once you’ve confirmed it’s safe, this step by step refinishing breakdown walks through each stage.
How Many Times Can You Refinish Engineered Hardwood?
Using the ~1mm-per-sand rule of thumb, you can map wear-layer thickness directly to how many refinish cycles a floor has left in it:
2mm veneer: About 1 refinish cycle, ever.
3mm veneer: 1 to 2 cycles over the floor’s life.
4mm veneer: Roughly 2 to 3 cycles.
6mm veneer: Multiple cycles, comparable to solid hardwood.
These numbers assume full sanding each time, not screen-and-recoat, which uses none of the wear layer. They also assume a professional handles the sanding with consistent technique. A rushed or uneven job can eat more wood in one pass than a careful one, which shrinks the number of cycles left no matter what the spec sheet says.
In real terms, if refinishing happens roughly every 8 to 10 years depending on foot traffic and finish durability, a 3mm veneer might last 15 to 20 years of active refinishing before it’s down to recoat-only territory. A 6mm veneer could stretch that timeline past 40 years. For a longer view on planning refinish timing around your specific floor, see this refinishing frequency guide.
When Refinishing Isn’t the Right Call
Some floors need to be left alone, no matter how tempting the sander looks. Watch for these red flags before you start:
Visible plywood or core material showing through worn spots. If you can see the substrate, there’s no wear layer left to sand.
Delamination, where the veneer is separating or bubbling away from the core.
Extensive water damage, especially staining that has soaked into the core rather than sitting on the surface.
Cupping or crowning, which signals moisture problems that sanding won’t fix and may make worse.
Evidence of multiple prior sandings, like an unusually thin edge profile at a threshold.
On floors with under about a 0.6mm wear layer remaining, or any core exposure, sanding is generally not a workable repair regardless of how the rest of the floor looks. Alternatives exist: localized board replacement for isolated damage, a screen-and-recoat if the finish is merely worn but the wood is sound, or full replacement when the damage is widespread. If a floor needs board-by-board replacement across multiple rooms, a full replacement often costs less over time than patch-repairing a floor that keeps failing in new spots.
DIY Sanding vs Hiring a Pro: What’s Actually at Stake
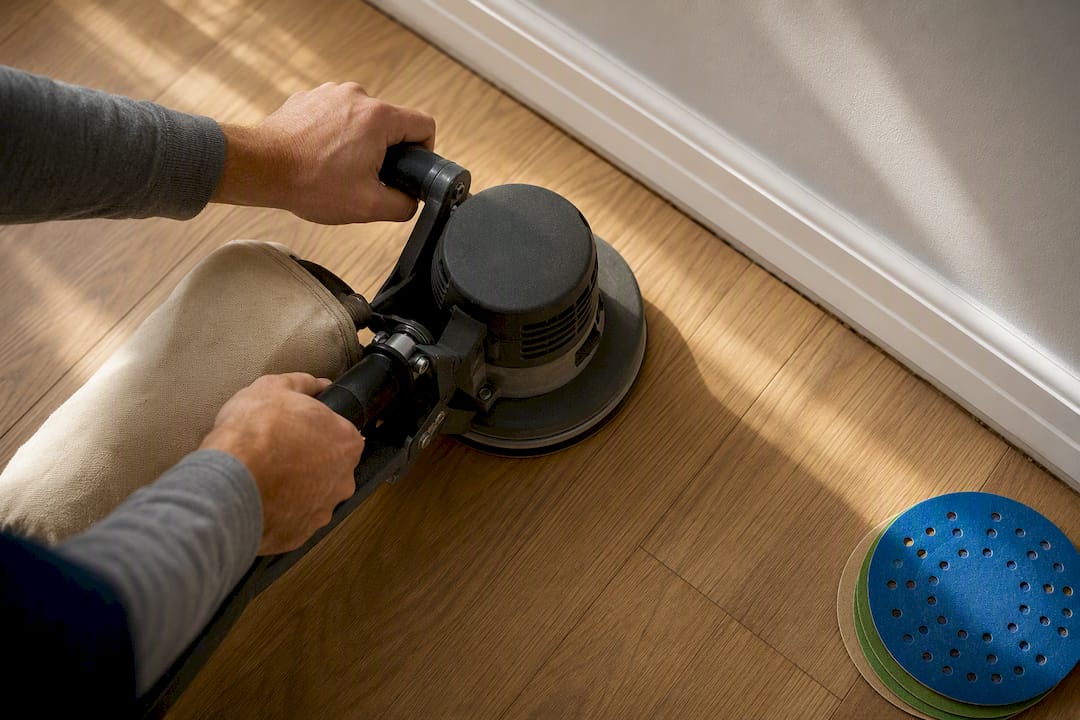
DIY refinishing on a solid wood floor is forgiving. On engineered hardwood, it’s a different game because the margin for error is measured in fractions of a millimeter. The most common DIY mistakes are running the sander too long in one spot, using the wrong grit sequence and leaving swirl marks, and sanding unevenly near edges where a rented drum sander is hard to control. Any of these can breach the veneer on a first attempt, especially on floors already close to their 2mm threshold.
Costs vary by square footage, finish type, and how much prep work damaged boards require, but full sand-and-refinish jobs generally cost more than a screen-and-recoat, which is the cheaper, faster option when it’s viable.
Call a professional when you’re not certain of the veneer thickness, when the floor has already been refinished once or twice, or when damage extends across multiple rooms. For a closer comparison of what each route actually involves, this DIY versus professional refinishing breakdown lays out the tradeoffs in more detail.
Pro Tip: If a contractor quotes a full refinish without first checking an exposed edge or asking for the spec sheet, that’s a sign they’re skipping the one step that prevents an irreversible mistake.
How Professionals Assess a Floor Before Sanding
A trained crew runs the same checks a careful homeowner would, just faster and with more reference points. The typical sequence looks like this:
Pull the spec sheet or product documentation if it’s available.
Measure an exposed edge at a register, threshold, or stair nose.
Run a small test-sand in an inconspicuous area to confirm the read before committing to the whole room.
Check for signs of prior sandings across different rooms, since thickness can vary floor to floor.
Choose screen-and-recoat or full sand-and-refinish based on what the measurements actually show, not what the homeowner hoped to hear.
This is close to the inspection process professionals use before any restoration work begins, and Dustless techniques and a speedy turnaround make that assessment step nearly frictionless. Spending 20 minutes confirming veneer thickness costs nothing compared to sanding through a floor that had one refinish left in it.
A Conservative, Measurement First Take on Refinishing
Most of the damage I see traced back to engineered hardwood refinishing didn’t come from bad luck. It came from someone skipping the measurement step because the floor “looked fine” from the top. Looking fine and having wood left to sand are two separate facts, and only one of them shows up before you plug in the sander.
My advice leans conservative on purpose: when the veneer thickness is unclear, treat it like it’s on the thin side of the range. A screen-and-recoat you didn’t strictly need costs you a little money. A full sand on a floor that only had 1.5mm of hardwood left costs you the whole floor. If you’re buying new engineered flooring, paying more for a 4mm or 6mm wear layer up front is one of the few flooring decisions that pays off decades later instead of immediately.
— Jim
Get a Professional Read on Your Floor Before You Sand
Once you’ve measured and you’re still not sure which side of the threshold your floor falls on, that’s exactly the gap AO Cleaning’s in-home consultation is built to close. Rather than guessing off an exposed edge in one doorway, a technician checks multiple points across the room, confirms whether you’re looking at a recoat or a full refinish, and gives you a straight answer before any sanding starts.

A locally owned and operated company has served homeowners in the St. Louis metro and central Illinois area since 2003, using dustless techniques that mean no plastic sheeting over your furniture and no lingering odor for a week afterward. If your veneer reads thin, a screen-and-recoat restores the surface without touching the wear layer at all. If it’s thick enough for a full cycle, the full sand, stain, and refinishing service handles it, with most jobs walkable again in about three hours. Book an in-home consultation and get a real number instead of a guess before you decide how to move forward.
Sources
The thickness thresholds and measurement guidance in this article draw on trade-specific flooring resources, including FloorSure’s guide on refinishing engineered hardwood, Potomac Floors’ thickness guide, Hudson Hardwood’s Philadelphia refinishing guide, and Buff & Coat Virginia’s refinishing guide. For a broader look at home renovation timing beyond flooring, One Day Doors & Closets covers similar quick-turnaround projects.
FAQ
Can 2mm engineered hardwood be refinished?
Yes, but only once, and carefully. A 2mm wear layer generally supports about one light, professionally done refinish before there’s no safe margin left for another.
Can you sand down and restain engineered hardwood?
You can, as long as the wear layer is thick enough, typically 3mm or more, to survive the wood removed during sanding and still leave a stable surface. Thinner veneers should get a screen-and-recoat instead, which changes the topcoat but not the stain underneath.
What is the best thickness for engineered hardwood?
For long-term refinishing flexibility, a wear layer of 4mm to 6mm gives you the most room to work with, supporting multiple sanding cycles over the floor’s life. Thinner veneers around 2mm still perform well day to day, but they limit you to one refinish and rely more heavily on recoating for upkeep.
How to tell if engineered hardwood can be refinished?
Check the manufacturer spec sheet first, or measure an exposed plank edge at a threshold, register, or stair nose to see the actual wear-layer thickness. If you can’t get a clear read, or the floor shows signs of prior heavy sanding, an in-home professional assessment is the safer next step before any sanding begins.
Recommended

Comments