


Marble Countertop Polishing: DIY Fixes and When to Call a Pro
- Kim M.

- 13 minutes ago
- 9 min read
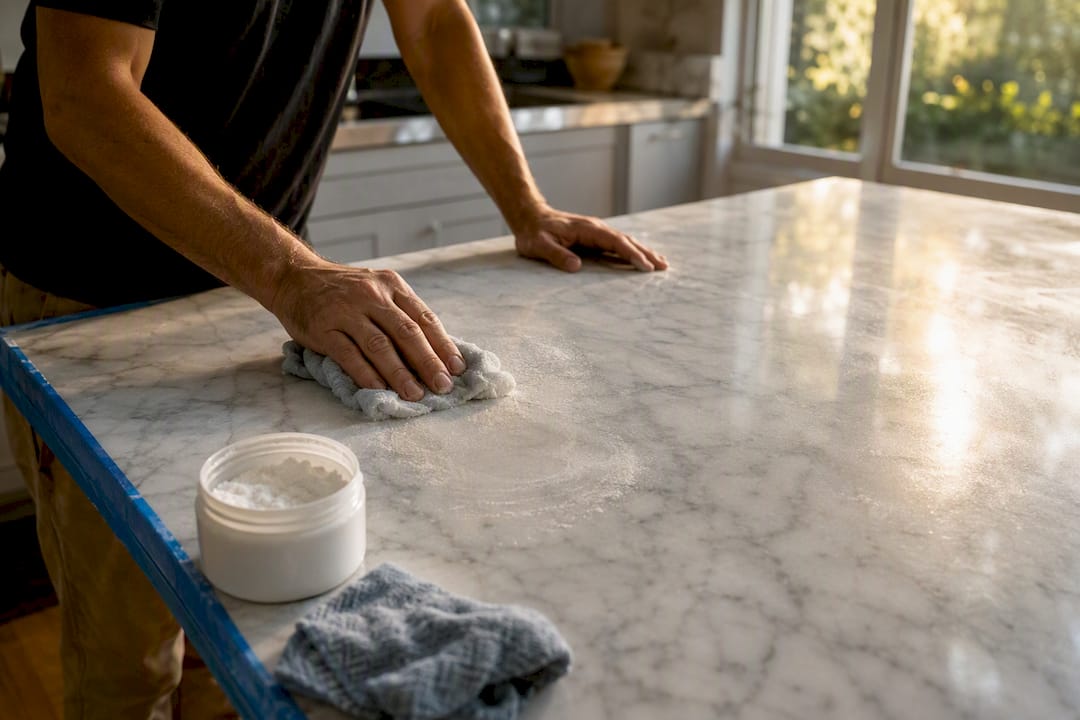
If your marble countertop only has light dulling or a few small etch marks, you can fix it yourself with a marble polishing powder and a felt pad. Deep scratches, chips, or dullness across the whole surface need diamond honing or a professional. The quickest way to tell which camp you’re in: drag a fingernail across the mark. If it catches or snags, you’re past hand-polishing territory.
Light etch or haze that’s smooth to the touch: hand polish with marble powder or a baking-soda paste
Fingernail catches, or dullness covers most of the slab: mechanical honing or professional restoration
Either way, seal the surface once it’s dry and polished
Pro Tip: Test any polish or sealer on a hidden corner first, like the underside lip near the sink cutout. Marble reacts differently depending on its finish, and a bad reaction on the whole counter is a much bigger headache than one small test patch.
Key Takeaways
Marble countertop polishing succeeds when you match the method to the damage: hand polish for light etching, diamond honing for scratches and widespread dullness, and always seal after.
Point | Details |
Run the fingernail test first | A catching nail means mechanical honing or a pro; a smooth surface usually means hand polish will work. |
Use marble-specific powder | Granite compounds won’t produce the same result on calcite-based marble. |
Follow the grit sequence in order | Skipping from a coarse to a fine diamond pad leaves swirl marks once the surface dries. |
Seal after polishing, not instead of it | A sealer resists stains but does not prevent etching from acidic spills. |
Call AO Cleaning for deeper damage | Their dustless, eco-friendly countertop service is a safer option than DIY once damage goes beyond light etching. |
Table of Contents
How Do You Identify Etches, Stains, Scratches, and Dullness?
Run your fingernail across the damaged spot. If it catches, you’re dealing with a scratch or chip, not surface etching, and hand polish alone won’t fix it. If your nail glides smoothly but the spot still looks cloudy or dull, that’s typically an etch, caused by something acidic sitting on the stone long enough to eat into the calcite.
Hold a flashlight low and at an angle across the surface, known as raking light, to reveal swirl marks, shallow scratches, and uneven sheen that overhead light hides completely.
Wipe the area clean and let it dry fully before judging anything, since wet marble can mask both etches and stains.
Check for color changes that don’t wipe away. That’s a stain, and it usually needs a poultice rather than polish.
Look for depth with raking light. Shallow dulling responds to hand polishing; anything with visible grooves needs mechanical work.
If you find both a stain and an etch in the same spot, pull the stain first with a poultice, then polish. Polishing over a stain just seals it in.
What Tools and Products Do You Need?
For hand polishing, keep the kit simple: a pH-neutral stone cleaner, microfiber cloths, a dedicated marble polishing powder, felt applicator pads, a spray bottle for water, painter’s tape to protect grout lines or backsplash edges, and nitrile gloves. Marble powders are formulated specifically for calcite-based stone, so skip anything labeled for granite. It won’t work the same way.
For tiny dull spots, a baking-soda paste mixed at roughly 3 parts soda to 1 part water is a workable low-cost stand-in, though it won’t match the gloss a real marble powder produces.
Going mechanical means renting or buying a variable-speed wet polisher, a set of diamond pads running 200 through 3,000 grit, a felt buffing pad, a spray bottle, and a respirator rated for fine dust.
Cover cabinets and nearby surfaces with plastic sheeting before you start
Tape off edges, sinks, and any exposed wood trim
Keep the work zone away from anything that can’t get wet or dusty
Pro Tip: Buy diamond pads in a set rather than piecing them together. A gap in the grit sequence, say jumping from 400 straight to 1500, leaves faint swirl marks that only show up once the counter’s dry.
How Do You Hand Polish Marble Countertop Surfaces?
Clean the entire surface with a pH-neutral stone cleaner and rinse thoroughly. Any grit or soap residue left behind will scratch the stone once you start rubbing.
Dry completely with a microfiber cloth. Polishing wet marble hides your progress and wastes powder.
Mix your marble polishing powder into a thin, damp paste following the product’s instructions. If you’re using the baking-soda fallback, stick to the 3:1 ratio and expect a milder result.
Work one section at a time, roughly 1 to 2 square feet, using a felt pad in overlapping circular passes. Press lightly. Marble is a soft stone, and heavy hand pressure does not speed things up, it just wears an uneven pattern into the surface.
Keep the paste moist the entire time. If it starts drying and clumping, mist it with water from your spray bottle.
Rinse the section fully, dry it, and check under raking light. If the etch or dull spot is still visible, run one more pass. Most light etching responds within one or two rounds of careful polishing.
Once you’re satisfied with the shine, let the area dry fully and run a water test. Drip a few drops of water on the surface. If it beads up within a few minutes, the stone doesn’t need resealing yet. If it soaks in or darkens the stone, apply an impregnating sealer once the whole counter has dried.
Marble polishing powder applied as a damp paste and buffed with a felt pad restores shine on small etched or dulled spots without any power tools at all, which is exactly why it’s the first thing worth trying before you consider anything mechanical.
When Do You Need Mechanical Honing Instead?
Mechanical polishing makes sense once dullness covers most of the counter, scratches catch your fingernail, or you notice lippage, a slight ridge where two slabs meet unevenly. Hand polishing can’t fix any of that. It only smooths the top layer of an otherwise sound surface.
The professional method runs a variable-speed wet polisher through a progressive diamond-pad grit sequence, and each grit has a specific job:
Grit Range | Purpose |
— | Removes deep scratches, chips, and lippage |
200–400 | Levels the surface and erases marks from the coarser grit |
— | Refines the finish and starts building sheen |
1500 | Smooths remaining haze and tightens the surface |
3000 grit | Produces the final polished, reflective shine |
Every grit’s job is to erase the scratch pattern left by the one before it. Skip a step, and you’ll see faint swirl marks once the surface dries, because a coarser pattern is still hiding underneath the higher grit’s sheen.
Run the polisher at a moderate, steady speed rather than maxing it out. Higher RPM generates more heat and can burn the stone if you linger in one spot. Keep the surface wet throughout each pass, overlap your strokes by about half a pad width, and stop every couple of minutes to wipe the slurry away and check your progress. Marble hides its true finish under a wet paste, so what looks even while soaked can reveal patchy spots the moment it dries.
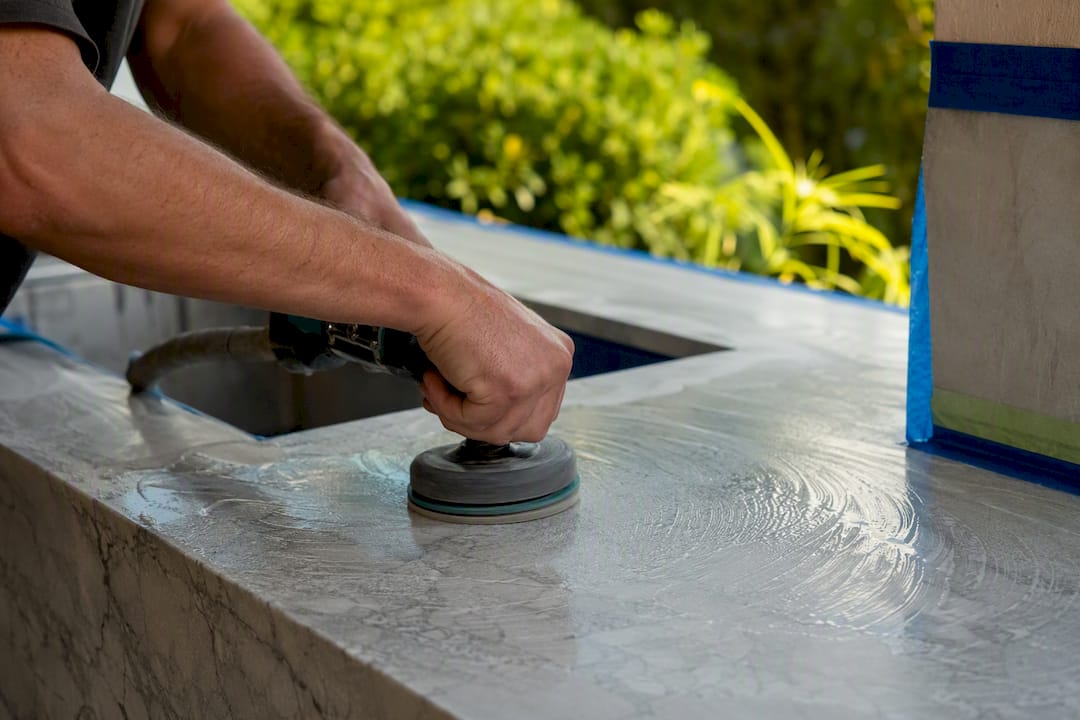
Pro Tip: Rushing the grit sequence is the single biggest mistake DIYers make with a rented polisher. A controlled, stepwise progression is the entire reason professionals get a uniform finish; skipping ahead is what produces the blotchy look homeowners then try to fix with even more polishing.
How Do You Rinse, Dry, and Inspect Between Passes?
Stopping at the right moment matters more than most people expect. Marble is soft, and polishing past the point of improvement just wears the surface unevenly.
Rinse the section completely after every single pass, hand or mechanical, so slurry doesn’t dry and cake onto the stone
Dry with a clean microfiber cloth before judging anything
Check under raking light from at least two different angles, since a swirl mark invisible from one direction can be obvious from another
Run a flashlight low across the surface to catch low spots or leftover haze that overhead light won’t show
Once you’re happy with the shine, do the water-bead test to decide whether resealing is next
What Sealing and Aftercare Does Marble Need?
A sealer protects marble from stains and slows moisture absorption, but it will not stop etching from acidic spills. That distinction trips up a lot of homeowners who assume sealed marble is immune to lemon juice or wine.
Choose a penetrating, impregnating sealer rated for natural stone countertops, not a surface coating.
Apply a thin, even coat and let it sit for the dwell time listed on the label.
Wipe away excess before it dries on the surface. Leftover sealer that’s allowed to dry creates a hazy film that’s genuinely annoying to correct.
Let it cure for 24 to 72 hours before using the counter normally, depending on the product.
Most sealed marble countertops need periodic resealing within the year, though heavy daily use or a water test that shows fast absorption can shorten that window. Between reseals, stick to pH-neutral cleaners, wipe up spills immediately, and keep anything acidic, wine, coffee, citrus, off the stone.
When Should You Hire a Professional Instead?
Some damage just isn’t a weekend project. Call a pro when you’re dealing with deep scratches that catch a fingernail, chips or cracks, dullness spread across most of the counter, or a finish that looks uneven no matter how you polish it by hand.
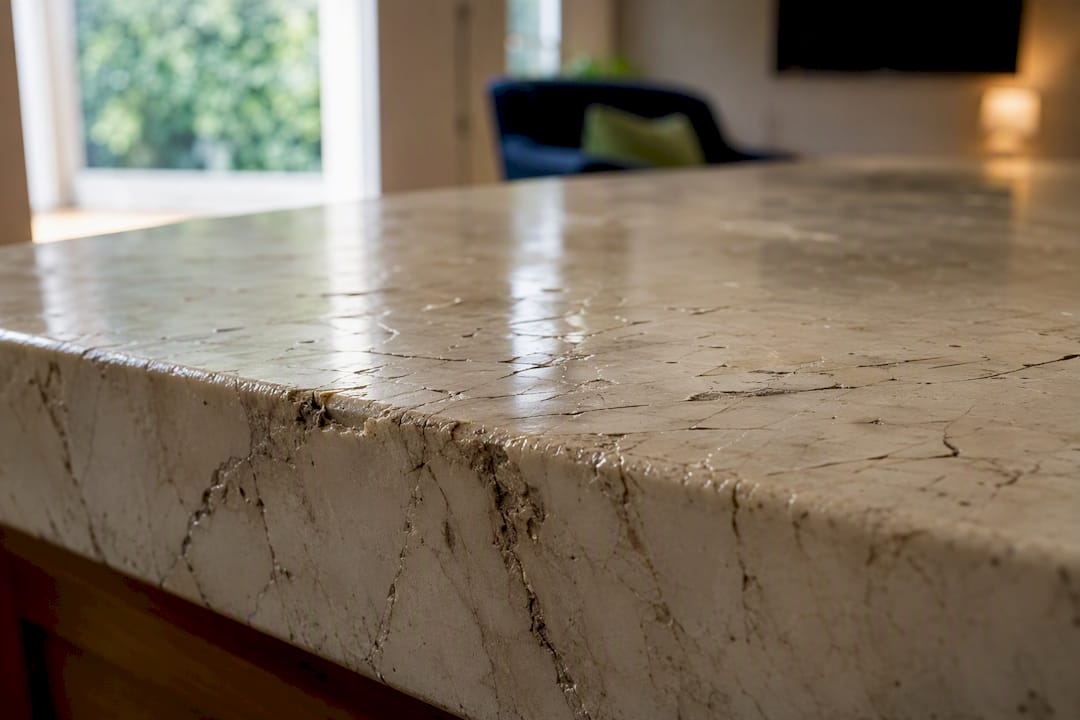
Pricing varies a lot depending on scope. Spot polishing and etch removal are commonly quoted per area or per project, while full restoration of an entire countertop costs substantially more, so get a firm quote before committing.
Before hiring anyone, ask:
What’s your process, and do you use diamond honing?
Is there a warranty on the finished work?
Do you use dustless containment techniques?
Can you show references or before-and-after photos?
A typical professional visit includes an inspection, a small test patch to confirm the approach works on your specific stone, the actual honing and polishing, sealing, and full cleanup.
Pro Tip: A contractor who won’t run a test patch before working the whole counter is skipping a step every reputable pro includes. That patch is what catches a bad reaction before it’s spread across your entire kitchen.
What Mistakes Ruin a Marble Polishing Job?
Using vinegar, lemon, or other acidic cleaners, which cause the etching you’re trying to fix in the first place.
Scrubbing with steel wool or coarse scouring pads, which leave scratches finer polish can’t erase.
Letting slurry or sealer dry on cabinets, grout, or wood trim nearby.
Over-polishing one spot until it outshines the surrounding stone, creating an obvious blotch instead of a blend.
Skipping the test patch and finding out the hard way that a product reacts badly with your specific slab.
How Does AO Cleaning’s Experience Compare to DIY Results?
AO Cleaning has restored hardwood floors and stone surfaces across the St. Louis metro area for over 20 years, backed by 450+ Google reviews. Their countertop service uses the same dustless techniques and eco-friendly products they apply to floor restoration work.
A professional visit differs from DIY in a few concrete ways:
Variable-speed diamond equipment calibrated for marble specifically, not rented gear you’re using for the first time
A test patch before committing to the full countertop
Containment that keeps dust and slurry off cabinets and floors
A finished result backed by the company’s reputation, not a first attempt
If your countertop shows widespread dullness, deep scratches, or damage you’re not confident diagnosing, professional restoration is the safer call over a DIY attempt.
A Note on Restraint Before You Start Polishing
Test every product on a hidden spot before it touches the visible counter. Marble is soft, and it’s far easier to over-polish a small area into a shiny blotch than to under-do it. When you’re not sure whether a mark is an etch, a stain, or actual damage, that uncertainty itself is a signal to bring in someone who diagnoses this for a living.
— Jim
Get a Professional Estimate for Your Marble Countertop
If hand polishing feels like more risk than you want to take on a countertop you use every day, AO Cleaning handles countertop cleaning, polishing, and sealing using the same dustless techniques and eco-friendly products behind their hardwood floor restoration work. That matters most when a mistake means replacing a slab instead of refinishing a floor.

An on-site estimate starts with an inspection of the damage, a test patch to confirm the right approach for your specific stone, and a clear timeframe before any work begins. Most jobs finish without leaving dust or fumes behind. If you’d rather have someone experienced handle the diamond honing and sealing, request an estimate for countertop restoration and find out what your counter needs before you commit to a DIY weekend.
Where Can You Learn More About Marble Care?
How to polish marble countertops covers hand polishing techniques and product mistakes to avoid.
Marble polishing methods: DIY and pro steps breaks down grit progression and sealing guidance in detail.
How to refinish marble countertops safely explains when a poultice, rather than polish, is the right call.
Maintaining marble countertops and floors offers preventive daily care tips worth following between projects.
Always check your specific product’s label before applying anything to your stone. Formulations vary, and manufacturer instructions override general guidance every time.
Sources
Recommended

Comments