


How Professional Floor Cleaning Works: A Homeowner's Guide

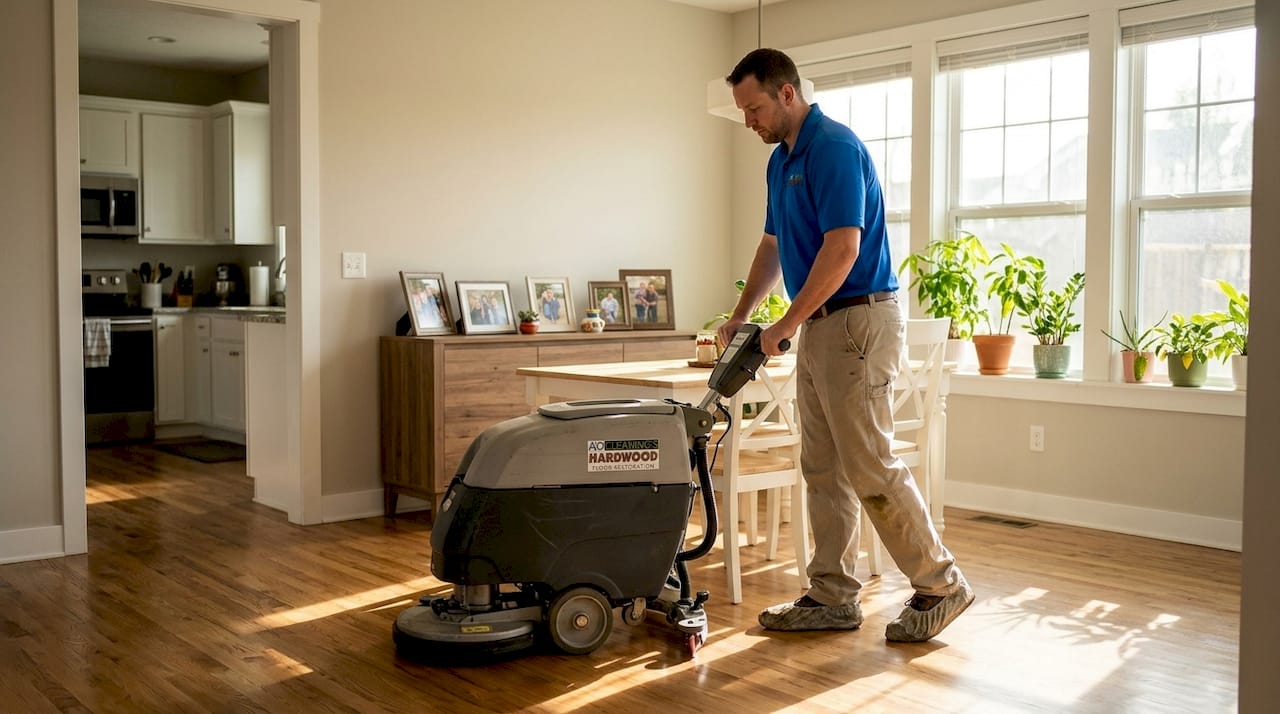
Most people assume a good mop and some floor cleaner handles the job. It doesn’t. Understanding how professional floor cleaning works reveals a structured process that goes far beyond surface moisture. What pros call “hard floor care” or “floor maintenance programs” combines dry prep, targeted chemistry, mechanical agitation, and controlled recovery. Every step exists for a reason. Skip one, and you either damage the floor or push the dirt around in a thin film that dries right back into place. This guide breaks down each stage so you know exactly what’s happening when a professional walks through your door.
Table of Contents
Key takeaways
Point | Details |
Dry cleaning comes first | Skipping the sweep or vacuum turns loose grit into a muddy paste that scratches and dulls floors. |
Equipment makes the real difference | Floor scrubbers apply, agitate, and recover dirty water in one pass, cutting drying time from 45 minutes to just a few minutes. |
Floor type determines the method | Hardwood, VCT, tile, and LVT each require different chemistry, moisture levels, and technique to avoid damage. |
Chemistry must be matched and diluted correctly | Wrong dilution leaves residue that attracts more dirt or strips protective finishes prematurely. |
Scheduled maintenance protects your investment | Routine surface cleaning combined with periodic deep cleaning extends floor lifespan and delays costly refinishing. |
How professional floor cleaning works, step by step
The professional floor cleaning process follows a specific sequence, and that sequence is not negotiable. Each step builds on the last.
1. Pre-inspection and obstacle removal. Before any cleaning starts, a professional assesses the floor type, traffic patterns, and problem areas. This shapes every decision that follows, from product selection to machine settings. Furniture and loose items come out first.
2. Dry cleaning. This is the step most homeowners skip, and it’s the most important one. Dry cleaning before wet cleaning is the foundation of professional floor care because loose grit and debris left on the floor turns into an abrasive mud paste the moment moisture hits it. That paste scratches the finish and grinds into grout lines. Sweeping, dust mopping, or vacuuming removes it before any solution is applied.
3. Solution application. The cleaning product is selected based on floor type and soil level. Dilution ratios matter here. Excess chemical concentration increases residue and re-soiling, while under-dilution means ineffective cleaning and wasted product.
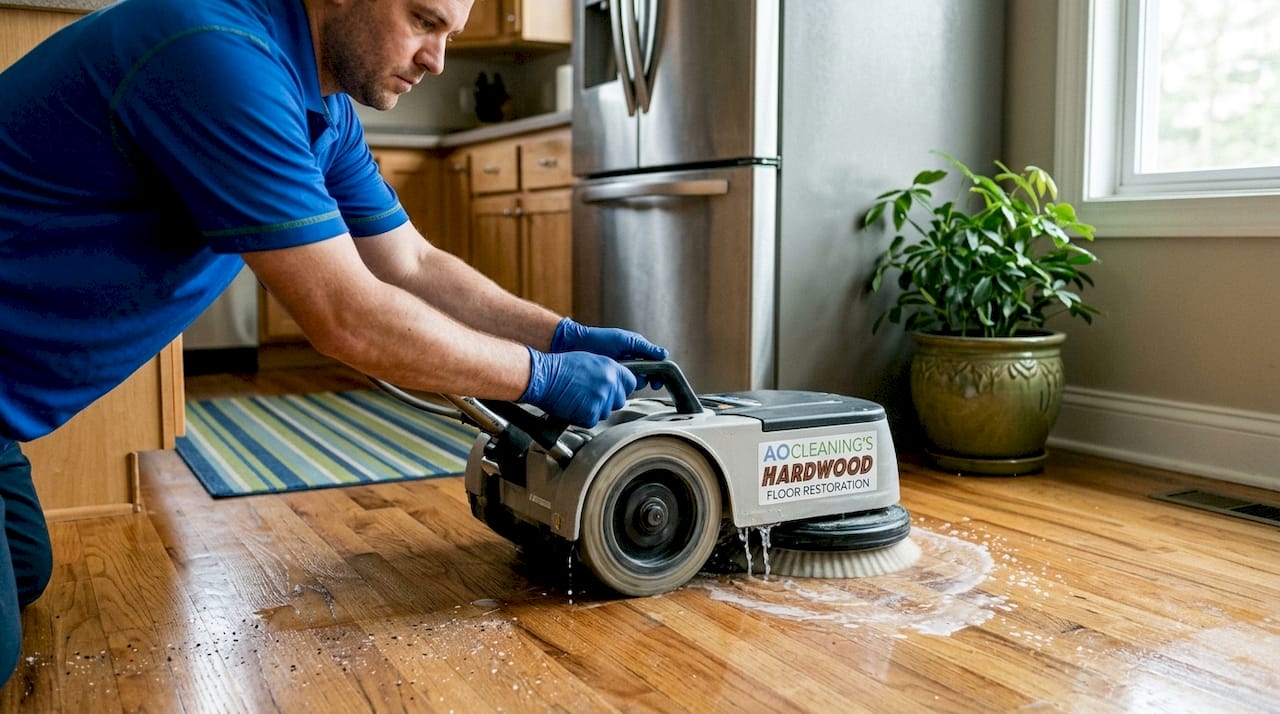
4. Mechanical agitation. A floor scrubber, rotary machine, or manual scrub brush physically loosens the soil from the floor surface. This step is what separates professional cleaning from mopping. Mopping smears; agitation lifts.
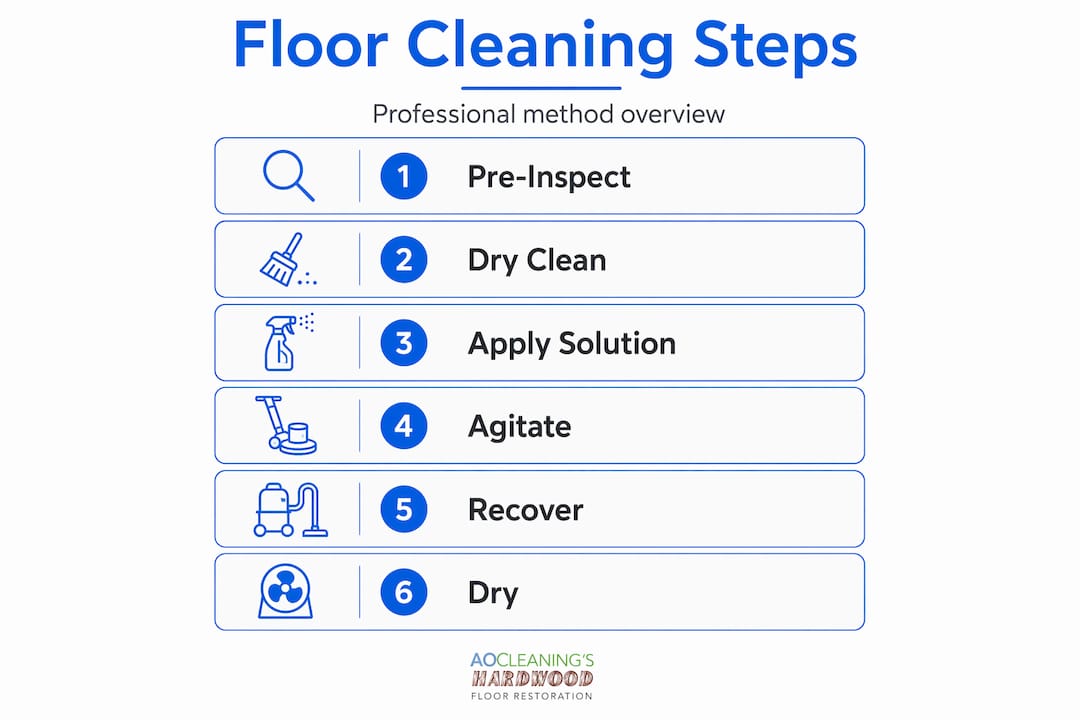
5. Dirty water recovery. Wet vacuuming or a floor scrubber’s built-in recovery system pulls the soiled solution off the floor immediately. Mechanical recovery prevents soil resettling and eliminates the slip hazard a wet floor creates.
6. Drying. Proper airflow and controlled drying prevent streaks, water marks, and residue lines. Rushing this step undoes much of the work done before it.
Pro Tip: Never let cleaning solution sit past the recommended dwell time. Dried chemistry leaves a film that attracts dirt faster than a clean floor would.
Floor cleaning equipment pros actually use
The single biggest advantage a professional has over a homeowner with a mop bucket is the equipment. Not because the machines are complicated, but because they do three things at once.
A floor scrubber dispenses cleaning solution, scrubs with a rotating pad or brush, and vacuums dirty water back into a recovery tank. The result: floors dry in minutes versus 30 to 45 minutes for traditional mopping, with far better soil removal and consistent pressure across the entire surface.
Here’s how the two methods compare:
Factor | Floor scrubber | Traditional mopping |
Drying time | Minutes | 30 to 45 minutes |
Soil removal | Mechanical agitation plus extraction | Smearing and redeposition |
Consistency | Even pressure across all passes | Varies by operator effort |
Slip risk | Minimal, near-dry floor | High during and after cleaning |
Labor per square foot | Lower | Higher |
Machines can’t do everything, though. Scrubbers cannot fully reach corners and edges, so manual detail cleaning with a hand tool or small brush always follows machine passes. Skipping that step leaves dirt borders around every room.
Pad selection also matters. Aggressive pads strip finish faster than intended on softer floors. Soft pads on heavy soil under-perform. Professionals rotate pads based on floor condition and soil type.
Pro Tip: Check your scrubber pad after every two or three passes. A pad loaded with soil is spreading that soil rather than lifting it.
Cleaning techniques by floor type
Not every floor responds the same way to moisture, chemistry, or agitation. Understanding floor cleaning services means understanding that methods of professional floor cleaning are highly material-specific.
Hardwood floors
Hardwood is moisture-sensitive, and professional cleaners treat it that way. Regular maintenance uses dry methods such as sweeping every few days, vacuuming weekly, and spot cleaning monthly. When deeper cleaning is needed, the goal is barely damp microfiber application that barely contacts the sealed finish without saturating the wood beneath. Wet mopping hardwood is not professional practice. It’s the fastest way to gray, cupped, and cracked boards. For scheduled deep cleaning, quarterly intervals work for most residential hardwood depending on traffic.
You can learn more about maintaining hardwood between service visits in this guide to hardwood floor maintenance practices.
Resilient floors (VCT and LVT)
Vinyl composition tile and luxury vinyl tile respond well to the full strip, clean, and wax cycle. This is a multi-stage process:
Apply stripper and let it dwell for the full 5 to 10 minutes. Cutting dwell time short means the chemical hasn’t broken the old finish bond.
Agitate and recover the old finish completely.
Neutralize the floor to a pH of 7 to 9 before any new finish goes down. pH verification after stripping is non-negotiable because alkaline residue from the stripper causes new finish to peel.
Apply 4 to 6 thin finish coats, allowing full dry time between each coat.
Buff or burnish the final coat for gloss and hardness.
Most finish failures on VCT trace back to skipped neutralization, not to the product itself.
Tile and grout
Tile is durable but grout is porous, and that’s where the dirt lives. Professional cleaning for tile uses mechanical scrubbing with rotating brushes, not flat mop pads. A disinfecting, high-pH cleaner breaks down the organic material in grout lines. Embedded soil in grout acts like sandpaper on foot traffic and slowly degrades the grout surface if left untreated. Hot water extraction or wet vacuuming pulls the debris out of the lines rather than spreading it.
Common mistakes that ruin floor cleaning results
Knowing the process is half the battle. Knowing where it goes wrong is the other half.
Skipping dry prep. Wet mopping over unswept floors creates a grit slurry that damages the finish and makes the floor look worse after cleaning than before.
Wrong dilution ratios. Both over-concentration and under-dilution create problems. Strict adherence to dilution ratios is required for effective, residue-free results.
Ignoring pH after stripping. This is the most common cause of finish failure. Stripping chemicals are alkaline; applying finish without neutralizing traps residue under the new coat.
Not recovering dirty water promptly. Leaving dirty water to air-dry on the floor deposits all the soil it picked up right back onto the surface. You end up with a dull, streaky floor and a false sense of having cleaned it.
Neglecting edges and corners. Machine passes cover the field. Edges require manual attention. Professionals always finish with detail work.
Pro Tip: Always test your cleaning solution on an inconspicuous area first, especially on older hardwood or specialty tile. Finish reactions show up fast and save you from a full-floor problem.
How to schedule professional cleaning for lasting results
One-time deep cleaning is not a maintenance plan. Real floor longevity comes from scheduled service that combines routine surface care with periodic restoration work.
Assess your floor type and traffic level first. A residential hallway with two people and a dog needs different intervals than a rental property with constant turnover. Professional assessments evaluate floor type, traffic, and problem areas before recommending any schedule.
Set a routine surface cleaning frequency. For most homes, this means weekly dust mopping and monthly damp cleaning. This prevents the buildup that makes deep cleaning harder and more expensive.
Schedule periodic deep cleaning. For hardwood, quarterly deep cleaning is the standard baseline. For resilient floors in higher-traffic settings, semi-annual stripping and refinishing maintains appearance and protection.
Plan for restoration milestones. Routine maintenance combined with scheduled restoration extends floor lifespan and delays the cost of full replacement. A screen and recoat every few years costs a fraction of a full sand and refinish.
Document and adjust. Track when services were done and what products were used. Floors respond differently over time, and a written record helps you and your professional make smarter decisions.
Understanding when to clean, buff, or refinish your floors makes it much easier to build a schedule that actually protects your investment.
My honest take on what most homeowners get wrong
I’ve been working with hardwood floors long enough to know that the biggest problems don’t start with bad luck. They start with the wrong assumption that effort substitutes for method. I’ve watched people scrub their hardwood floors with string mops and buckets of diluted cleaner, working twice as hard as necessary, and ending up with floors that look duller every year. They weren’t being lazy. They were using the wrong process.
What I’ve learned is that consistency with the right tools outperforms sporadic heavy cleaning every single time. A homeowner who dust mops three times a week and does a controlled damp clean once a month will have floors that look better at year five than someone who does an aggressive wet clean every Saturday.
The other thing I see constantly is people treating stripping and waxing as a DIY weekend project. The chemistry involved in that process is not forgiving. Skipped neutralization, rushed dwell times, and too-thick finish coats are the reasons floors peel within weeks. That’s not a product failure. That’s a process failure. When tasks like stripping, full sanding, and recoating are involved, hiring a professional isn’t a luxury. It’s how you avoid paying twice.
Floors are the most used surface in any building and the most overlooked until something goes wrong. Proactive maintenance is not about spending more. It’s about spending smarter before the floor is too far gone to save without major cost.
— Jim
Protect your floors with expert care from Aosaveswoodfloors
If this article made one thing clear, it’s that floors respond to the right process, not just effort. Aosaveswoodfloors has been applying that process for over 20 years across central Illinois and the St. Louis metro area, and the results speak through 450+ Google reviews from homeowners who almost replaced floors that just needed the right care.

Whether your hardwood needs a clean and buff service to restore shine between deep cleanings, or the finish has worn to the point where a full sand and refinishing is the right call, Aosaveswoodfloors customizes every service to your floor’s actual condition. They use dustless techniques, eco-friendly products, and complete most jobs in a single day with floors ready to walk on in about three hours. Before you replace those floors, call Aosaveswoodfloors first.
FAQ
What does the professional floor cleaning process actually involve?
The professional floor cleaning process includes pre-inspection, dry cleaning to remove loose debris, solution application matched to the floor type, mechanical agitation, dirty water recovery, and controlled drying. Each step is required for a residue-free result.
How often should floors be professionally cleaned?
Most hardwood floors benefit from quarterly deep cleaning, with routine surface care weekly. High-traffic or resilient floors in commercial settings may need deep cleaning every six months, with stripping and refinishing annually or semi-annually.
Why is dry cleaning the first step professionals take?
Skipping dry cleaning before wet cleaning turns loose grit into a muddy, abrasive paste that scratches the floor finish and pushes dirt deeper into grout lines or wood grain. It’s the most skipped and most damaging shortcut in floor care.
What floor cleaning equipment do professionals use that homeowners typically don’t have?
Professionals primarily use floor scrubbers that dispense solution, agitate, and recover dirty water simultaneously. This cuts drying time from 30 to 45 minutes down to just a few minutes and delivers consistent, streak-free results across large surface areas.
Can homeowners do professional-level floor cleaning themselves?
Routine surface cleaning, dust mopping, and controlled damp cleaning are all manageable at home. Tasks like stripping and waxing resilient floors or refinishing hardwood require professional-grade equipment and chemistry knowledge, and errors in those processes cause finish failures that cost more to fix than the original service would have.
Recommended

Comments