


Stop Sanding Blindly: Floor Sanding Grit Sequence for Homeowners

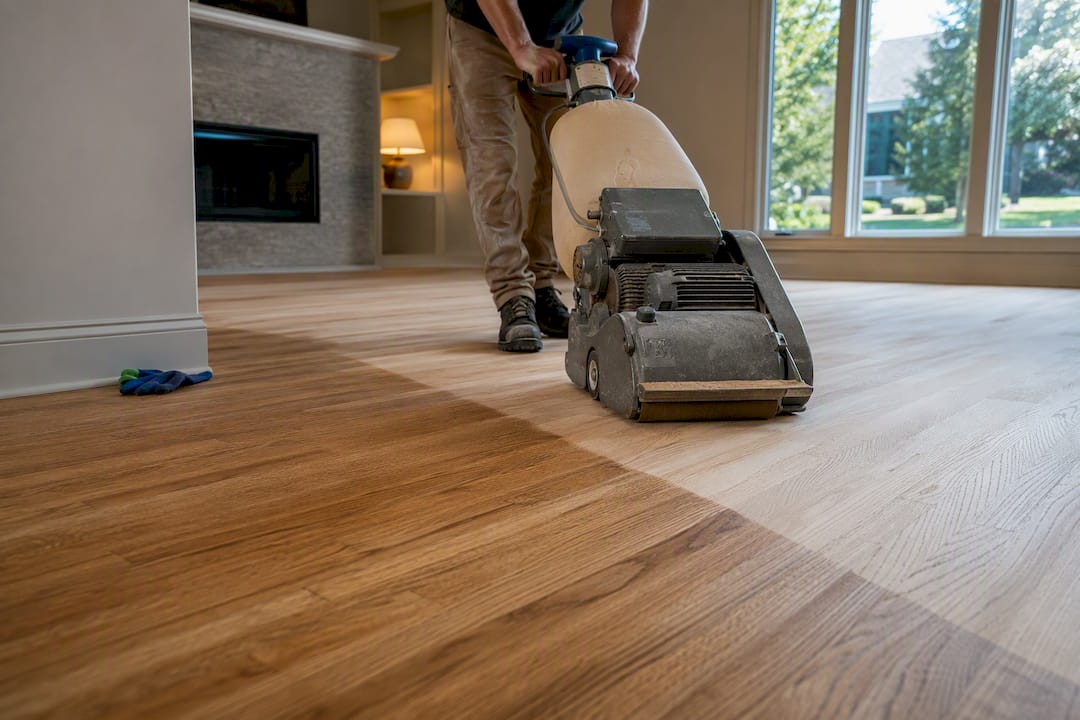
For most hardwood floors, the correct grit progression usually starts with a coarse grit to remove damage, followed by medium and fine grits to smooth and finish. A light refresh typically uses medium to fine grits only. Two key rules apply: start with the finest grit that still removes the damage, and never skip more than one grit step going forward. Edge sanders need their own matching sequence, and verification comes before every jump.
TL;DR:
Starting with the appropriate grit depends on the floor’s condition, with heavy damage requiring a coarse grit like 36 or 40, and light scuffing needing only 60 or 80.
Skipping more than one grit step can leave scratches that finer grits cannot remove, especially when moving from coarse to very fine files.
Final grit choice, typically between 100 and 120, significantly impacts stain absorption and finish bonding, with denser woods like maple needing coarser finishing steps.
Proper verification through the pencil test, raking light, and stain patch tests are essential before progressing to finer grits to ensure a smooth, even surface.
Heavy damage or complex patterns are better handled by professionals, as they ensure precise control, dust containment, and optimal grit sequencing for best results.
Table of Contents
What Grit Sequence Should You Use for Sanding Hardwood Floors?
The right ladder depends on what’s already on the floor, not on habit or whatever bag of sandpaper is cheapest at the hardware store. There are three situations most homeowners run into, and each one calls for a different starting point.
Heavy refinish ladder: Start with a coarse grit suitable for deep gouges or thick finish buildup, then progress through medium to fine grits to remove scratches and achieve a smooth finish. Starting with a sufficiently coarse grit for heavy damage is important. A finer grit will just skate over the damage and burn out fast trying to cut through old finish.
Typical refinish ladder: 40 grit, then 60, then 80, then 100. Most hardwood floors that need a full sand and refinish but aren’t structurally damaged fall into this category. This sequence, sometimes stretched to a 36 start for harder species like oak or hickory, is the most common progression professionals use, and it’s the one to default to if you’re unsure which category your floor falls into.
Light refresh ladder: Use medium to fine grits to lightly smooth the surface without removing deep finish or stain, suitable for floor preps that only have shallow scuffing and require a new coat to bond.
A few practical notes on how these ladders actually work:
You can skip a single grit step if the floor is in good shape (going 40 straight to 80, for example), but skipping two steps at once almost always leaves scratch marks the next grit can’t erase.
The rule of thumb from abrasives manufacturers is that each new grit shouldn’t be more than roughly 50% coarser or finer than the step before it, which is why jumping from 40 straight to 100 usually backfires.
Edge sanders typically use a grit one step coarser than the main drum sander at each stage, because they cut more aggressively; both tools should converge on the same final grit before finishing.
Bona’s professional sequencing guidance offers an alternate valid ladder, 40 to 60 to 100, showing there’s some flexibility once the floor condition and abrasive quality are accounted for.
How Do You Choose the Right Starting Grit?
Guessing at a starting grit is how DIY sanding jobs go sideways. Walk your floor first and answer these questions before you turn a machine on.
Check the finish type. Old oil-based polyurethane sits thicker and harder than a worn waterborne coat, and it needs a more aggressive first cut.
Measure scratch and gouge depth. Run your fingernail across the deepest marks. If it catches noticeably, you need 36 or 40 grit. If the floor just looks dull with shallow scuffing, 60 or 80 is enough.
Look for dents and finish buildup. Areas near doorways or under rugs often have thicker wax or finish layers that need extra attention at the coarse stage.
Run a small test cut. Sand a two-foot square in a closet or under furniture with your planned starting grit. If it clears the finish and defects in a reasonable number of passes, you’ve picked correctly.
Do the pencil-line test. Draw a few light pencil lines across the test patch before sanding. Run the machine once, then check: if the lines are completely gone, that grit is doing its job. If ghost lines remain, drop to a coarser grit before moving forward.
The rule of thumb worth repeating: always use the finest grit that will fully remove the issue. Going coarser than necessary just means more time spent working through the middle grits to erase scratches you didn’t need to create. This checklist overlaps a lot with a proper pre-refinishing inspection, and it’s worth doing both at once so you’re not walking the floor twice.
What Is the Correct Sanding Workflow, Pass by Pass?
The order of your machine passes matters as much as the grit itself. At the coarse stage, most pros run the drum sander at roughly a 45-degree angle to the wood grain in one direction, then a second pass at the opposite 45-degree angle. This crosshatch pattern levels the floor and removes finish far faster than sanding straight with the grain from the start. Once the floor is flat and the finish is gone, every subsequent grit runs straight with the grain, in the direction of the boards.
A typical coarse-grit stage takes two to three full passes across the room before the floor looks consistent. If a pass reveals low spots, dips, or leftover finish in one section, repeat that coarse cut in that area rather than moving on and hoping the next grit catches it. It won’t.
A few workflow points to keep in mind:
Vacuum thoroughly between every grit change. Leftover coarse-grit dust trapped under your sanding belt will scratch the floor at the finer grit.
Edger discs cut faster than the main drum, so run the edger one grit coarser at each stage, then match it to the main floor’s exact final grit before you finish.
Keep the sander moving at a steady pace. A machine that sits still for even a few seconds will dig a trench.
If you’re sanding a large room, herringbone or parquet pattern, or a floor with heavy cupping, this is where hiring a pro usually saves you money instead of costing you extra.
Pro Tip: If your arms are shaking and the machine feels like it’s fighting you, that’s a sign to slow your walking pace, not push harder. Let the sandpaper do the work; forcing the machine usually just gouges the wood.
For a full walkthrough of the entire process from start to finish, the complete sand and refinish guide covers equipment setup in more detail.
Does Final Grit Really Affect Stain and Finish Results?
Yes, and this is where a lot of DIY jobs quietly go wrong. The final grit you sand to determines how much stain the wood will absorb and how well your finish coat bonds to the surface.
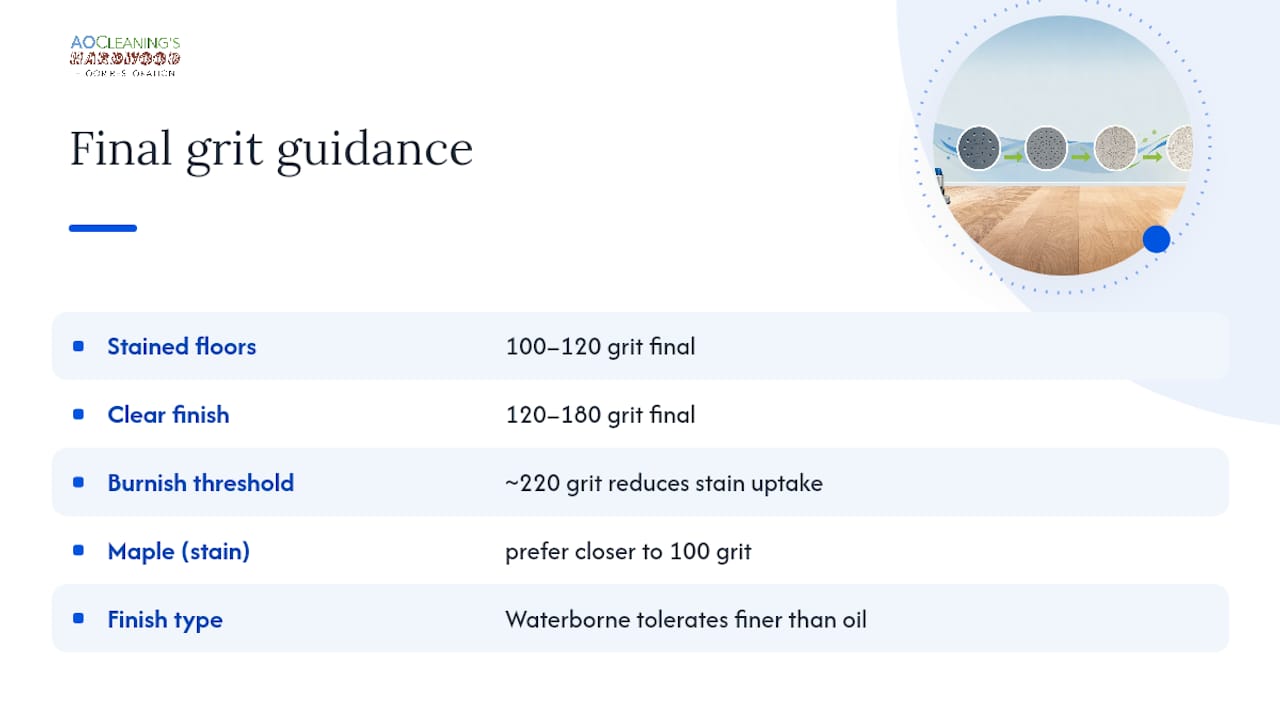
For floors getting stained, stop at 100 to 120 grit. Going finer than that starts to close the wood’s pores, and sanding past roughly 220 grit can burnish the surface enough to noticeably reduce stain uptake, leaving the floor blotchy or lighter than expected once the stain goes on. For floors getting a clear finish with no stain, you have a little more room, and most professional sequences land between 120 and 180 grit depending on wood species and whether you’re using a waterborne or oil-based finish.
Denser, tighter-grained species like maple or hard maple are more prone to blotching and burnishing than open-grained species like oak. If you’re staining maple, staying closer to 100 grit rather than 120 gives the stain more surface texture to grip.
Waterborne finishes bond fine at a slightly finer final grit than oil-based polyurethane, which sometimes benefits from a marginally rougher surface for better mechanical adhesion, as explained in the guide to the best sheen for interior doors. How the wood’s own porosity affects finish behavior is worth understanding before you settle on a final grit, especially if you’re working with a species you haven’t refinished before.
What Are the Most Common Sanding Mistakes to Avoid?
Most DIY sanding problems trace back to one of a handful of repeatable errors, and nearly all of them are fixable if you catch them early.
Skipping too many grits. Jumping from 40 straight to 100 leaves deep ghost scratches that no amount of finer sanding will erase. The fix is to go back one or two steps and re-sand the affected area properly.
Burnishing the wood. This happens when you linger too long at one grit or the machine sits in one spot. The surface gets glassy and won’t absorb stain evenly. Sanding it back with a slightly coarser grit resets the surface.
Washboarding. Wavy ridges across the floor usually come from feeding the machine too slowly or running worn-out abrasive. Slow, even walking speed and fresh belts prevent it.
Uneven stain absorption. If a test patch shows blotchy color, the culprit is almost always inconsistent final-grit sanding. Re-sand the whole area to one uniform grit before restaining.
How Do You Verify Your Sanding Before Moving to the Next Grit?
Three checks catch nearly every mistake before it becomes permanent.
The pencil test. Draw light pencil lines across the section you’re about to sand. Run the machine once at the current grit. If the lines are fully gone, the previous grit’s scratch pattern is erased and you’re clear to advance. If faint lines remain, run another pass before moving on.
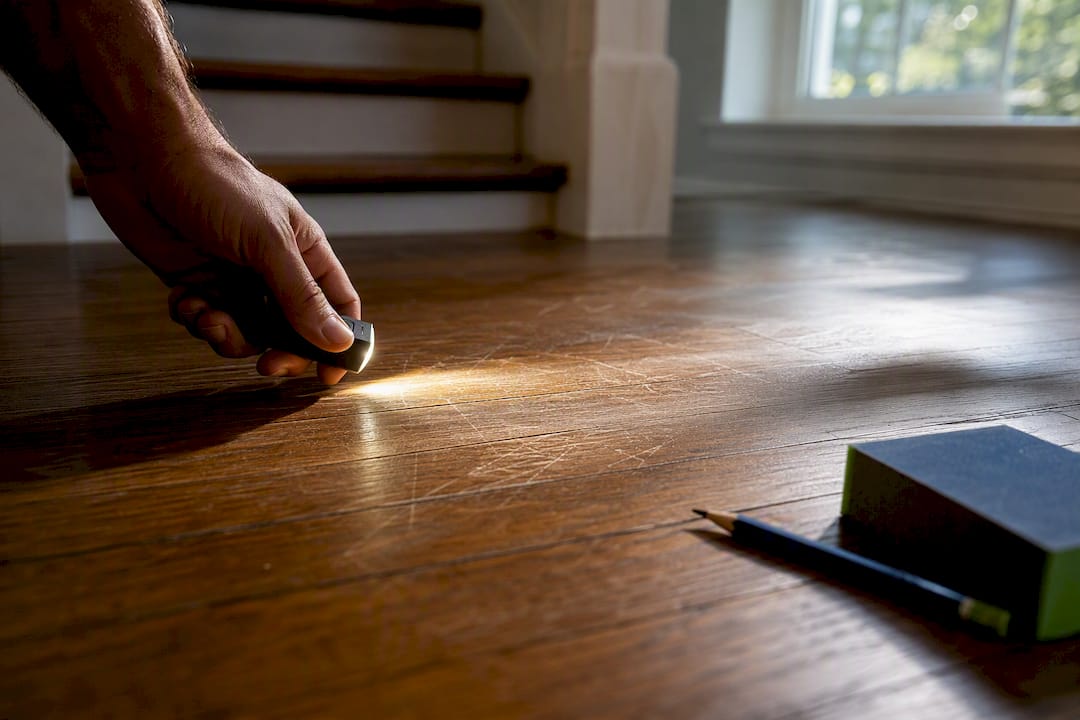
Raking light inspection. Set up a work light low to the floor, almost parallel to the boards, and look across the surface. Any scratch, dip, or missed spot throws a shadow under raking light that’s invisible under normal overhead lighting.
A sample stain patch. Before committing the whole room, sand a hidden test area (a closet corner works well) to your planned final grit and apply your actual stain and finish. This confirms color and absorption before you’re stuck with the results on 800 square feet of flooring.
Pro Tip: After the final grit pass, hand-sand any remaining “squigglies,” the faint curved marks the machine leaves near walls and corners, using a sanding block loaded with the same final grit. Then vacuum thoroughly and tack the floor with a slightly damp cloth before any stain or finish goes down.
When Should You Hire a Pro Instead of Sanding It Yourself?
Some jobs are genuinely better left to a crew with commercial equipment and dust containment systems. Large rooms, floors with heavy cupping or crowning, parquet or herringbone patterns, and tight timelines are the situations where DIY sanding tends to cost more in redone work than it saves.
A professional hardwood floor restoration company has been serving central Illinois and the St. Louis metro area since 2003, supported by over 450 Google reviews reflecting two decades of experience. A few things a professional crew brings to the table that are hard to replicate with a rented drum sander:
Dustless sanding techniques and eco-friendly products help minimize cleanup and reduce lingering odors after the job.
Accurate grit selection based on floor condition, determined efficiently by experienced professionals.
Precise machine control on edges, transitions, and pattern floors to avoid marks that DIY sanding might leave.
Many restoration jobs are completed quickly, often with floors ready to walk on within a few hours.
If your project fits any of the “hire a pro” scenarios above, or you’d just rather not spend a weekend wrestling a drum sander, that’s exactly the kind of job a full sand and refinish handles from start to finish.
Coated, Aluminum Oxide, or Silicon Carbide: Which Sandpaper Is Right?
Not all sandpaper cuts the same, and picking the wrong type will slow you down no matter how correct your grit sequence is. Floor sanding uses coated abrasives, meaning grit particles are bonded to a paper or cloth backing, sold as belts, discs, or sheets depending on your machine.
Aluminum oxide is the standard choice for hardwood floors, and for most homeowners it’s the only type worth buying. It’s a synthetic abrasive that fractures slightly as it wears, exposing fresh cutting edges instead of going dull all at once. That makes it durable enough to survive a full coarse-grit pass without collapsing, and it works well across every grit in a typical ladder from 36 up through 120.
Silicon carbide is sharper and cuts faster than aluminum oxide, but it wears out quicker and is more brittle under heavy pressure. It shows up more often in finer-grit sanding screens and buffing pads used for screen-and-recoat work than in the coarse belts used for a full sand. If you’re doing a light refresh rather than a full strip, a silicon carbide screen at the final stage can leave a slightly smoother scratch pattern.
For a standard DIY refinish, stick with aluminum oxide belts and discs through your entire ladder. Save silicon carbide screens for the buffing step on a recoat job, where the finer, faster cut actually plays to its strengths.
How Often Should You Replace Sanding Belts and Discs?
A dull belt is one of the most overlooked reasons DIY sanding jobs take twice as long as they should. Aluminum oxide belts lose their cutting edge gradually, and a belt that’s gone glassy smooth will polish the wood instead of cutting it, which is a fast track to burnishing at the exact stage where you’re trying to remove real damage.
As a general guide, plan on swapping belts every 300 to 400 square feet at the coarse grits (36 to 40), since that stage removes the most material and wears abrasive fastest. Medium and fine grits (60 through 120) last longer, often covering 500 to 600 square feet before losing their edge, since they’re cutting less material per pass.
Watch for the warning signs rather than sticking rigidly to a square-footage number. If the machine starts requiring more downward pressure to cut, if you notice a burning smell, or if the floor starts looking shinier rather than more matte after a pass, the belt is done. Keep a stack of spares on hand for every grit in your ladder; running out mid-project and trying to stretch a worn belt through the last section of floor is how uneven scratch patterns end up baked into the final sand.
Grit Sequence for Homeowners: What DIY Guides Get Wrong
Most DIY sanding guides treat grit sequence like a recipe: follow the numbers in order and you’re done. That’s backwards. The numbers are a starting guess, and the pencil test and raking light are what actually tell you whether you’re ready to move on. Floor condition varies board to board, especially near doorways and rugs, and a fixed pass count ignores that completely.
The bigger blind spot is final grit. Homeowners obsess over the first coarse cut because it feels the most dramatic, then rush the final stage because the floor already looks decent. That’s exactly backwards. The final grit is what determines whether your stain goes on even or blotchy, and it’s the cheapest step to get right since it just means one more careful pass instead of one more expensive redo.
If you’re on the fence about DIY versus hiring out, be honest about your room. A small bedroom with light wear is a reasonable weekend project. A cupped, parquet, or heavily damaged floor on a deadline is where the math favors calling in a professional clean and buff or full restoration instead.
— Jim
Sources
The grit ladders and rules in this article draw on the NWFA’s sand-and-finish guidelines, the industry body most flooring professionals train under, along with Bona’s professional sanding sequence guidance for manufacturer-backed alternate ladders. Practical verification techniques come from Popular Woodworking’s sanding rules, and grit-by-grit condition guidance is drawn from HSS’s sandpaper grit breakdown.
Recommended

Comments