


Homeowners: Fix Hardwood Floor Gaps, DIY Only for Gaps Under 3/16 Inch
- Kim M.

- 11 minutes ago
- 8 min read
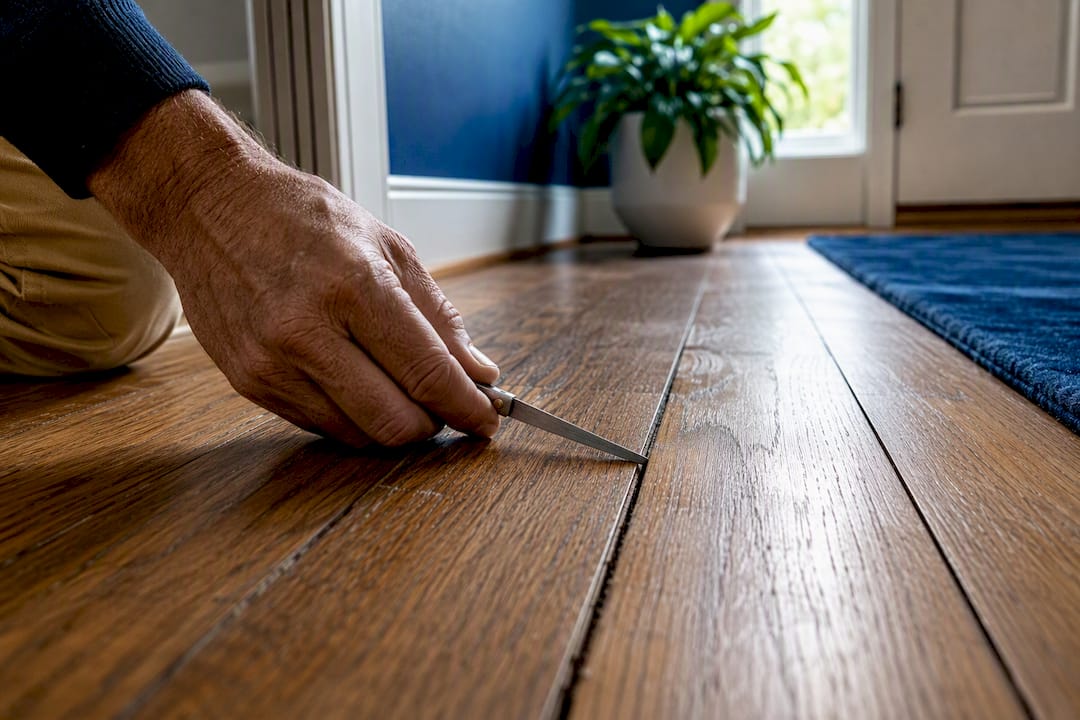
Fixing gaps in hardwood floors starts with figuring out whether the gap is seasonal or permanent, because that answer decides everything else. Small gaps generally can be left alone or managed by controlling humidity. Slightly larger gaps may be addressed with wood putty or flexible fillers. Gaps that are moderately wide often suit rope filler, wood slivers, or epoxy. Very wide gaps, especially if accompanied by unstable boards, require professional assessment before attempting a repair.
TL;DR:
Gaps that shrink with seasonal humidity changes are normal and should be managed with humidity control rather than permanent fillers.
Wide gaps over 1/2 inch or those that do not narrow with humidity adjustments indicate underlying structural issues and require professional inspection.
Use flexible fillers like rope filler or glued slivers for gaps between 1/16 and 3/16 inches, and avoid rigid products that can crack if the gap is seasonal.
Proper cleaning, deep filling, and respecting cure times are essential steps for successful DIY gap repair; rushing these increases failure risk.
Large or persistent gaps, board instability, or signs of subfloor movement warrant professional repairs involving re-fastening or refinishing rather than simple filling.
Table of Contents
What Causes Gaps to Fix in Hardwood Floors?
Wood moves. That’s the short version, and it explains most of what you’re seeing between your boards. Solid hardwood absorbs and releases moisture with the seasons, expanding when indoor humidity climbs in summer and shrinking when your furnace dries out the air in winter. That contraction pulls boards apart at the seams, and it happens every single heating season whether you fill the gaps or not.
Humidity swings are the primary driver, but they’re not the only one. Poor acclimation before installation, where boards get nailed down before they’ve adjusted to your home’s moisture level, leaves floors prone to gapping from day one. Subfloor problems, uneven joists, and general wear from decades of foot traffic all contribute too, and those tend to produce gaps that don’t close back up once summer humidity returns.
That distinction matters more than most homeowners realize. A gap that closes in July and reopens in January is your floor doing exactly what wood does. Filling it with a rigid product is a mistake, because the boards will swell against the hardened filler and either crack it or push it out entirely. Managing seasonal humidity instead of forcing a permanent fix is often the smarter move, at least until you’ve confirmed the gap isn’t going anywhere.
How Do You Tell if a Gap Is Seasonal or Permanent?
You need three things before you touch a filler: a way to measure the gap, a way to track it over time, and a sense of what “normal” movement looks like in your climate. None of this requires special tools.
Measure the width. A feeler gauge gives you an exact reading, but a business card (about 0.015 inch) or a stack of them works fine for a quick estimate.
Photograph and log the location. Note the room, the board, and the width, then check again in a different season. Gaps that shrink noticeably in humid months are seasonal.
Check your indoor humidity. A basic hygrometer, the kind sold for under $15 at most hardware stores, tells you whether you’re in the 35 to 45 percent range that keeps wood stable.
Test the floor underfoot. Walk the area slowly. Rocking, springiness, or a hollow sound points to a subfloor or fastening issue, not simple seasonal movement.
Recheck after adjusting humidity. If dry winter air is the culprit, running a humidifier for two to three weeks and remeasuring will often show the gap has partly closed on its own.
The National Wood Flooring Association makes this point directly: many gaps are normal wood behavior, and rushing a rigid repair on a seasonal gap is one of the most common reasons DIY fixes fail. A gap that stays the same width across two different seasons, dry winter and humid summer, is the one you can safely call permanent.
What’s the Best Filler for Each Gap Size?
Match the product to the width, and match the width to what the wood is actually doing. That’s the whole system. Here’s how the NWFA’s sizing thresholds break down in practice, with the reasoning behind each one.
Under 1/16 inch: Leave it, or address it with humidity control. Filling hairline gaps is cosmetic work with little structural upside.
1/16 to 3/16 inch: Wood putty, trowelable filler, or flexible caulk. This is the sweet spot for most seasonal-adjacent gaps that have proven stable across a full year.
3/16 to 1/2 inch: Rope filler or specialized epoxy. Wide enough that rigid fillers crack, narrow enough that you’re not looking at structural repair.
Over 1/2 inch: Professional inspection first. Gaps this wide often point to subfloor movement or joist problems that filler won’t solve.
Small gaps are where trowelable fillers earn their reputation. During a full refinishing job, professionals often mix filler with fine sanding dust pulled from the same floor, which produces a near-invisible color match across hundreds of hairline gaps at once. It’s not a technique most DIYers replicate on a single room, but it explains why a professionally refinished floor looks seamless in a way spot-filled boards rarely do.
Medium and wide gaps call for something with give. Natural-fiber rope filler accepts wood stain well and stays flexible enough to move with the board without popping loose, which makes it a favorite for wide-plank and antique floors where a little rustic texture is expected anyway. Wood slivers, thin tapered strips glued and trimmed flush, give a more invisible result but demand real saw and planing skill. They’re best reserved for one or two prominent gaps rather than a whole room.
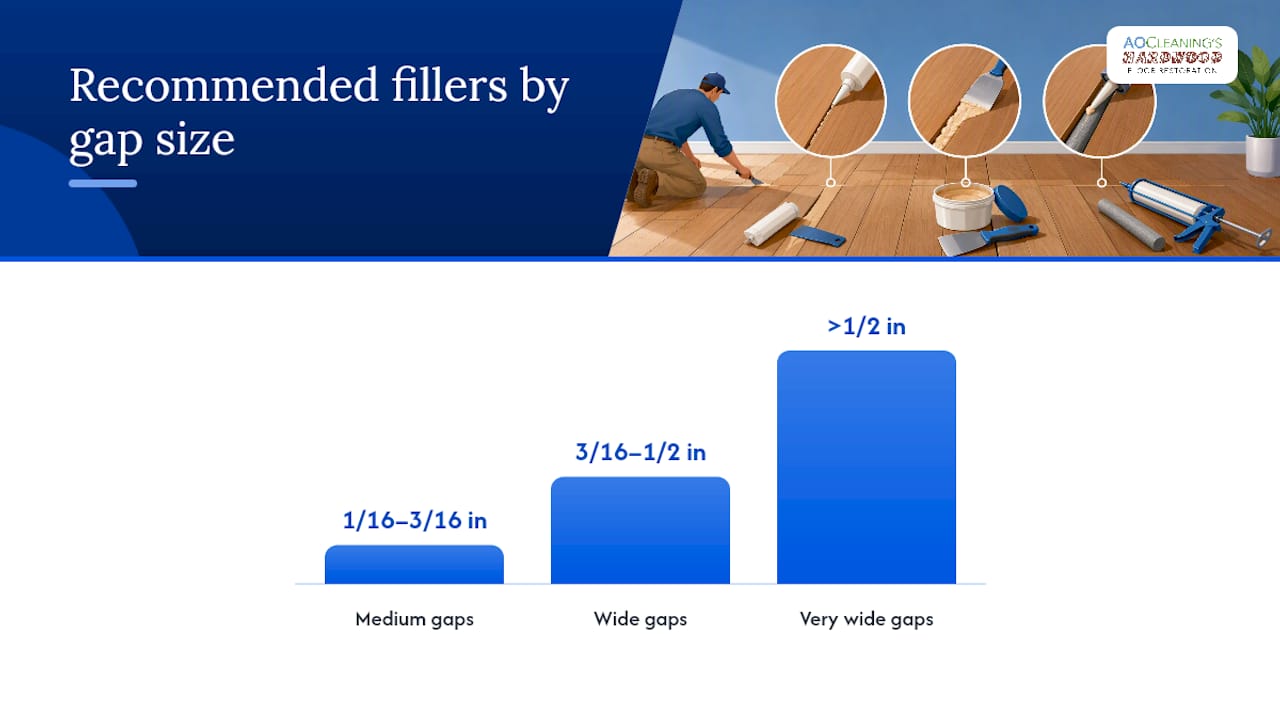
Very wide gaps, especially anything approaching or exceeding a half inch, are where epoxy can act as a salvage option if board replacement isn’t in the budget. But at that width, get a structural look first. A gap that large usually isn’t about humidity anymore.
Pro Tip: Never use silicone caulk or standard painter’s caulk on hardwood gaps. Silicone prevents proper adhesion for any future repair, and painter’s caulk shrinks and collects dirt within a season, leaving you with a dark, grimy line instead of a clean fix.
How Do You Apply and Cure Hardwood Floor Gap Filler?
Preparation causes more failed repairs than bad products do. Ground Floor Supply’s technical guidance traces most filler failures back to three habits: a dirty gap, skimming the surface instead of packing filler deep, and sanding before the product has fully cured.
Clean thoroughly. Vacuum each gap, then scrape out old wax or debris with a putty knife or a thin scraper blade.
Tape the edges on finished floors to keep excess filler off the surrounding finish, since flexible fillers can’t be sanded away later.
Force filler deep into the crack, not just across the top. A putty knife pressed at an angle works better than a flat swipe.
Skip backer rod unless the gap is unusually deep. On most residential gaps, it adds a step without adding much benefit.
Respect cure times. Duraseal’s trowelable fillers set in about an hour, but flexible systems like Pak Stop or Flex Fill need a minimum of 16 hours, ideally overnight, before you sand or walk heavy furniture across them.
Sand with a fine grit, 150 or higher, and blend gently into surrounding boards rather than digging in.
Vacuum and recoat if the repair sits in a finished area, checking polyurethane cure time before foot traffic resumes.
Pro Tip: Sanding a filler even an hour before it’s fully cured is the single most common way DIYers pull the repair right back out of the gap. When in doubt, wait an extra night.
When Should You Call a Professional Instead?
Some gaps are a filler job. Others are a floor problem wearing a gap’s disguise. A few signs mean it’s time to stop troubleshooting and get a professional inspection:
Gaps wider than 1/2 inch that haven’t narrowed across a full humid season
Boards that rock, bounce, or feel spongy underfoot
Multiple adjacent boards gapping in the same pattern, suggesting subfloor or joist movement
Cupping or crowning alongside the gapping
Professionals typically fix these with re-fastening or re-nailing loose boards, sliver replacement for isolated wide gaps, or a full sand-and-refinish when the damage is spread across a room. Structural repairs need equipment and diagnostic skill most homeowners don’t have on hand, and a misdiagnosed subfloor issue tends to come back worse.
What Do Flooring Professionals Do Differently?
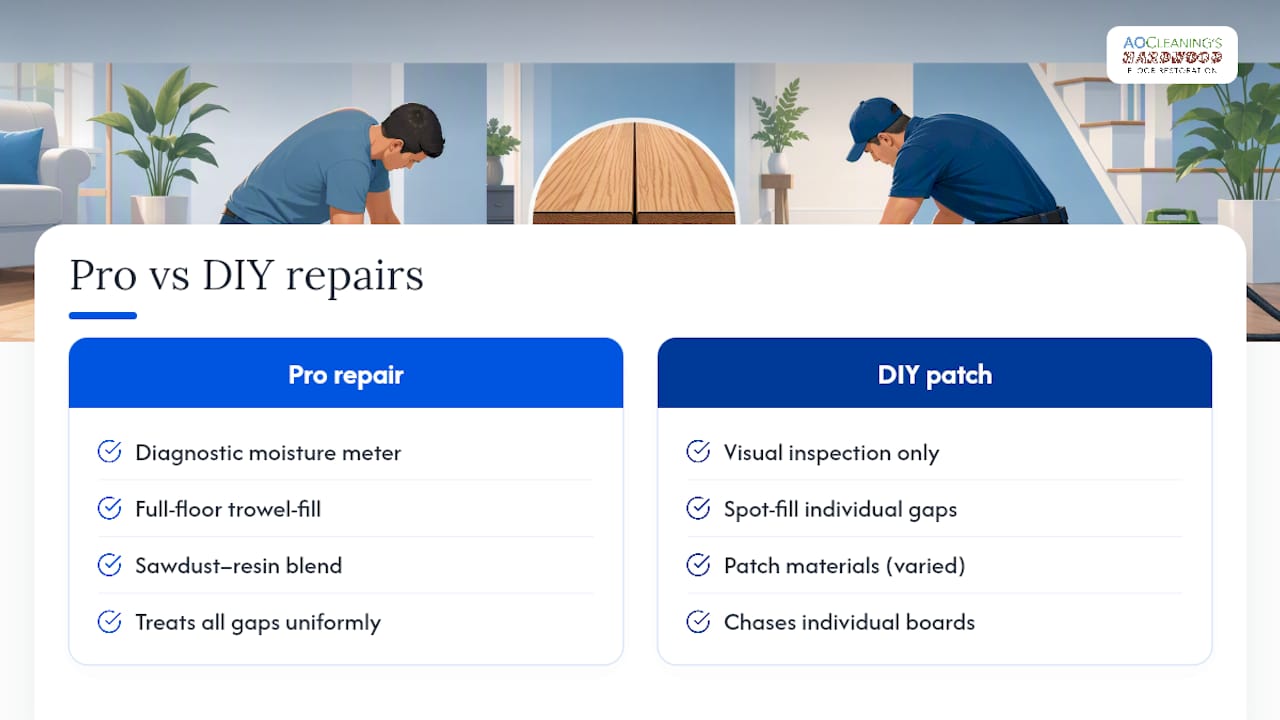
AO Cleaning’s Hardwood Floor Restoration has worked on floors across central Illinois and the St. Louis metro area since 2003, and the tools that separate a pro repair from a DIY patch are usually diagnostic, not cosmetic. A moisture meter reads subfloor and board moisture content directly, catching issues a visual check misses entirely.
During a full sand-and-refinish, techs trowel-fill the entire floor with a sawdust-resin blend pulled from that same floor, treating every hairline gap uniformly instead of chasing individual boards. That approach, paired with dustless techniques and eco-friendly products, tends to produce longer-lasting results on floors with widespread gapping or wear than spot repairs ever will.
When Does DIY Make Sense, and When Should You Call Someone?
Here’s my honest read after walking through all of this: a single gap between two boards, under 3/16 inch, that’s stayed consistent across two seasons, is a Saturday-afternoon job. You’ve got the tools, the process is forgiving, and the stakes of getting it slightly wrong are low.
Where I’d stop and call someone is anything involving multiple rooms, gaps over 1/2 inch, or boards that move underfoot. That’s not a filler problem anymore, and a rigid DIY fix on a structural issue usually costs more to undo later than it would have to diagnose properly upfront. Scratch repair and small gap fills are reasonable weekend projects. Widespread gapping across a floor almost never is.
— Jim
A Faster, Cleaner Fix From AO Cleaning
If you’ve measured, diagnosed, and realized this is bigger than a tube of filler, AO Cleaning handles the jobs where DIY runs out of road. Their Hardwood Floor Clean and Buff service and full sand-and-refinish option both use the same sawdust-resin trowel-fill technique described above, treating an entire floor’s worth of gaps in one dustless, eco-friendly pass instead of patching board by board.

Most restoration jobs finish in a single day, with floors walkable in about three hours, and there’s no lingering odor to work around afterward. If your gaps have gone beyond a weekend fix, or you’d rather skip the trial-and-error entirely, book a clean and buff consultation and get a professional read on what your floor actually needs.
Sources
For gap-width thresholds and filler selection, consult the National Wood Flooring Association. For cure-time specifics, see DuraSeal’s product guidance. For rope-filler technique, This Old House offers detailed steps, and structural concerns always warrant a professional inspection.
Recommended

Comments