


What Is Hardwood Floor Buffing? A Homeowner's Guide

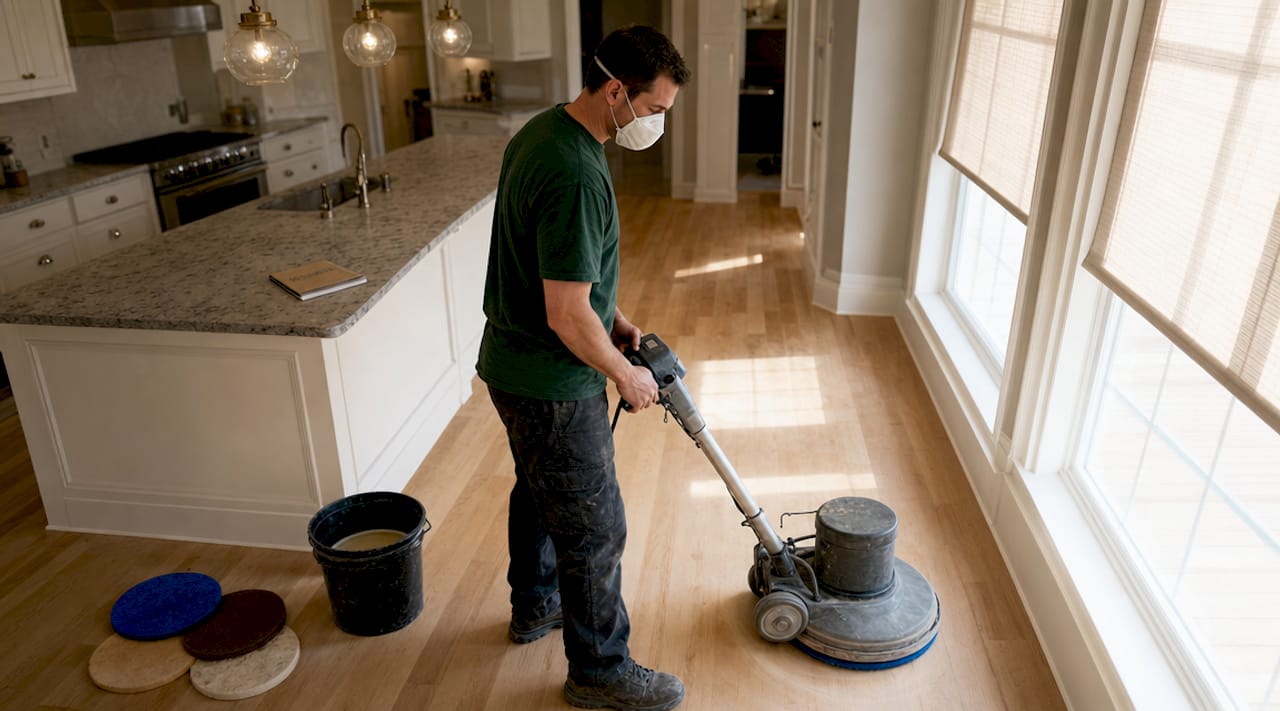
Hardwood floor buffing is the process of lightly abrading a floor’s existing finish to restore its shine and smooth out minor surface imperfections without touching the wood beneath. The industry term for this process is “screen and recoat” when a fresh topcoat follows the abrasion, though homeowners and contractors alike use “buffing” as the everyday shorthand. Professional buffing costs $2 to $4 per square foot depending on floor condition and local labor rates, making it one of the most cost-effective maintenance services available to homeowners. It sits firmly between routine cleaning and full sanding on the restoration spectrum, and understanding where it fits can save you thousands of dollars in unnecessary refinishing work.
What is hardwood floor buffing and when does your floor need it?
Buffing is appropriate when your floor shows light scratches, a dull or hazy finish, or general wear from foot traffic, but no deep structural damage. Buffing only treats superficial wear like minor scuffs and finish dullness. It cannot fix deep gouges, boards with worn-through finish exposing bare wood, or water-damaged planks. Those situations call for sanding and full refinishing.
Signs your floor is a good candidate for buffing:
The finish looks dull or cloudy but the wood grain underneath is still protected
Light scratches are visible in raking light but don’t catch your fingernail
The floor feels slightly rough underfoot but shows no soft spots or cupping
It has been three to five years since the last professional service
Buffing is recommended every 3 to 5 years for high-traffic residential areas to restore shine and extend the polyurethane finish life. That interval keeps the protective layer intact before it wears through completely, which is the point of no return for a buff-only approach.
One condition that disqualifies a floor from buffing is a wax or silicone-based finish treatment. Buffing is unsuitable on wax or silicone-treated floors because any new topcoat applied afterward will fail to bond, peeling within weeks. If you are unsure what finish is on your floor, a professional assessment before scheduling service is the right call.
Pro Tip: Drag a coin lightly across an inconspicuous area. If the finish powders white, it is likely polyurethane and a good buffing candidate. If it smears or feels waxy, you may have a wax finish that needs removal first.
The value of buffing comes from timing. Catching a floor in the “dull but not damaged” window costs a fraction of what full sanding and refinishing runs, and it adds years to the finish life. Homeowners who decide between buffing and refinishing early avoid the much larger expense of a complete restoration.
How the floor buffing process works
The buffing process uses a rotary floor buffer fitted with an abrasive screening pad to scuff the existing finish layer. This light abrasion creates microscopic scratches across the finish surface, giving the new topcoat something to grip. Buffing refreshes the protective layer without changing the stain color or removing any wood fiber, which is the core difference between buffing and sanding.
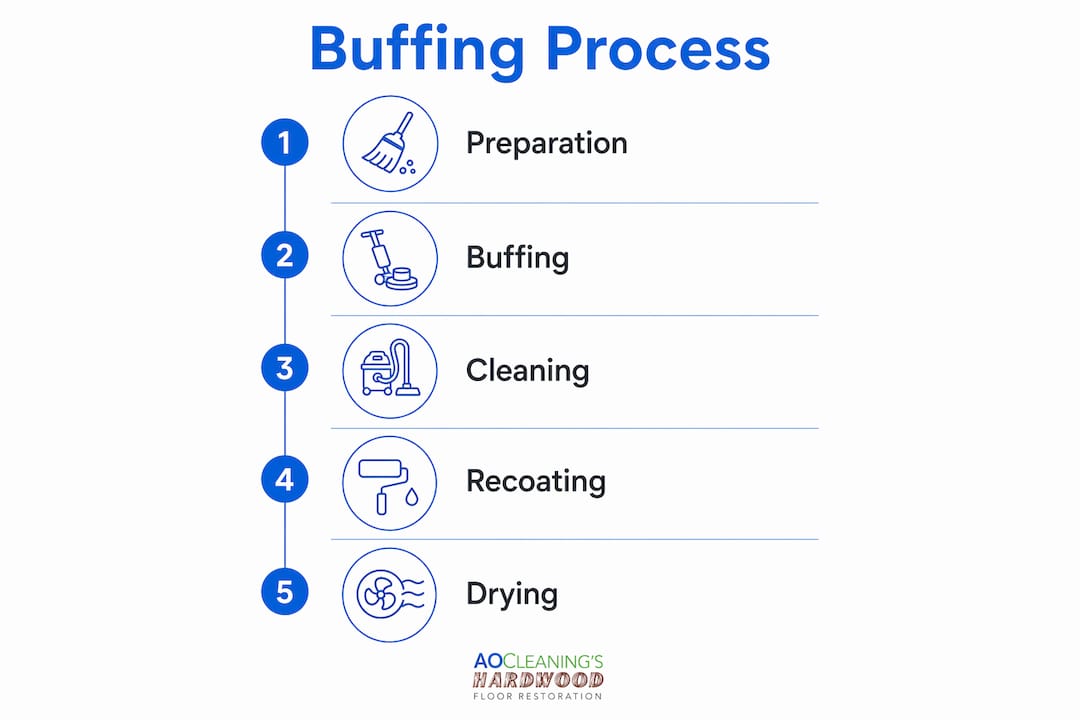
Here is what a professional floor buffing process looks like from start to finish:
Clear and clean the room. All furniture is removed and the floor is vacuumed and mopped with a pH-neutral cleaner to remove any grease, wax residue, or cleaning product buildup that would interfere with adhesion.
Screen the floor. The buffer, fitted with a 120-grit or 150-grit abrasive screen pad, moves across the floor in overlapping passes. Corners and edges are done by hand with a sanding sponge.
Vacuum and tack. All dust from the screening is vacuumed thoroughly, then a tack cloth wipes the surface to remove fine particles the vacuum misses.
Apply the recoat. A water-based or oil-based polyurethane topcoat is applied with a T-bar applicator in thin, even coats. Most jobs require two coats with light drying time between them.
Allow cure time. The floor is ready for light foot traffic in roughly three hours, but full cure takes 24 to 48 hours before furniture is moved back.
DIY buffing is feasible for experienced homeowners with the right equipment, but professionals consistently deliver flawless results because they control pad pressure, overlap, and finish application with practiced precision. Rental buffers from hardware stores like Home Depot or Menards are available, but an inexperienced operator can leave visible swirl marks or uneven sheen if the machine tilts or stalls.
Pro Tip: Always run the buffer in the direction of the wood grain, never across it. Cross-grain passes leave circular scratches that telegraph through the new finish coat.
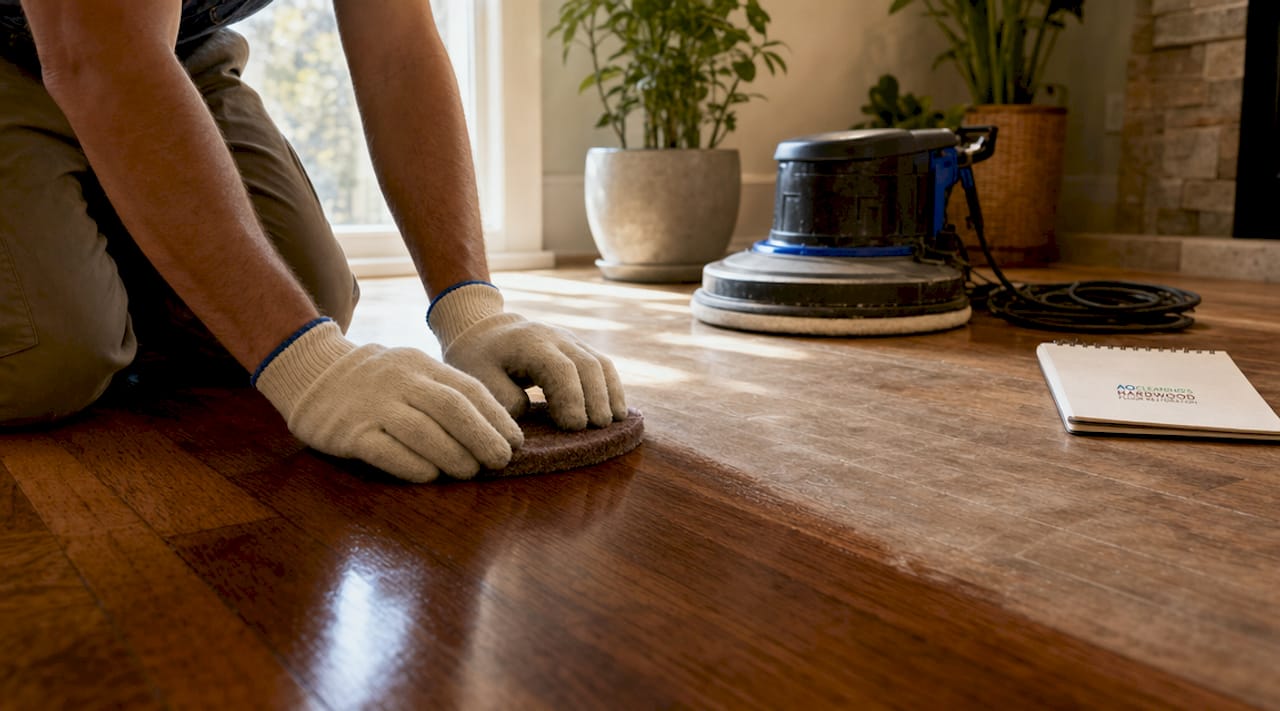
One important precaution applies to engineered hardwood. Engineered floors with thin wear layers require extra caution because aggressive buffing can burn through to the substrate. Inspect high-traffic areas for worn-through finish before starting, and when in doubt, have a professional measure the remaining wear layer first.
Cleaning and maintenance practices that protect your finish
The single biggest factor in how often your floor needs buffing is what you clean it with between professional services. Using vinegar, steam mops, or oil soaps leaves residues that prevent future finish adhesion and cause premature floor failure. This is not a minor inconvenience. It can render a floor unbuffable and force a full sand-and-refinish job years ahead of schedule.
Products and practices to avoid entirely:
Vinegar or vinegar-based cleaners (they etch the finish over time)
Steam mops (moisture and heat penetrate finish seams and cause swelling)
Oil soaps like Murphy Oil Soap (leave a film that blocks topcoat adhesion)
Wet mopping with excessive water (standing water warps wood and lifts finish edges)
“pH-neutral cleaners and microfiber tools are the standard recommendation for preserving finish integrity between professional buffing sessions.” Hardwood Floor Cleaning & Maintenance Definitive Guide
Cleaning with pH-neutral products and microfiber tools prevents premature finish failure and extends the time between professional buffings. A microfiber dust mop used daily in high-traffic areas removes the abrasive grit that scratches finish faster than anything else in a home. Damp mopping once a week with a properly diluted pH-neutral cleaner handles the rest. For expert tips on what to do between professional visits, the maintenance guide from Aosaveswoodfloors covers a practical routine that most homeowners can follow without any special equipment.
Buffing vs. sanding vs. chemical abrasion: which method fits your floor?
These three restoration methods address different levels of floor damage, and choosing the wrong one wastes money or, worse, damages the floor.
Sanding removes the entire finish coat and a thin layer of wood fiber using drum or orbital sanders. It corrects deep scratches, stains, cupping, and color changes. The trade-off is time, dust, and cost. Sanding also reduces the floor’s thickness, and repeated sanding can thin the wear layer to the point where future buffing becomes risky. Most solid hardwood floors can be sanded six to eight times over their lifetime before the boards become too thin.
Chemical abrasion, also called liquid deglossing or hardwood floor deglossing, uses a chemical solution to etch the existing finish surface instead of a mechanical pad. Chemical abrasion requires strict ventilation and safety protocols, making it less accessible for typical homeowners. Like mechanical buffing, it only prepares the surface for recoating and cannot fix deep scratches or structural damage.
Method | Best for | Removes wood? | Cost range | DIY-friendly? |
Buffing (screen and recoat) | Dull finish, light scratches | No | $2 to $4 per sq ft | Possible with experience |
Chemical abrasion (deglossing) | Dull finish, no damage | No | Similar to buffing | Difficult due to fumes |
Full sanding and refinishing | Deep damage, stains, color change | Yes | $3 to $8 per sq ft | Not recommended |
One compatibility risk applies to all three methods. A test patch is advised before recoating floors previously treated with wax, silicone, or incompatible finishes. Water-based topcoats fail on waxed floors without proper preparation, and that failure is not always visible until the new coat starts peeling weeks later. For a detailed breakdown of which service level your floor actually needs, the clean and buff vs. screen and recoat comparison from Aosaveswoodfloors is one of the clearest explanations available.
Key takeaways
Hardwood floor buffing extends finish life and restores appearance without sanding, making it the most cost-effective maintenance step for floors with light wear and no structural damage.
Point | Details |
Buffing vs. sanding | Buffing abrades only the finish layer; sanding removes finish and wood fiber. |
Ideal timing | Schedule buffing every 3 to 5 years in high-traffic areas before finish wears through. |
Disqualifying conditions | Wax, silicone, deep gouges, and worn-through finish require different treatment before or instead of buffing. |
Cleaning matters | pH-neutral cleaners and microfiber tools extend finish life and reduce buffing frequency. |
Test before recoating | Always patch-test floors with unknown finish history to avoid adhesion failure. |
What 20 years of floors taught me about buffing
After working with hardwood floors across St. Louis and central Illinois since 2003, the pattern I see most often is homeowners waiting too long. They notice the dull finish, assume the floor is past saving, and start pricing out replacement. Nine times out of ten, a clean and buff is all the floor needed. The finish was still intact. The wood was fine. They just needed someone to tell them that.
The mistake I see on the DIY side is skipping the cleaning step before buffing. Homeowners rent a buffer, screen the floor, apply a coat, and then wonder why the new finish looks cloudy or peels at the edges. The culprit is almost always residue from an oil soap or a wax-based polish they had been using for years. That residue does not come off with a quick vacuum. It needs a proper chemical clean before the screen ever touches the floor.
My honest advice: if your floor is dull but the wood feels solid underfoot, call a professional for an assessment before you do anything else. The screen and recoat process is fast, affordable, and far less disruptive than sanding. Most homeowners are back on their floors the same day. That is a hard outcome to beat.
— Jim
Restore your floors before you replace them
If your hardwood floors look dull, scratched, or worn, Aosaveswoodfloors has been helping homeowners across St. Louis, Columbia, Belleville, and surrounding communities bring them back since 2003. With over 450 Google reviews and more than 20 years of experience, the team at AO Cleaning uses dustless techniques and eco-friendly products on every job.

Most hardwood floor refinishing services are completed in a single day, with floors ready to walk on in about three hours. For everyday maintenance between professional services, the AO Hardwood Neutral Cleaner is a pH-balanced formula designed to clean without leaving the residues that block finish adhesion. Before you refloor it, let Aosaveswoodfloors restore it.
FAQ
What is hardwood floor buffing in simple terms?
Hardwood floor buffing is the process of lightly scuffing the existing finish with an abrasive pad to restore shine and smooth minor surface imperfections, followed by a fresh topcoat. It does not remove any wood and is far less invasive than sanding.
How often should hardwood floors be buffed?
Buffing every 3 to 5 years is the standard recommendation for high-traffic residential areas. Floors in low-traffic rooms may go longer between services.
What is the difference between buffing and refinishing?
Buffing refreshes the finish layer without removing wood, while refinishing involves sanding down to bare wood and applying an entirely new stain and finish. Refinishing costs more, takes longer, and is only necessary when damage goes deeper than the finish.
Can all hardwood floors be buffed?
No. Floors with wax or silicone treatments, deep gouges, water damage, or worn-through finish are not suitable candidates for buffing alone. A test patch before recoating is the safest way to confirm compatibility on floors with an unknown finish history.
What is hardwood floor deglossing and how does it differ from buffing?
Hardwood floor deglossing uses a liquid chemical solution to etch the finish surface instead of a mechanical abrasive pad. Chemical abrasion requires strict ventilation and safety protocols, making it harder for homeowners to do safely at home compared to mechanical buffing.
Recommended

Comments