


Can You Refinish Hardwood Stairs Yourself?
- Kim M.

- 11 minutes ago
- 11 min read
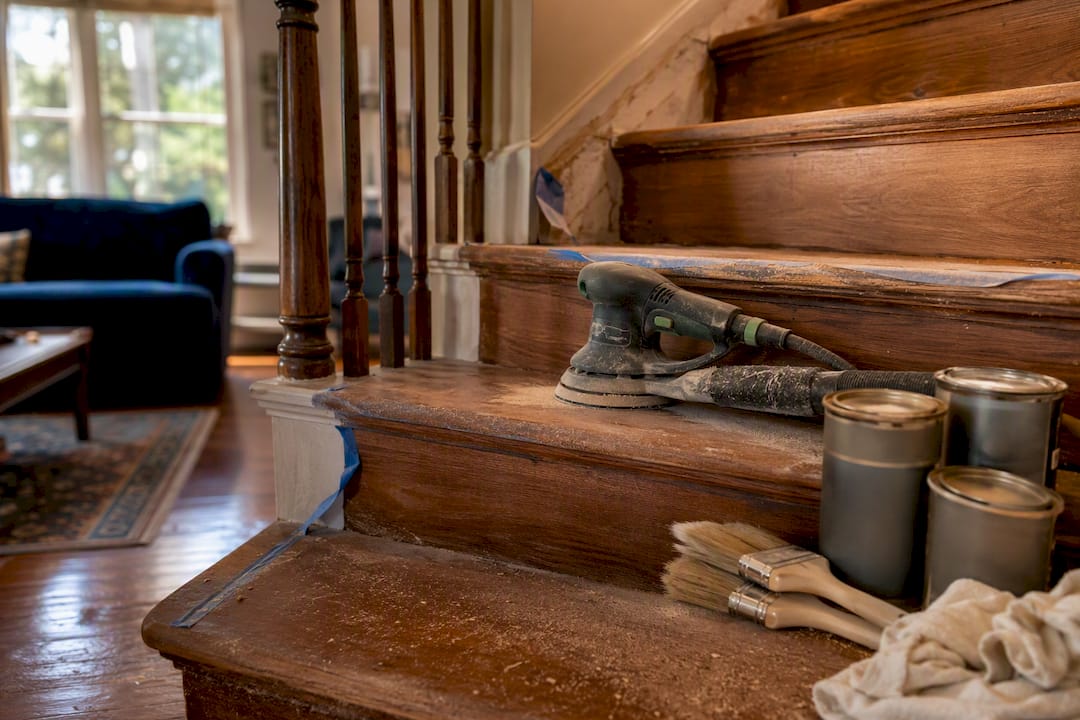
Yes. Most solid hardwood stairs are well within reach of a confident DIYer who has patience and the right sander. Engineered treads with a thin veneer, or stairs with loose stringers and structural give, are a different story. In such cases, it is advisable to consult a professional before attempting any sanding.
Here’s the snapshot: DIY materials for a typical staircase run a few hundred dollars, while a professional job typically lands between $700 and $1,900 or more depending on the number of steps and how much repair work is involved, according to Angi’s cost data. Plan on several days for the entire project, including dry and cure times.
The one thing that separates a clean project from a disaster is dust containment. Skip it, and fine sanding dust migrates through your whole house, settles into your finish coats, and ruins the final look.
Before you start, confirm three things:
Your treads are solid wood, not a thin veneer over particleboard or MDF core.
No tread wobbles, flexes, or shows structural damage that goes beyond the surface.
You’re prepared to isolate the stairwell and run a HEPA vacuum through the entire process.
If any of that gives you pause, stop and get a professional opinion first. Sanding through veneer on an engineered tread isn’t a fixable mistake, it’s a replacement job.
Key Takeaways
Solid hardwood stairs can be refinished by a DIYer who sands in the correct grit sequence and contains dust properly, while engineered treads or structural issues call for a professional.
Point | Details |
Inspect before sanding | Confirm solid wood versus veneer and check for loose or flexing treads first. |
Follow the grit progression | Move from 60 or 80 grit up to 120 to 150, vacuuming and using a tack cloth between each step. |
Budget three or more coats | Apply thin polyurethane coats and lightly abrade with 220 grit between each one. |
Contain dust aggressively | Seal the stairwell and run a HEPA vacuum throughout, since this is where most DIY jobs fail. |
Know your cost range | DIY runs $150 to $600 in materials, while professional jobs like those from Aosaveswoodfloors typically fall between $700 and $1,900 or more. |
Table of Contents
Tools and Materials You Need to Refinish Hardwood Stairs
Gathering everything before you start saves you from a dust-covered mid-project trip to the hardware store. Here’s what actually belongs on your list.
Sanding equipment:
A random-orbital sander (5 inch or 6 inch pad) for the flat tread and riser surfaces.
A detail or corner sander for nosings, the rounded front edge of each tread that a flat sander can’t reach.
Sanding pads in 60, 80, 100, 120, and 150 grit — buy more than you think you need, since stairs chew through pads faster than open floors.
A pull scraper or 5-in-1 tool for tight corners against risers and stringers.
Dust and surface prep: 5. A shop vacuum with a true HEPA filter, not a standard shop-vac filter. 6. Tack cloths, one per grit change, minimum. 7. Plastic sheeting or a zipper-door dust barrier to seal off the stairwell from the rest of the house. 8. Painter’s tape and drop cloths for baseboards, walls, and any adjoining flooring.
Finishing supplies: 9. Wood filler that matches your species, plus a pre-stain conditioner if you’re staining a softer wood like pine. 10. Your chosen stain (or none, if you’re going with a natural finish) and a quality water-based or oil-based polyurethane. 11. Natural-bristle or foam brushes sized for tread width, plus lint-free rags for wiping stain.
Personal protective equipment: 12. An N95 mask for light dust work, upgraded to a half-face respirator with P100 cartridges once you’re sanding old finish. 13. Organic-vapor cartridges if you’re applying oil-based stain or poly, since the mask filter for dust doesn’t protect against solvent fumes. 14. Safety glasses and hearing protection for extended sander use.
Pro Tip: Rent the detail sander rather than buying one. You’ll use it for maybe two hours on a typical staircase, and a rental saves real money over a purchase you’ll use once a year at most.
A printable checklist makes it easy to confirm you have everything staged before the first sander touches wood.
How Do You Sand and Refinish Stair Treads Step by Step?
This is the part where most DIY projects succeed or fail. Follow the sequence pros use, and you’ll avoid the two most common failures: sanding through the tread veneer and trapping dust in your finish coats.
1. Inspect every tread and riser
Check for solid wood versus a veneered top layer — stair treads often have a solid nosing but a veneer over a core underneath, and sanding aggressively through that veneer ruins the tread. Press on each tread to find squeaks or flex. Look for deep gouges, pet stains, or water damage that will need filler or a partial tread replacement before you sand.
2. Strip and protect
Pull up any carpet, padding, and tack strips, and pry out every staple. Mask off walls, baseboards, and the flooring at the top and bottom of the stairs. Mark any tread you already know needs extra attention or replacement so you don’t forget mid-sand.
3. Handle repairs first
Secure squeaky treads from underneath if you can access the stair’s underside, using construction adhesive and screws rather than more nails. Fill small gouges with a color-matched wood filler and let it cure fully before sanding. If a tread has structural rot or a crack through the wood, replace it rather than patch it. This is also where you decide, honestly, whether the job is still a DIY project.
4. Sand in sequence
Start at 60 grit only if the old finish is thick or heavily worn; otherwise 80 grit is usually enough to strip most residential poly. Work each tread with the random-orbital sander in the direction of the grain, then move to 100, then finish at 120 to 150 grit for a smooth surface that takes stain evenly. D and G Flooring’s guide walks through this same progression and notes how much more hand-sanding stairs demand compared to open floors.
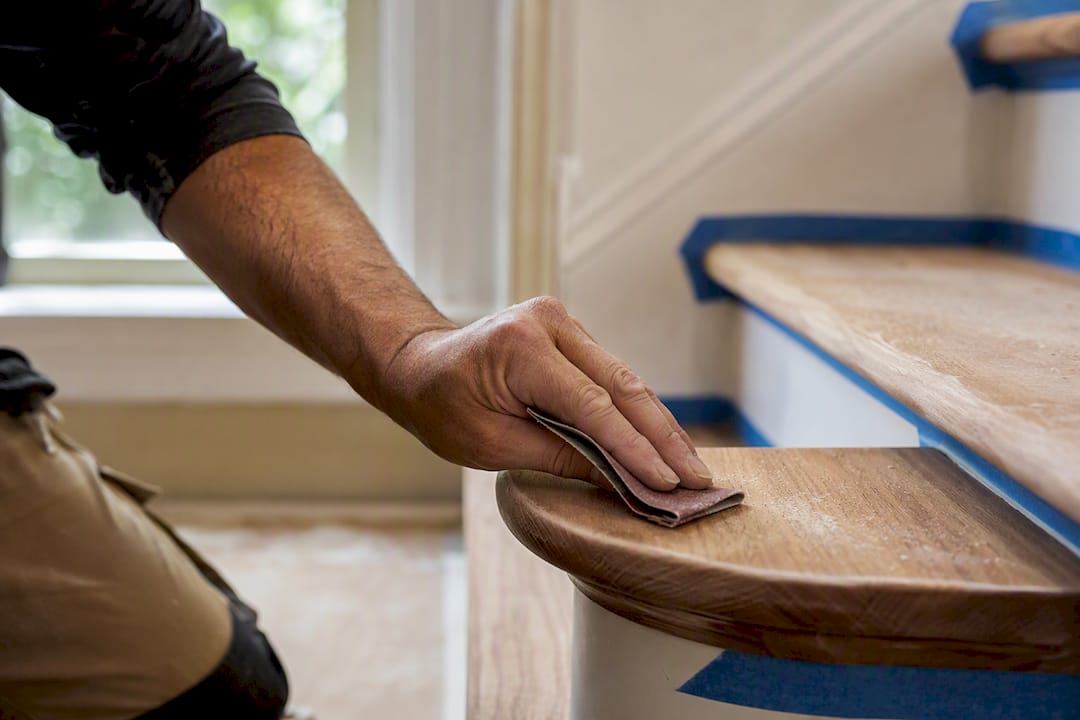
Hand-sand the nosings and any tight corner the power sander can’t reach, using a sanding sponge or folded sandpaper. This detail work takes longer than people expect. Budget real time for it.
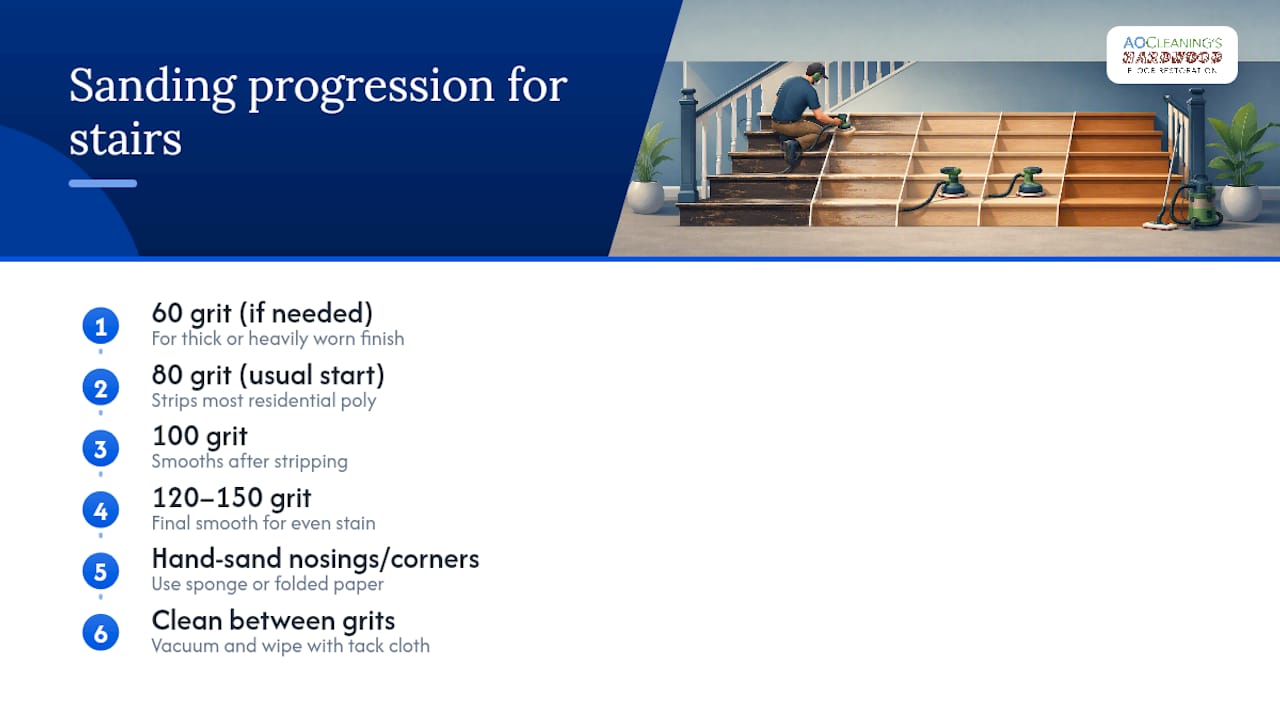
Vacuum thoroughly and wipe with a tack cloth between every single grit change. This Old House stresses this step because leftover coarse-grit dust gets dragged around by the next grit and leaves fine scratches that show up under stain and finish.
5. Stain, if you’re staining
Test your stain on an offcut or a hidden underside of a tread first. If you’re working with pine or another soft wood, apply a pre-stain conditioner so the color absorbs evenly instead of blotching. Apply stain with a rag or brush, let it sit two to five minutes depending on the depth of color you want, then wipe the excess off with the grain. Work one or two treads at a time so the stain doesn’t dry before you wipe it.
6. Seal with polyurethane
Apply the first coat thin. A heavy first coat is the single most common amateur mistake, since it dries slowly and shows brush marks. Work top-to-bottom so you always have a clear exit at the bottom of the stairs while coats cure. Between coats, practitioners recommend a light abrasion with 220 grit or a scuff pad so the next coat bonds mechanically instead of just sitting on top. Plan for a minimum of three coats on stairs, since they take more abuse per square foot than any other surface in the house.
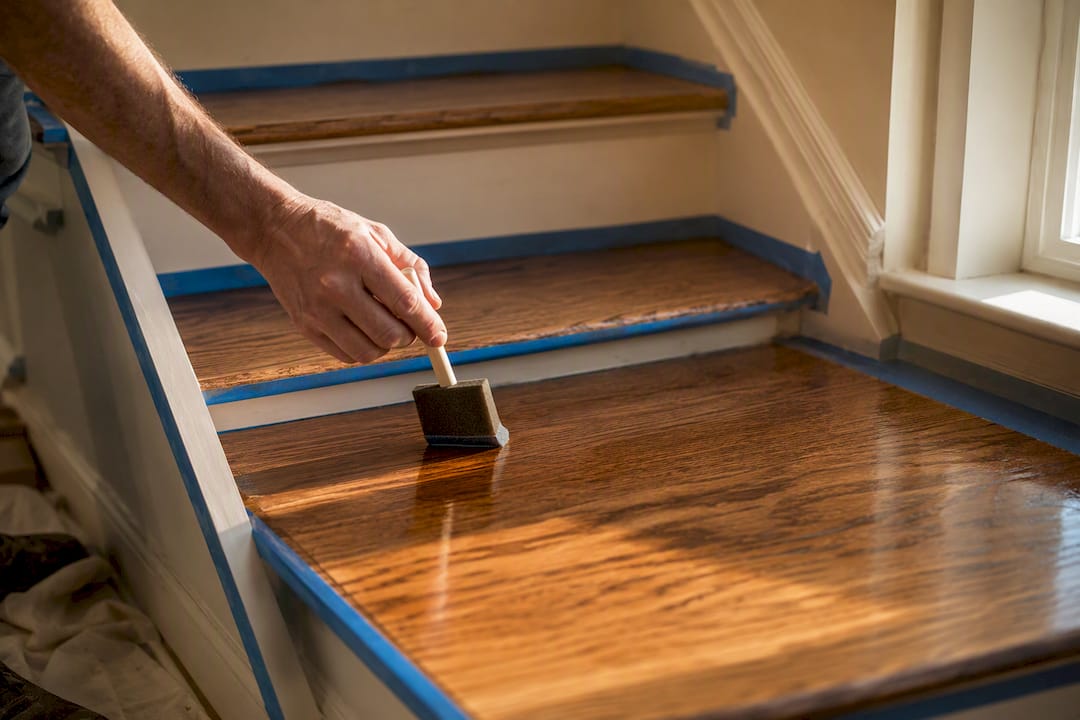
Pro Tip: Work every other tread on day one, let those cure, then finish the remaining treads on day two. You lose a stair-free house for a bit longer, but everyone in the household still has a usable, if zigzag, path up and down.
If your stairs have curved sections, winders, or a landing with mixed wood direction, the sanding pattern gets considerably harder to keep even, and that’s usually where DIYers benefit from at least a consultation with a professional before committing to the full job themselves.
Water-Based or Oil-Based Poly: Which Finish Is Best for Stairs?
The choice comes down to how much time you have and how much color shift you’re willing to accept. Neither option is objectively better, they solve different problems.
Water-based polyurethane dries fast, often recoat-ready in two to three hours, stays clear over time instead of yellowing, and has noticeably less odor. That makes it the practical choice if your stairs are the only path to bedrooms and you can’t shut the house down for days.
Oil-based polyurethane cures harder and holds up better against the abrasion stairs take daily, and it gives wood a warm amber tone many homeowners prefer on oak or walnut. The tradeoff is a longer cure window, often 24 hours or more between coats, and fumes strong enough that ventilation and a proper respirator aren’t optional.
On sheen, satin and semi-gloss dominate stair projects for a practical reason: high-gloss finishes show every scuff, scratch, and footprint, while satin hides daily wear without looking dull.
Satin: the most forgiving sheen for a busy household, hides scuffs well.
Semi-gloss: a bit more shine, still forgiving, common on formal staircases.
Gloss: striking when new, but shows wear fastest, rarely recommended for stairs.
Plan on three coats minimum, and if you’ve got kids, dogs, or heavy daily traffic, push to three or four coats since D and G Flooring’s trade guidance treats stair treads as needing more film build than flat flooring gets. Households with unusually heavy wear sometimes step up to a conversion varnish or a commercial-grade finish product, which trades easier DIY application for a noticeably tougher wear layer.
How Much Does It Cost and How Long Does It Take?
DIY materials for a full staircase typically run between $150 and $600, with the range driven mostly by finish choice (oil-based poly costs less than premium water-based lines) and whether you’re renting or buying the detail sander.
Hiring a professional costs more but buys you speed and a warranty. Angi’s cost data puts professional stair refinishing in the $700 to $1,900+ range for a full project, with the final number driven by step count, tread condition, and whether repairs are needed. Stairs consistently cost more per square foot than flat floors because every tread, riser, and nosing has to be treated individually with hand labor that open floor sanders skip entirely.
Timeline runs longer than people expect. Sanding and detail work eat the most hours, and dry and cure time between coats stretches the calendar even after the labor is done. The Spruce notes that a full refinish, floors or stairs, commonly takes several days once you factor in cure windows properly. Budget two to four days for a staircase, and don’t rush the final cure before walking on it in shoes.
One piece of good news on paperwork: permits are usually unnecessary for refinishing alone, since you’re not altering structure. That changes fast if you’re replacing a stringer or moving a landing, which crosses into construction work your local building department will want to know about.
What Safety Steps Matter Most for Stair Refinishing?
Dust control and fume safety aren’t optional extras on a stair job, they’re the difference between a clean result and weeks of cleanup or a genuine health hazard.
Seal the stairwell with plastic sheeting or a zipper dust barrier before you turn on any sander, since an open stairwell acts like a chimney and pulls fine dust into every room on both floors.
Run a HEPA-filtered shop vacuum continuously where possible, not just at the end of a sanding session.
Wear an N95 for light dust and upgrade to a half-face respirator with P100 cartridges once you’re stripping old finish, since fine sanding dust from old coatings is finer and more persistent than fresh wood dust.
Switch to organic-vapor cartridges, not particulate filters, when you’re applying oil-based stain or poly. Particulate masks don’t block solvent fumes at all.
Store oil-soaked rags in a sealed metal container filled with water, never in a plastic trash bag. Oil-based finish rags can spontaneously combust as they dry, and it’s a real fire risk homeowners underestimate.
Keep extension cords and power tools clear of tread edges while working on stairs, since a tripped cord on a staircase is a fall risk you don’t want.
Pro Tip: Open a window at both the top and bottom of the stairwell and point a box fan out one of them. That cross draft clears solvent fumes far faster than either window alone.
Everyday Care That Extends Your Stair Finish
A finished staircase isn’t maintenance-free, but the upkeep is light if you stay ahead of grit and wear.
Sweep or vacuum stairs weekly. Grit tracked in from outside acts like sandpaper under every footstep and is the single biggest cause of premature finish wear.
Wipe spills immediately, and avoid steam mops or ammonia-based cleaners, which dull polyurethane over time.
Add a runner with a non-slip pad on heavily used staircases. It absorbs the wear that would otherwise hit bare wood directly.
Watch for dulling or light scratching in the finish layer, not the wood itself. That’s your cue for a screen-and-recoat rather than a full sand.
A screen-and-recoat works well when the existing finish film is intact, buffing the surface and adding a fresh coat without stripping down to bare wood, which saves significant time versus a full refinish.
When Should You Call a Professional Instead?
Some stairs are DIY-friendly. Others aren’t, and the difference usually shows up during your inspection, not after you’ve started sanding.
Call a professional if your treads are engineered with a thin veneer, since sanding through that layer means replacing the tread entirely rather than just re-sanding it; for guidance, see Engineered Floor Refinishing Head of Harbor | Modern. The same goes for any structural issue, a cracked stringer, a tread that flexes under weight, or curved sections and winders where the grain direction changes constantly. If you’re on a tight timeline, or dust and fumes are a genuine health concern for someone in the house, hiring out is the more practical call.
Aosaveswoodfloors has handled full sand-and-refinish projects and screen-and-recoat work across central Illinois and the St. Louis metro area since 2003, building a track record backed by more than 450 Google reviews. Their dustless technique matters specifically for stairs, where containment is hardest to manage in a DIY setup, and most jobs are walkable again in about three hours.
If you’re vetting any professional, not just Aosaveswoodfloors, ask these questions before signing anything:
What’s your dust containment plan for a stairwell specifically?
Is the work covered by a warranty, and for how long?
Are you insured, and can you provide references from recent stair jobs?
What’s the realistic timeline including cure time before we can use the stairs normally?
Pro Tip: Ask specifically about stairs, not just “floors” in general. A crew with strong reviews on flat-floor refinishing may still be inexperienced with the extra hand-sanding stairs demand.
Where DIY Confidence Should Meet a Little Humility
The trade advice in this guide, the grit progression, the vacuum-between-every-pass habit, the top-to-bottom coating order, isn’t complicated. It’s just tedious, and tedious work is exactly where DIYers cut corners. That’s the real gap between what most online guides promise and what actually determines your result: not skill with a sander, but whether you’ll actually stop and vacuum for the sixth time in an hour.
Where I think conventional DIY advice oversells itself is the “anyone can do this in a weekend” framing. Realistically, budget two to four days once cure time is honest, and treat hand-sanding the nosings as its own separate task, not an afterthought squeezed into the last hour.
Prioritize the inspection step above everything else. A homeowner who correctly identifies a veneered tread or a flexing stringer before sanding saves themselves from a mistake that no amount of sandpaper fixes. Get that judgment right, and the rest of the project is genuinely manageable.
— Jim
A Faster, Dust-Free Way to Get Stairs Refinished
If reading through sanding sequences and cure windows has you leaning toward hiring it out, Aosaveswoodfloors gives central Illinois and St. Louis metro homeowners a way to skip the multi-day DIY commitment entirely. Their dustless technique means no sealed-off stairwell, no zipper walls, and no oil-rag disposal to think about, and most restoration jobs are ready to walk on in about three hours instead of the two to four days a DIY project typically takes.

For stairs where the existing finish is still in decent shape, their clean and buff service restores shine without a full sand. For treads that need to be stripped down and started over, their full sand and refinishing service covers the complete job, including cases where a tread turns out to be engineered or structurally compromised, situations covered in more detail in this guide to refinishing engineered hardwood. Call Aosaveswoodfloors for a quote before you commit a weekend to sanding, you might find the professional timeline and price fit your situation better than the DIY route does.
Sources
Recommended

Comments