


How to Protect Hardwood Floors During a Move

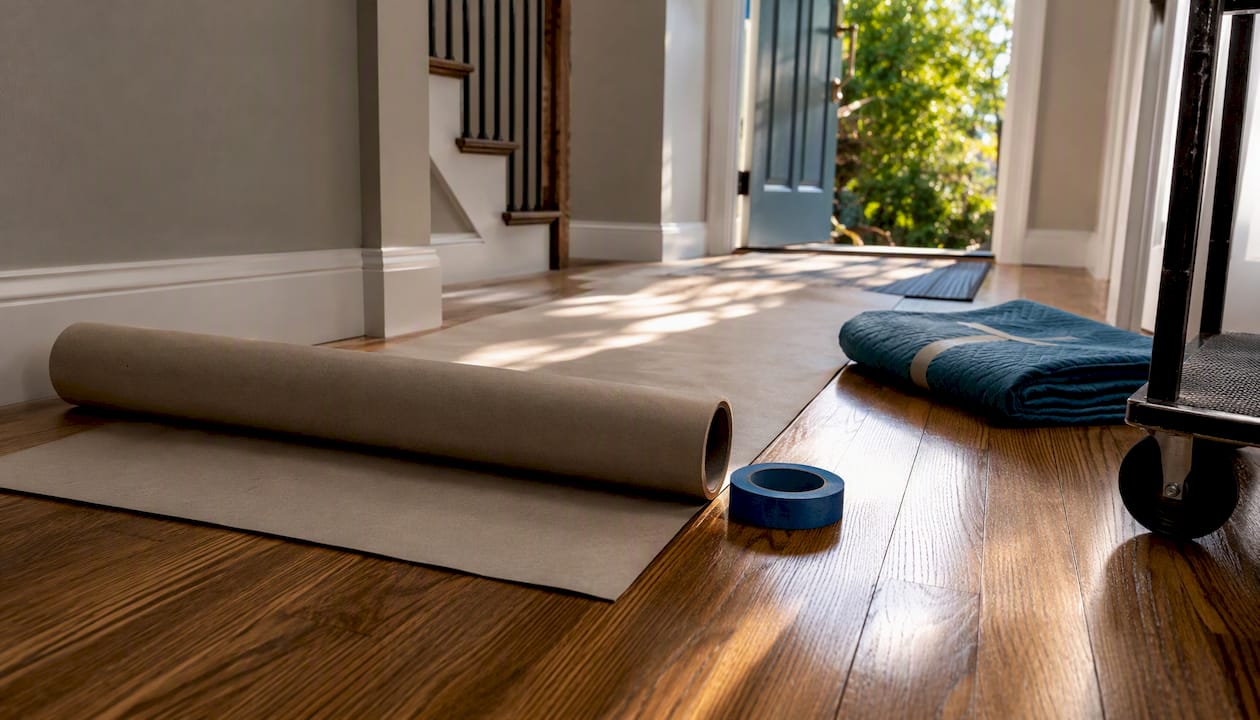
Cover every high-traffic route with a purpose-made floor protector, secure seams with low-tack painter’s tape, and use rubber-wheeled equipment. That combination stops the vast majority of scratches, dents, and tracked-in grit before they happen. The finish layer is what protects the wood, not the wood itself, so once it wears through, you’re looking at a full sand and recoat.
Three things to grab before movers arrive:
A floor protector roll or runner (Ram Board, red rosin paper, or corrugated cardboard runner): lays a continuous barrier over the paths movers will walk dozens of times
Low-tack painter’s tape: secures seams between sheets without leaving adhesive residue on your finish
A rubber-wheeled appliance dolly: distributes weight and rolls without gouging; hard plastic or metal wheels are a fast way to ruin a finish
The National Wood Flooring Association consistently points to grit abrasion as the leading cause of finish wear, which is why covering routes and capturing dirt at the door matters more than any single product choice.
Key Takeaways
Protecting hardwood floors during a move requires clean surfaces, the right protector for each route, rubber-wheeled equipment, and a threshold check before any heavy item crosses.
Point | Details |
Cover routes before movers arrive | Lay Ram Board or rosin paper on every traffic path and secure seams with low-tack tape. |
Never tape adhesive to the finish | Route tape to protector-to-protector seams to avoid residue or finish damage. |
Use rubber-wheeled dollies only | Hard plastic or metal wheels concentrate load and scratch hardwood finish on contact. |
Protect thresholds first | Rigid Masonite or plywood panels at doorways prevent the most common move-day dents. |
Aosaveswoodfloors for post-move repair | 1-day restoration, screen and recoat, and clean and buff services restore finish fast with dustless, eco-friendly methods. |
Table of Contents
How to protect hardwood floors during moving: a step-by-step checklist
Protection works best when it follows a sequence. Rush the prep and you end up with a runner that shifts, a seam that gaps, or grit trapped under the covering doing slow damage all day.
Start with a clean, dry floor. Everything else depends on it.
Sweep and dry-mop all hardwood surfaces the morning of the move. Grit trapped under a protector acts like sandpaper for hours. Clean first, then cover.
Measure your traffic paths. Walk the route movers will use and note the length of each hallway, the width of doorways, and any tight corners. Buy 10–15% more material than your measurements suggest.
Place a heavy-duty doormat outside every exterior door and a second mat just inside. This two-mat system catches the grit that a single mat misses.
Roll out your floor protector along every high-traffic route, starting at the front door and working inward. Overlap seams by at least 2 inches.
Secure seams with low-tack painter’s tape. Tape protector to protector, not protector to floor finish, whenever possible. Adhesive contact with a factory or job-site finish can lift or cloud it.
Protect thresholds and stair transitions with extra layers or rigid panels. These spots take the most concentrated impact.
Split your crew into inside and outside teams to limit how many people track across unprotected areas. Keeping dirt levels low is often more effective than adding more layers of material.
Remove furniture legs and wheels when practical before moving pieces. A dresser on its base slides; a dresser on casters rolls and pivots unpredictably.
Use sliders under furniture legs for short moves across a room. Use a rubber-wheeled dolly for anything traveling more than a few feet.
Define a set-down zone (a piece of plywood or a moving blanket) in each room so movers have a safe place to rest items without setting them directly on bare floor.
Handle spills immediately. If something spills on a protector, blot it from the outside in with a dry cloth. Lift the protector edge carefully to check whether liquid reached the floor underneath. Avoid steam and standing water on hardwood at all costs.
Remove protectors carefully after the move. Pull slowly at a low angle. Check for any adhesive residue and clean it with a manufacturer-approved hardwood cleaner before it sets.
Materials quick-reference:
Red rosin paper: budget-friendly, flexible, good for light-to-moderate foot traffic
Ram Board: heavy-duty, breathable, reusable, best for long hallways and contractor-level traffic
Floor Shield or self-adhering film: fast install, but confirm finish compatibility before use on hardwood
Corrugated cardboard runners: widely available, free or near-free, adequate for light foot traffic only
Pro Tip: Place the second doormat inside on top of your floor protector, not on bare floor. Movers will naturally wipe their feet on it, and it stays put because the protector underneath anchors it flat.
Safety note: Runners shift at corners. Fold the edge under itself or use a second strip of low-tack tape to pin it flat. A lifted runner edge is a trip hazard, especially when movers are carrying something they can’t see past.
Which floor protection material should you use?
Choose your protector based on the load it will carry. Foot traffic only needs something different from an appliance path. Finish sensitivity changes the equation further.
Red rosin paper is the go-to budget choice. It’s flexible enough to navigate corners and costs almost nothing per roll. The downside: it tears under concentrated loads and offers minimal impact protection if something heavy drops.
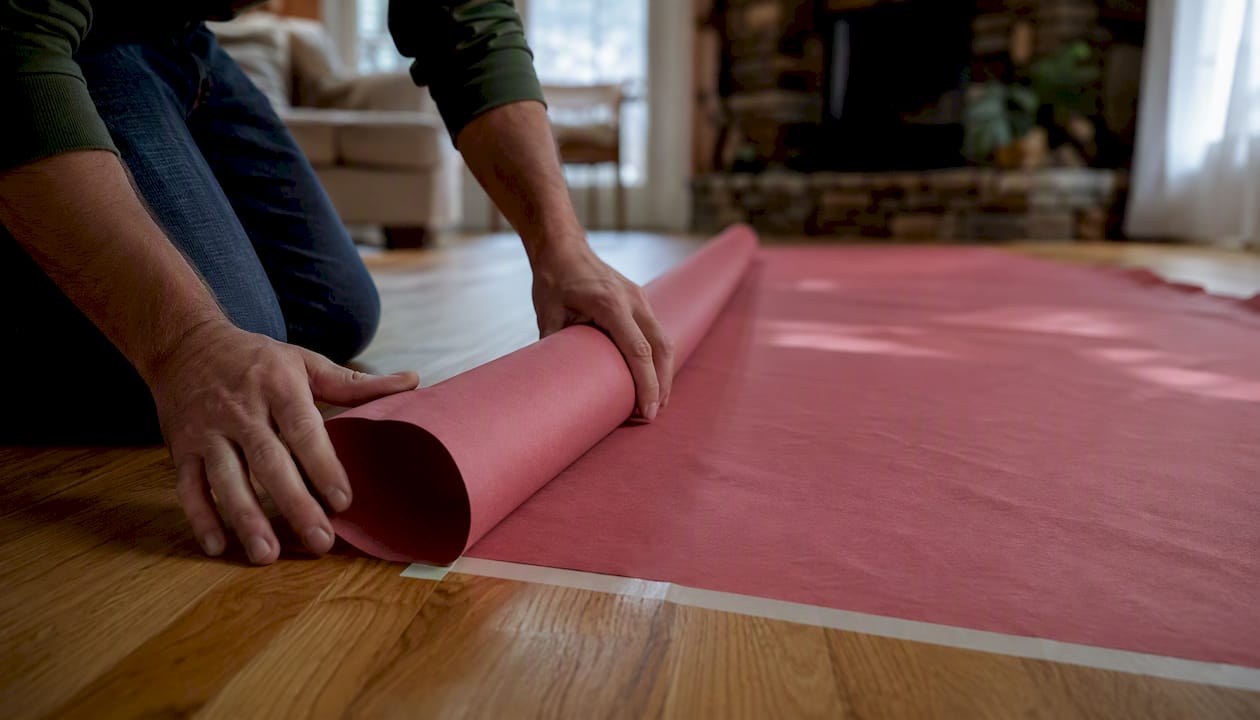
Ram Board is what pros reach for in long hallways and contractor situations. It’s breathable (so moisture doesn’t get trapped), tear-resistant, and handles heavy foot traffic and rolling loads better than any paper-based option. Heavier to unroll, but worth it for a full-day move.
Floor Shield and similar self-adhering films install in seconds and stay put without tape. The catch: adhesive-backed films designed for carpet are not safe for many hardwood finishes. If you use one, confirm the manufacturer explicitly lists your finish type as compatible. When in doubt, skip it.
Corrugated cardboard runners cost nothing if you save boxes, and they work fine for light foot traffic. Edges curl quickly, which creates trip hazards, and they offer almost no protection against a dropped item.
Finish-specific caution: Freshly refinished floors (within 30 days) and oil-based finishes are the most vulnerable to adhesive contact. Use Ram Board or rosin paper with tape-to-tape seams only on these surfaces.
How to move refrigerators and heavy furniture without scratching floors
The highest-risk moments in any move are appliances and large furniture pieces. A refrigerator on a hard plastic dolly wheel can leave a gouge in seconds.
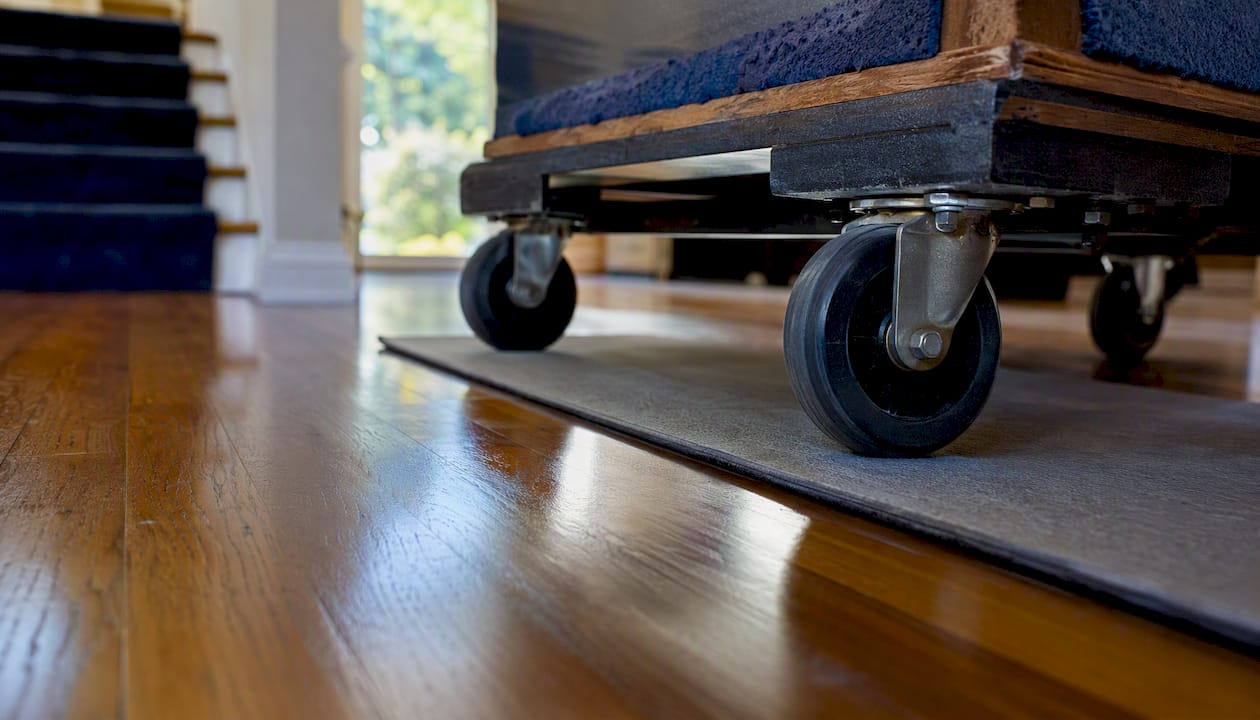
The combination that works: rigid path + rubber wheels + slow, controlled lowering.
Moving appliances
Disconnect and empty the appliance completely.
Lay a plywood or Masonite panel at every threshold and doorway the appliance will cross. Rigid panels distribute point loads that would crack or dent thin protection layers.
Place Ram Board or a moving blanket under the appliance’s base before tilting it onto the dolly.
Use an appliance dolly with rubber wheels and safety straps. Never use a dolly with hard plastic or metal wheels on hardwood.
Move slowly. Lower the appliance onto its new position; don’t slide it into place.
Moving heavy furniture
Empty all drawers and remove them if possible.
Slide furniture sliders (felt for lighter pieces, nylon for heavier loads) under each leg before moving.
For anything over roughly 100 lbs, use a two-person lift with moving straps rather than pushing across the floor.
Set the piece down on a moving blanket or plywood pad, not directly on bare hardwood.
Tool list for high-risk moves:
Rubber-wheeled appliance dolly with straps
Felt or nylon furniture sliders
Plywood or Masonite sheets (at least 3/8 inch thick)
Lifting straps
Moving blankets
Corner guards for doorframes
Safety warning: Never use plastic-wheeled dollies on hardwood. Tipping is the other major risk. Keep straps snug, move slowly around corners, and never carry a large item alone on stairs.
Day-before prep that saves you on moving day
The hour you spend the day before is worth three hours of scrambling on moving day.
Run the water-bead test in high-traffic zones: drop a few beads of water on the floor. If they bead up, the finish is intact. If they absorb quickly, the finish is worn and that area needs extra protection or a pro assessment before heavy loads cross it.
Inspect for vulnerable spots: gaps between boards, areas where finish looks dull or whitish, and any exposed raw wood. These spots need rigid protection, not just paper.
Replace worn felt pads on all furniture legs. A missing pad on a chair leg is a scratch waiting to happen.
Remove area rugs and vacuum under them. Grit hides under rugs and gets picked up by socks and shoes.
Pad furniture corners with moving blankets or foam wrap to protect doorframes and walls, which also protects floors from falling objects.
Label a set-down zone in each room with a piece of tape on the wall so every mover knows where to place items without guessing.
For post-move care, a hardwood floor maintenance checklist is a practical reference for keeping the finish in good shape after everything is back in place.
What does floor protection actually cost?
Small apartments can be prepped in 30–90 minutes. A 2–3 bedroom house typically takes 1–3 hours depending on materials and how many people are laying them.
Rough material costs (retail):
Red rosin paper: approximately $20 to $35 per roll
Ram Board: approximately $50 to $80 per roll
Corrugated floor runners: free (repurposed boxes) to a low cost per linear foot per linear foot
Low-tack painter’s tape: $5–$10 per roll
Time tradeoffs: Ram Board takes longer to unroll and position than rosin paper, but it stays flat and rarely needs re-securing. Cardboard is instant but requires constant edge-checking. For a 1,500-square-foot home with two main hallways and a kitchen path, budget somewhat more than the measured length of your main traffic paths.
Cost-saving approach: Use inexpensive corrugated runners at entry points where foot traffic is light, Ram Board in the main hallway, and a Masonite panel at each threshold where appliances cross. That combination gives maximum protection where it counts without buying premium material for every square foot.
When should you call a professional floor service?
DIY protection handles most moves well. A few situations call for a pro.
Call a professional if:
The water-bead test shows rapid absorption in multiple areas (finish is gone, raw wood is exposed)
You notice deep gouges, dents, or finish chips after the move
The floor has a wax finish (common in older homes) that reacts unpredictably to adhesives and moisture
You need the floor ready for guests, a sale, or a rental within days of moving
Aosaveswoodfloors offers 1-day hardwood floor restoration, screen and recoat, clean and buff, and full sand and refinishing. Most services are completed in a single day, with floors ready to walk on in about three hours. Their dustless methods mean no grit cloud settling back onto a freshly coated surface.
What to expect from an in-home estimate: A technician inspects finish wear, checks for moisture issues, and recommends repair versus recoat based on what they actually see. You get a transparent cost estimate before any work starts.
Pro Tip: If you’re moving into a home and the floors look dull but not damaged, a clean and buff before you bring furniture in is far cheaper than a full refinish after a year of traffic on a compromised finish.
For guidance on what to do after a professional service, maintaining refinished hardwood floors long term is worth reading before you move furniture back in.
What movers get wrong about floor protection
Thresholds and stair transitions are where most of the real damage happens. Not the middle of a hallway. Not the living room. The two-inch strip of floor at every doorway and the first and last step on every staircase take the most concentrated, repeated impact during a move, and they’re almost always the last thing anyone protects.
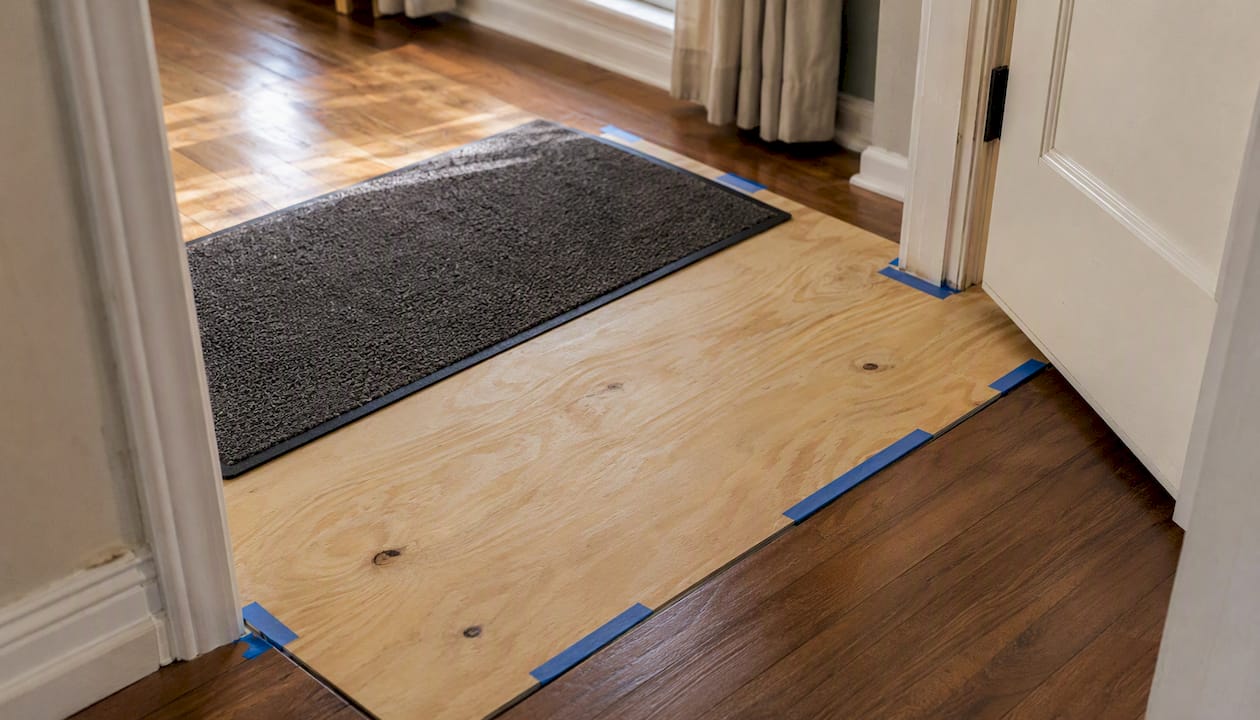
A single plywood panel over a threshold costs almost nothing and takes 30 seconds to place. Without it, a refrigerator dolly crossing that threshold three times can chip the finish edge in a way that requires spot refinishing. That’s a $300–$500 repair for a $2 fix.
The other thing most checklists miss: the inside doormat. Everyone knows to put a mat outside. The mat just inside the door, on top of the protector, is what actually stops grit from traveling further into the house. Movers will use it automatically if it’s there.
Aosaveswoodfloors uses dustless techniques and eco-friendly products on every job, so if a move does result in finish damage, the repair process doesn’t create a second mess to deal with.
Floors that survive a move, and look better after
Moving day is hard on hardwood. Aosaveswoodfloors makes the recovery fast. Their 1-day hardwood floor restoration service is built for exactly the kind of situation a move creates: a finish that’s been stressed, scuffed, or worn through in spots, and a homeowner who needs it fixed before life resumes. Dustless methods, eco-friendly products, and walk-on-ready floors in about three hours. No lingering odors, no overnight wait, no second appointment.

Serving St. Louis, Columbia, Belleville, Fairview Heights, Waterloo, O’Fallon, and surrounding communities in central Illinois and the St. Louis metro area. If the floors show wear after your move, or if you want a pro assessment before you bring heavy furniture in, schedule an in-home consultation at Aosaveswoodfloors.
Sources
Recommended

Comments