


Polyurethane Cure Time: How Long Until Floors Are Ready

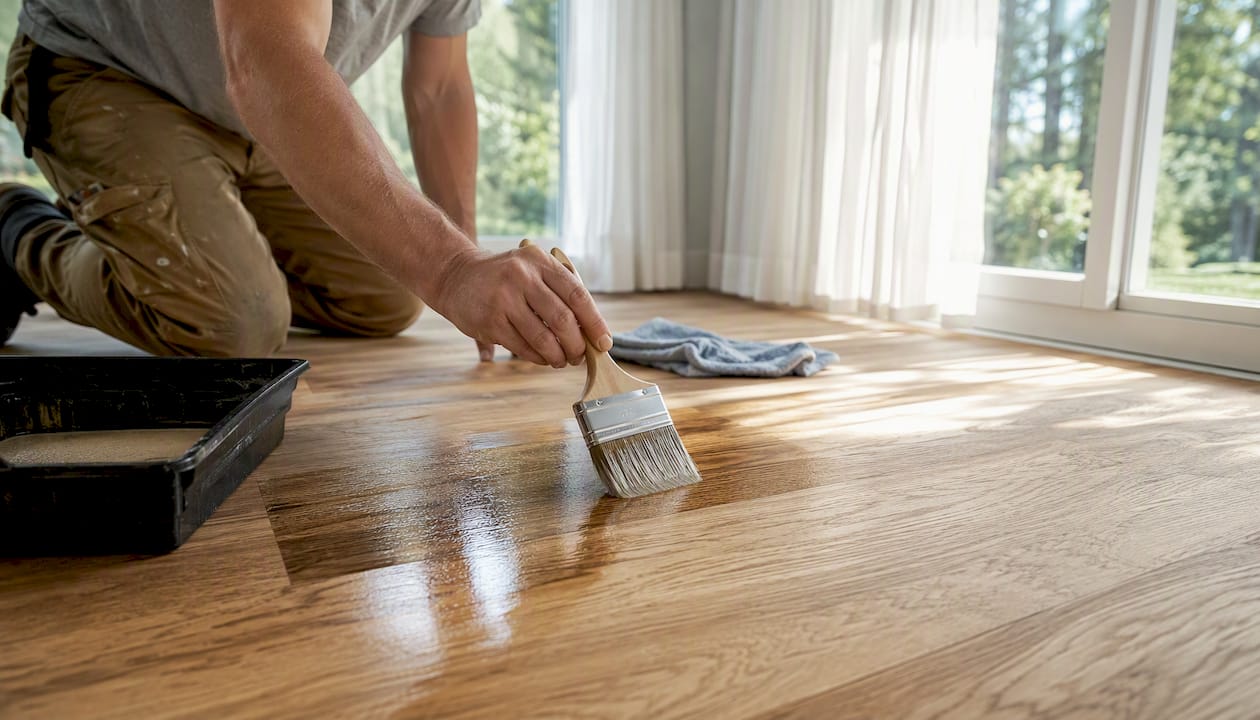
Water-based polyurethane reaches light-use readiness in about 24 hours and full cure in 7 to 21 days. Oil-based polyurethane needs 48 to 72 hours before light use and about about a month to fully cure. Those numbers assume a room around 70°F with moderate humidity. Cold, damp, or poorly ventilated spaces stretch every stage.
Here’s what those windows actually let you do:
Walk in socks: usually safe within 24 hours for water-based, 48+ hours for oil-based
Set furniture back down: wait 2 to 3 days minimum, and use felt pads
Put hot mugs or plates on the surface: hold off until full cure
Roll rugs or heavy loads back onto the floor: wait the full cure window, not just the recoat window
Three things change these numbers fast: temperature below 65°F, humidity above 70%, and coats applied thicker than the label recommends. When in doubt, add a few days rather than gamble on a finish that looks dry but isn’t done working.
Key Takeaways
Full polyurethane cure takes 7 to 21 days for water-based finishes and about a month for oil-based finishes, and only field tests confirm readiness, not the calendar.
Point | Details |
Dry is not cured | Surface drying takes hours; full chemical cure takes days to weeks longer. |
Test before you trust the date | Use touch, sandpaper, fingernail, and coffee-mug tests to confirm each stage. |
Cold and humidity slow everything | Below 65°F or above 70% humidity can double your expected cure time. |
Rugs need extra patience | Wait two weeks after water-based and three to four weeks after oil-based jobs. |
A pro controls the variables | Aosaveswoodfloors manages temperature and airflow for one-day restorations, so floors are walkable in about three hours. |
Table of Contents
Polyurethane Drying vs Curing: What’s the Real Difference?
“Dry” and “cured” describe two completely different chemical events, and confusing them is the single most common reason people damage a brand-new finish. Drying is just evaporation. Solvents in oil-based poly or water in water-based formulas leave the film, and within a few hours you get a surface skin that feels solid to the touch. Curing is a chemical reaction: polymer chains cross-link and lock together, and that process keeps running underneath the surface for days or even weeks after the top feels done.
The distinction matters because a dry surface and a cured surface behave nothing alike. A dry-but-uncured film scratches easily, dents under concentrated weight, and softens if a hot pan or a rubber mat sits on it too long. A cured film resists all three. This is why drying and curing are treated as separate milestones on every manufacturer’s technical data sheet, not interchangeable terms.
You can check where a finish stands with three low-tech tests: the touch test (does it feel tacky?), the fingernail test (does a light press leave a mark?), and the sandpaper test (does 220-grit sanding produce fine dust or gummy strings?). Gummy residue means the film is still curing underneath, even if the surface passed the touch test hours ago.
How Long Does Polyurethane Take to Cure by Type?
The type of polyurethane you use sets the entire timeline, and the gap between water-based and oil-based products is bigger than most first-time DIYers expect.
Stage | Water-Based Polyurethane | Oil-Based Polyurethane |
Surface dry | 1 to 2 hours | 4 hours |
Recoat-ready | 2 to 3 hours | 8 to 12 hours |
Light use (socks, light foot traffic) | About 24 hours | 48 to 72 hours |
Full cure | 7 to 21 days | About about a month |
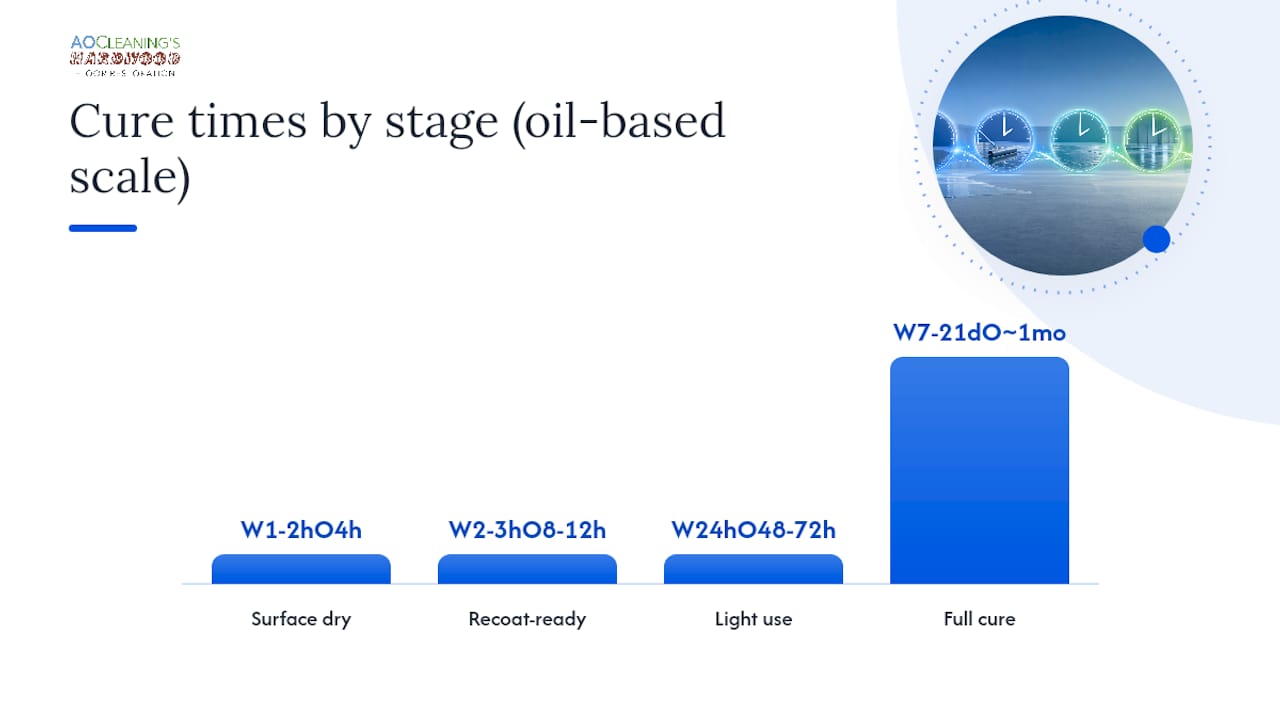
These figures come from field-tested drying benchmarks for both formula types, and they line up closely with manufacturer data. Rust-Oleum’s technical sheet for its Ultimate Polyurethane lists touch-dry at 2 hours, recoat at 2 hours, light use at 48 hours, and full cure at about one week, tested at 70°F and 50% relative humidity.
Wipe-on formulas complicate the picture slightly. Because you apply thinner coats, each individual coat dries and sands faster. But wipe-on systems typically need more coats to build the same film thickness as a brushed application, so the total project time often ends up similar. Fast-drying labels follow the same logic: they shrink the time between coats, not the final cure clock. A “one-hour dry” formula still needs its full 7 to about a month before the chemistry finishes locking in.
Treat every number in that table as a best-case scenario. Lab testing happens in a controlled room at ideal temperature and humidity. Your garage in February or a bathroom with no exhaust fan is not that room. If you’re finishing wood indoors during winter or in a humid basement, plan for the long end of every range and check back with a physical test before moving to the next step. For a broader look at how finish type affects your overall project timeline, this guide to hardwood floor finish types breaks down the trade-offs by category.
Which Field Test Tells You It’s Safe to Proceed?
Each of the four drying stages has a matching test you can run with tools already sitting in a junk drawer. Do the test in a corner or closet first so you don’t leave a mark on a visible section of floor.
Touch test (confirms surface dry): Press a clean finger lightly on the surface. No tackiness or fingerprint means it’s surface dry, though nowhere near cured.
220-grit sandpaper test (confirms recoat-ready): Lightly sand a hidden spot. Fine white dust means you’re clear to recoat. Gummy strings or clogging mean the film is still too soft, so stop and wait longer.
Fingernail press test (confirms light-use stage): Press a fingernail firmly into the finish. If it doesn’t leave a dent, the floor can typically handle socks and light foot traffic.
Coffee-mug test (confirms full cure): Set a warm, not scalding, coffee mug on the surface for a few minutes. No ring, no soft spot, no smell transfer means the finish has fully cured and can handle daily abuse.
Pro Tip: Run the sandpaper test before every recoat, not just once. A humid afternoon can slow curing enough to turn a “should be ready” coat into a gummy mess under fresh sandpaper.
Passing the touch test only means you can walk near the floor without leaving footprints. Passing the coffee-mug test is what tells you it’s safe to drag furniture, drop a hot pan, or let pets run across the surface without consequence.
What Slows Down Polyurethane Curing the Most?
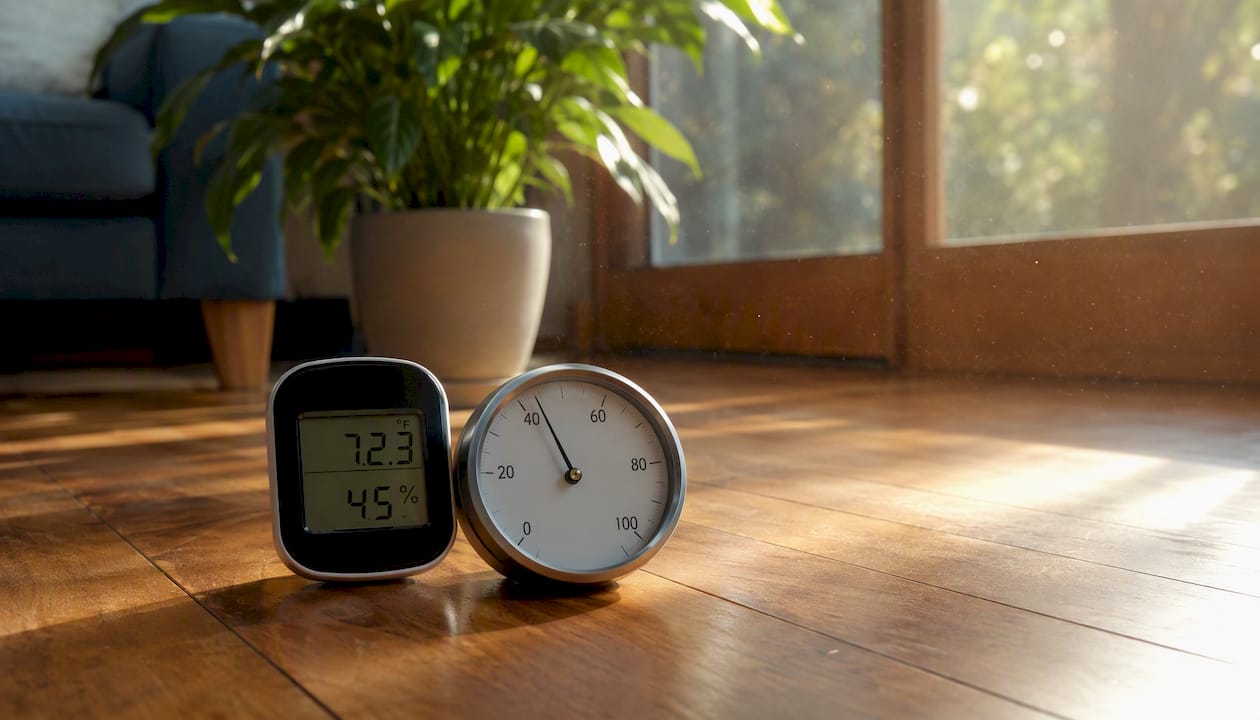
Temperature and humidity do more to your timeline than the product label ever will. Below 65°F, expect cure times to stretch 1.5 to 2 times longer than the standard range. Drop below 50°F and cure can nearly stall, since the chemical cross-linking reaction that hardens the finish is temperature-dependent. Humidity above 70% relative humidity can slow oil-based cure by 2x or more, because moisture in the air competes with the evaporation the film needs to progress toward full hardness.
Factor | Effect on cure time |
Below 65°F | 1.5 to 2x longer |
Below 50°F | Cure nearly stops |
Humidity above 70% RH | Up to 2x longer (oil-based especially) |
No airflow / closed room | Noticeably slower, uneven cure |
Thick or heavy coats | Surface skins over while the interior stays soft |
Coat thickness deserves its own warning. A heavy coat forms a skin on top well before the interior has cured, which traps solvents or moisture underneath. That trapped material can cause bubbling, a permanently soft layer, or a tacky feel that never fully resolves.
Pro Tip: If you’re finishing over a stain, confirm the stain itself is fully dry before the first poly coat goes on. Uncured stain underneath a finish coat is one of the most common causes of a floor that stays tacky for weeks no matter how long you wait.
When Can You Move Furniture, Rugs, or Use the Kitchen Again?
Match your activity to the actual cure stage, not the calendar day you finished the last coat.
Safe once light-use stage is reached (24 hours water-based, 48 to 72 hours oil-based):
Walking through in socks or clean shoes
Light dusting with a dry microfiber mop
Wait for full cure (7 to 21 days water-based, about a month oil-based):
Placing dining tables, china cabinets, or anything with concentrated point-load legs
Setting hot mugs, pans, or crockpots directly on the surface
Using standard household cleaners or solvents
Sliding furniture instead of lifting it
Wait even longer for rugs: insiders recommend holding off on area rugs for two weeks after water-based jobs and three to four weeks after oil-based jobs, since rugs block airflow to the finish and can chemically bond or imprint into a film that’s still soft underneath.
For furniture placement specifics after a water-based refinish, see this breakdown of when it’s safe to walk on floors. Homeowners with kitchens or high-traffic dining areas should treat the full-cure window as non-negotiable. A dropped pan or a dragged chair leg during the first week is the most common way a brand-new finish gets its first scar.
Why Is My Polyurethane Still Tacky or Sticky?
A finish that stays tacky well past its expected window almost always traces back to one of five causes: a cold room, humidity above 70%, a coat applied too thick, uncured stain underneath, or poor airflow trapping evaporating solvents near the surface.
Work through fixes from least to most invasive:
Raise the temperature and add airflow first. A space heater and a box fan (pointed at the ceiling, not the floor) can rescue a slow cure without touching the finish itself.
Give it more time before touching anything. Many “stuck” finishes are simply behind schedule, not defective.
Thin future coats. If this keeps happening project after project, you’re likely applying poly heavier than the label recommends.
Sand and recoat a thin final layer if the surface has fully skinned over but stays soft underneath, since a fresh thin coat can sometimes level out an uneven cure.
Strip and start over if tackiness lingers past about a month with a persistent chemical smell. That combination usually signals contamination or a reaction that won’t resolve on its own, and it’s worth involving a professional refinisher at that point.
Do Pros Really Cure Floors Faster Than DIYers?
Professional shops don’t rush the chemistry. They control the room. A restoration crew arrives with humidity meters, portable heaters, and air movers dialed to the exact conditions a manufacturer’s data sheet assumes, which is why a same-day service can promise floors walkable in about three hours while still respecting the underlying cure chemistry.
Homeowners hire that kind of control for a few practical reasons:
Dust-free sanding equipment that keeps debris out of a curing finish
Climate management that keeps a project on schedule regardless of the season outside
A guaranteed timeline instead of guessing based on a thermostat reading
Aosaveswoodfloors has managed this balance across central Illinois and the St. Louis metro area since 2003, running one-day restoration jobs where dustless techniques and eco-friendly finishes get floors back to walkable in hours, not days. For a look at how full sand-and-refinish projects are scheduled around cure windows, see how long floor refinishing takes.
Conservative planning beats rushing
The biggest mistake I see in DIY finishing questions isn’t a bad product choice. It’s clock-watching instead of testing. A calendar doesn’t know your basement humidity or how thick your last coat went on. Run the sandpaper and fingernail tests before you trust a date on a label, and pad every timeline by a few extra days when your space isn’t a controlled 70°F room. Cure time punishes impatience more than almost any other step in a wood finishing project.
Prefer a Guaranteed Timeline? Skip the Waiting Game
Cure time is the one variable DIYers can’t shortcut, but you can hand it off entirely. Aosaveswoodfloors runs one-day hardwood floor restoration across St. Louis, Monroe, and Madison Counties, with dustless sanding and eco-friendly finishes that get floors walkable in about three hours instead of a multi-week home cure schedule.

With over 20 years in business and 450+ Google reviews, Aosaveswoodfloors has built its reputation on getting the environment right the first time, so you’re not troubleshooting tacky spots or waiting out a humid week before you can move furniture back in. Services range from clean and buff to full sand and refinishing, screen and recoat, and wax removal, all scheduled around controlled cure conditions rather than guesswork. If your floors need attention and you’d rather not spend three weeks tiptoeing around a cure window, schedule a consultation and get a timeline you can actually plan around.
Frequently Asked Questions
How long does polyurethane take to cure before I can walk on it? Light foot traffic in socks is usually fine after about 24 hours for water-based polyurethane and 48 to 72 hours for oil-based. Full cure, when the floor can handle anything, takes 7 to 21 days for water-based and about a month for oil-based.
Is polyurethane cure time the same as drying time? No. Drying is evaporation and happens in hours. Curing is the chemical hardening process that continues for days or weeks afterward, and it’s what actually determines when a floor resists scratches, heat, and solvents.
Can I speed up polyurethane cure time? You can’t accelerate the chemistry itself, but you can stop it from slowing down. Keep the room around 70°F, run a fan for airflow, and keep humidity moderate. Fast-drying formulas shorten recoat windows, not the final cure timeline.
How do I know if my polyurethane is fully cured? Run the coffee-mug test: set a warm mug on the surface for a few minutes and check for a ring, soft spot, or smell transfer. No mark means the finish has reached full cure.
Why is my polyurethane still tacky after two days? Cold temperatures, high humidity, an overly thick coat, or uncured stain underneath are the most common causes. Raise the room temperature, add airflow, and give it more time before assuming something went wrong.
Sources
Recommended

Comments