


Hardwood Floor UV Finish: What Homeowners Should Know

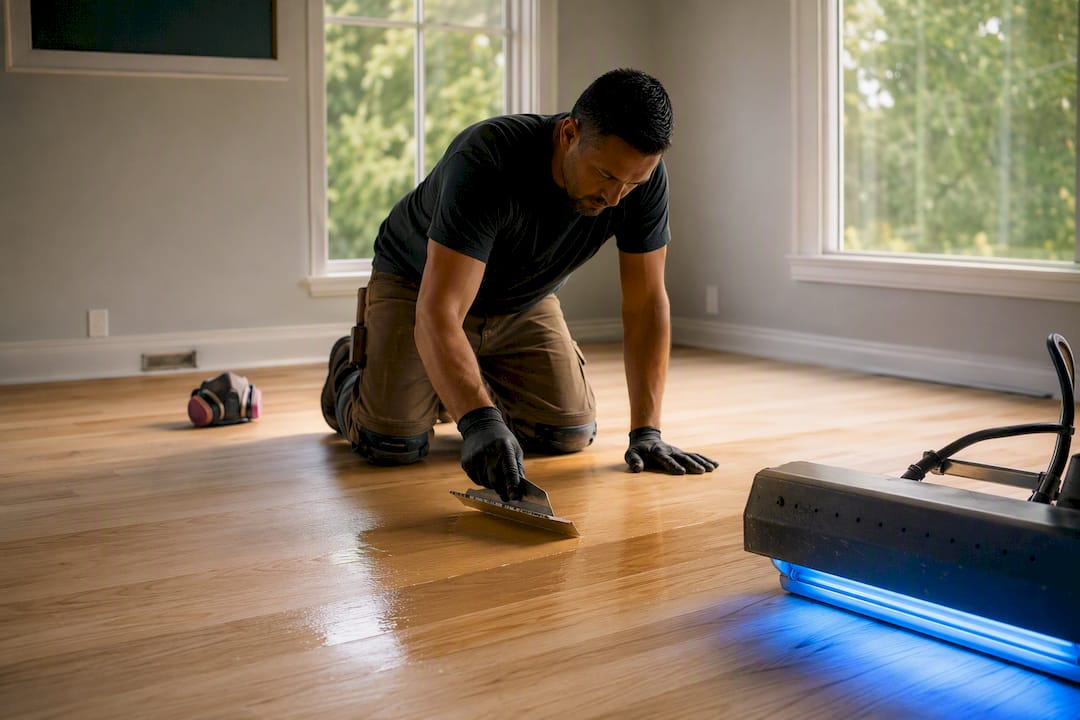
A hardwood floor UV finish is a wood coating that hardens instantly under concentrated ultraviolet light instead of drying slowly in open air. That single difference changes almost everything about the project. Floors coated with a UV-cured finish are typically ready for light foot traffic within an hour or two, compared with the days or weeks conventional oil or water-based polyurethanes need to fully cure.
For most homeowners, that speed pairs with genuine durability. UV-cured coatings polymerize into a dense, tightly crosslinked surface that resists scratches and wear better than many traditional finishes. The catch: getting there requires the right lamp equipment, correct dosage, and a contractor who actually knows how to run it. Rush the pass or use underpowered equipment, and you end up with a tacky, under-cured surface that never fully hardens.
Cures in minutes to a few hours, not days
Commercial-grade hardness once cured correctly
Requires professional equipment and technique to avoid under-cure
Key Takeaways
UV-cured hardwood finishes trade a modest cost premium for same-day usability and denser, more wear-resistant surfaces than conventional air-dried polyurethane.
Point | Details |
Speed is the headline benefit | Floors are typically walk-ready within a few hours instead of the days polyurethane needs. |
Durability comes from chemistry | Photopolymerization creates a dense, crosslinked coating that resists scratches better than most air-dried finishes. |
Equipment precision decides success | Incorrect lamp intensity or wavelength causes under-cure, so professional-grade equipment matters. |
Best suited to recoats, not color changes | Deep stains, gouges, or major color shifts still need a full sand and refinish first. |
Aosaveswoodfloors offers matching services | 1-day restoration, screen and recoat, and full sand and refinishing all use dustless, low-disruption techniques. |
Table of Contents
Benefits of a UV-Cured Hardwood Finish for Homeowners
The biggest selling point isn’t just speed. It’s what that speed lets you skip: no waiting three days to move the couch back, no plastic sheeting taped over doorways for a week, no scheduling a hotel stay around a refinishing job. UV curing collapses that entire downtime window into a single visit.
The hardness matters just as much long-term. Photopolymerized coatings form a denser molecular structure than air-dried finishes, which is why commercial spaces with heavy daily traffic increasingly favor them. A busy kitchen or a home with dogs and kids sees the same benefit on a smaller scale.
Low-VOC, low-odor advantage: Many field-applied waterborne UV-curable topcoats are formulated at near-zero VOC levels without hazardous air pollutants, which explains why UV jobs smell like almost nothing compared with the sharp, lingering odor of oil-based polyurethane.
That air-quality difference is a big deal for anyone with young kids, pets, asthma, or a home office they can’t abandon for a week. You can generally stay in the house during and after the job.
On looks, modern UV topcoats have closed the gap with traditional finishes. You’re no longer stuck with a shiny, plastic-looking surface:
Matte and low-gloss sheens are widely available
Satin finishes read as natural, not synthetic
Color clarity holds up well since the coating doesn’t yellow the way some oil finishes do over time
The tradeoff worth knowing up front: UV coatings often cost more per gallon than standard polyurethane. Given the durability and the labor savings from a one-day turnaround, most homeowners find that premium pays for itself over the life of the floor.
What Types of UV Finishes Will You Encounter?
Not all UV-cured finishes are built the same, and the differences affect both performance and how a contractor applies them.
Waterborne UV-curable topcoats are the most common option for on-site residential work. They apply like a standard water-based finish, then get hit with a UV lamp pass instead of sitting to air-dry.
UV-oil hybrid systems combine the penetrating, natural look of an oil finish with a UV-reactive component in the top layer, giving you an oiled aesthetic without the week-long cure oils usually demand.
Factory-applied UV finishes show up on prefinished engineered flooring, cured under industrial lamps before the boards ever reach a job site. This is why prefinished floors can go into service almost immediately after installation.
The chemistry behind all three relies on photoinitiators, chemical compounds that absorb UV light and trigger a chain reaction that locks the coating into a hard, crosslinked film in seconds. Sherwin-Williams’ industrial coatings division notes this rapid polymerization is what makes UV coatings solvent-free and so much harder than conventional finishes.
Formulation matters more than most homeowners realize. Some UV-curable products are engineered specifically for medium-pressure mercury lamp systems and are explicitly not LED-compatible. A contractor using the wrong lamp type on the wrong product isn’t cutting a corner. He’s applying a coating that may never cure properly.
How On-Site UV Refinishing Actually Works
A UV recoat follows a tighter, faster sequence than a standard refinish, but every step still matters.
Dust containment and prep. Contractors set up a dust-control system, similar to a Bona-style containment rig, then screen or lightly sand the existing floor and clean thoroughly. Any dust or debris left behind gets sealed permanently under the new coating, so this step gets no shortcuts.
Coating application. The UV-curable topcoat goes down with a roller or applicator, often in one to two coats. Waterborne systems need a brief flash-off window before the UV pass to let excess moisture escape.
UV curing pass. A mobile UV unit moves across the floor at a controlled speed, delivering the intensity and wavelength the specific product requires. Multiple passes may be needed depending on coat thickness.
Inspection and walkthrough. The contractor checks for tack, missed spots, and even cure before clearing the floor for use.
The pacing is what surprises most homeowners. A full sand-and-refinish with UV curing can often complete start to finish in a single day, with floors safe for light foot traffic in about three hours. Heavier furniture typically waits until the contractor gives the all-clear, sometimes the same evening, sometimes the next day depending on the product.
Pro Tip: Ask your contractor exactly when you can put rugs and furniture pads back down. Fully cured doesn’t always mean fully “settled,” and some coatings benefit from a short buffer before heavy items sit on them.
Why Equipment Quality Determines the Outcome
UV curing rewards precision and punishes shortcuts, which is exactly why this is not a great DIY project.
Manufacturers publish specific intensity thresholds. Some products call for output around 500 mW/cm2 from a medium-pressure mercury system, and running a lamp below that spec, or moving it too fast across the floor, is a leading cause of under-cure.
Failure modes worth knowing:
Under-cure, leaving a sticky or soft surface that never fully hardens
Trapped debris, which becomes permanently locked under the coating and can’t be sanded out without a full strip-and-refinish
Poor bonding to the substrate when prep or cleaning was rushed
Lamp mismatch, since many UV products are not LED-compatible and require the exact lamp type the manufacturer specifies
When vetting a contractor, ask about their dust-control setup, how many UV jobs they’ve run, and whether they can show recent photos. A company that trains on both the equipment standards trade groups like NWFA publish and the manufacturer’s own specs is a safer bet than one improvising with a rental unit.
UV finishing is best suited to recoats, screen-and-recoat jobs, and many engineered or solid floors that don’t need major color correction. If you’re chasing a dramatic stain change or deep scratch removal, a full sand and traditional refinish is still the right call before any UV topcoat goes down.
How Does a UV Finish Hold Up Against Polyurethane Under Stress?
Under everyday wear, the two finishes behave differently in ways that matter depending on your household.
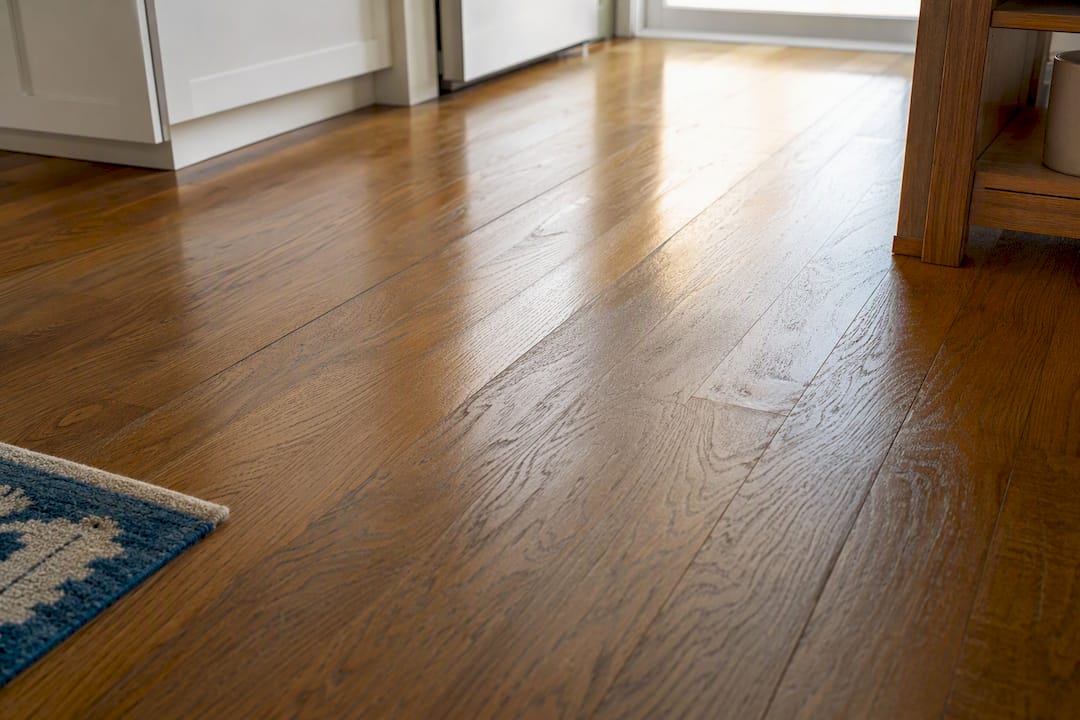
Against abrasion, foot traffic, and pet claws, UV-cured coatings generally outperform standard water-based polyurethane because the crosslinked structure resists surface scuffing better. Oil-modified polyurethane, the traditional standby, holds its own on scratch resistance but takes far longer to reach that hardness and stays soft and vulnerable during the entire cure window.
Against impact, dropped pans, furniture legs, heavy equipment, both finish types can dent if the wood underneath compresses, since the finish only protects the surface, not the substrate. Neither UV nor polyurethane changes that physics.
Against chemical exposure, cleaning products, spilled wine, pet accidents, UV finishes tend to resist staining well because of their density, though prolonged exposure to any liquid left standing on any hardwood finish will eventually cause problems.
Against UV light itself (sunlight, not curing lamps), some formulations of polyurethane, especially oil-based versions, amber and yellow over years of sun exposure. Many UV-cured waterborne topcoats hold their clarity longer, which is part of why they photograph and age better in sun-heavy rooms.
The practical takeaway: if your floor sees heavy daily use, from kids, dogs, high heels, or a home gym setup, UV curing’s hardness advantage shows up fastest in the first year or two. If your floor sits in a low-traffic formal room, the gap between the two finishes narrows considerably.
Safety Precautions Beyond Low VOC Levels
Low odor doesn’t mean zero precautions. UV lamps emit intense ultraviolet light, and direct or reflected exposure to skin and eyes during the curing pass carries real risk.
Professional crews wear UV-blocking eyewear during the curing pass, not just standard safety glasses, since ordinary lenses don’t filter UV wavelengths. Some also cover exposed skin, particularly for longer jobs where the operator stands closer to the lamp housing for extended periods.
Ventilation still matters even with low-VOC products. Waterborne systems release some moisture vapor during the flash-off window before curing, and good airflow keeps that from lingering.
Homeowners generally don’t need to be in the room during the actual curing pass, and most contractors prefer it that way. If you have curious kids or pets, plan to keep them in a separate part of the house while the UV unit is running, then get the all-clear before anyone walks back through.
One more precaution that’s easy to overlook: electrical safety. Mobile UV curing units draw significant power, and a contractor running one in an older home should confirm the circuit can handle the load before setup, not mid-job.
Common UV Finish Problems and How Contractors Fix Them
Most UV finish complaints trace back to one of a handful of root causes, and nearly all of them are preventable with the right process.
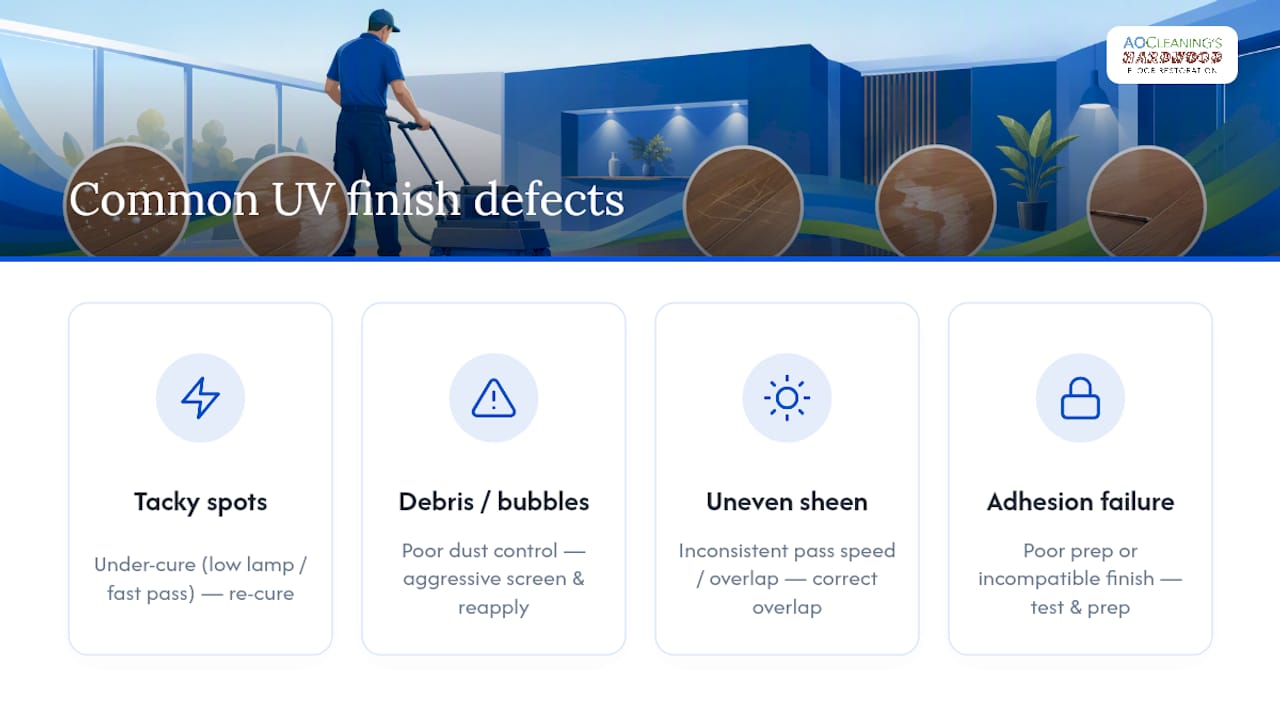
Tacky or soft spots almost always mean under-cure, either from lamp intensity that was too low, a pass that moved too quickly, or a lamp mismatched to the product’s requirements. The fix is a re-cure pass if caught early; if the coating has already started collecting dust and debris, the affected area may need to be screened and recoated.
Visible debris or bubbles trapped in the finish point back to inadequate dust containment during prep. Once sealed under a UV-cured layer, this isn’t sandable out lightly. It typically requires a more aggressive screen and reapplication.
Uneven sheen or cloudy patches usually come from inconsistent lamp pass speed or overlap gaps between passes. An experienced operator overlaps each pass by a set margin specifically to avoid this.
Adhesion failure or peeling at edges or in high-moisture areas often traces back to inadequate cleaning before coating, or applying UV topcoat over an incompatible existing finish without proper testing.
The common thread: every one of these defects is a process failure, not a product failure. That’s the strongest argument for hiring a contractor with real UV-specific experience rather than someone applying it for the first time on your floor.
Where to Source UV Finish Products and Contractors
Homeowners rarely buy UV-curable topcoats directly. The lamp equipment and dosage precision required make this a contractor-applied product in nearly every residential case, unlike a can of polyurethane you can pick up at a hardware store.
Manufacturers like CureUV sell both the coatings and the curing units to trade professionals, with product pages that list exact wavelength and intensity specs for each formulation. Factory-applied UV finishes, by contrast, arrive already cured on prefinished engineered and solid flooring sold through flooring retailers and distributors.
If you’re looking for a contractor rather than a product, regional installers who specialize in flooring and refinishing are a good starting point for understanding what a professional-grade job should include. Trade organizations also maintain contractor directories and training standards worth checking before you hire.
Is UV Finish Better for the Environment Than Traditional Finishes?
The environmental case for UV finishing rests on a few concrete factors, not marketing language.
Solvent content is the biggest difference. Many waterborne UV-curable topcoats are formulated with near-zero VOCs and no hazardous air pollutants, compared with the higher solvent loads in traditional oil-based polyurethanes. Less solvent means less off-gassing into your home’s air and less material entering the waste stream during application.
Energy use tells a more complicated story. UV lamp systems draw real electricity during the curing pass, and that energy cost is concentrated into a short window rather than spread across days of passive air-drying. Whether that nets out as more or less total energy use depends on the specific equipment and job length, and no manufacturer publishes a clean side-by-side comparison.
Longevity plays into the sustainability math too. A harder, more durable finish that lasts longer between recoats means fewer refinishing cycles over a floor’s lifespan, which reduces the total material and labor footprint over 10 or 15 years, even if any single UV job isn’t dramatically “greener” on its own.
The honest summary: UV finishing wins clearly on indoor air quality and solvent reduction. It’s a more modest, harder-to-quantify win on lifecycle environmental impact, and homeowners shouldn’t expect a dramatic sustainability story beyond the VOC advantage.
When We Recommend UV Finishing, and When We Don’t
We’ve built our business around fast, low-odor, one-day service, so UV-capable recoats and screen-and-recoat jobs are exactly where we lean hardest. Busy households, home offices, and rental properties that can’t absorb a week of downtime benefit the most.
Where we steer homeowners toward a conventional full sand and refinish instead: floors needing a real color change, deep gouges, or water damage repair. UV curing hardens a topcoat fast. It doesn’t fix what’s wrong underneath it.
— Jim
How AO Cleaning Handles UV-Capable Hardwood Refinishing
If you’ve read this far, you already know why speed and durability matter, and that’s exactly where Aosaveswoodfloors built its entire service model. Our 1-day hardwood floor restoration gets floors walkable in about three hours using dustless prep and eco-friendly coatings, no week of hotel stays, no plastic sheeting across your kitchen doorway.

For floors that just need a refresh rather than a full sand, our clean and buff and screen and recoat services cover the lighter end of the job at a lower cost, still with the same one-visit, low-disruption approach. And when a floor genuinely needs a complete overhaul, whether from deep scratches, sun damage, or a color change, our full sand and refinishing service handles that too, with the same dust-controlled process and same-day turnaround wherever the coating allows it.
We serve homeowners across St. Louis, Columbia, Belleville, Fairview Heights, Waterloo, O’Fallon, and the surrounding Illinois and Missouri communities. Before you replace those floors, get a quote and let us walk you through which finish and timeline actually fits your situation.
Sources
Recommended

Comments