


Wait 2–3 Weeks Before Sanding: Cupped Hardwood Repair for Homeowners

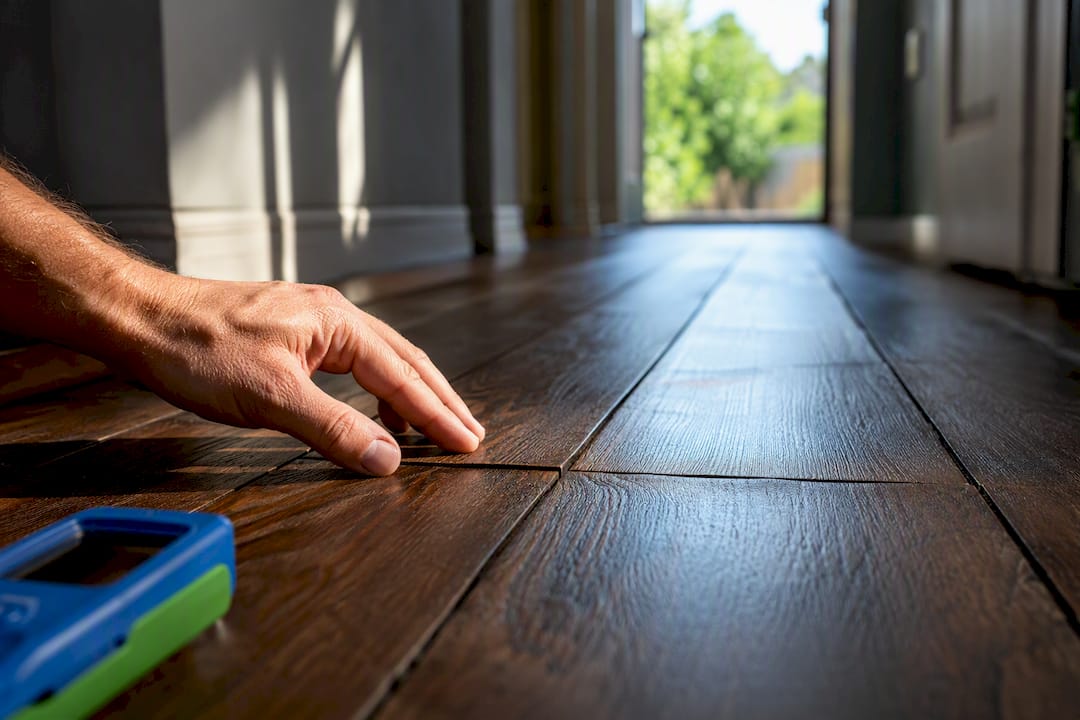
Yes, cupped hardwood floors can usually be fixed, but not by sanding first. The board edges rise because moisture built up under or around the wood, and that has to stop before anything else happens. Locate the moisture source, cut it off, and let indoor humidity settle before you touch the surface. Mild cases flatten out on their own in weeks; sanding wet boards locks in a worse problem called crowning.
TL;DR:
Moisture sources such as plumbing leaks, crawl space dampness, or high indoor humidity primarily cause cupping, and curing the source is essential before repairs.
Moisture meter readings should be taken at multiple points and compared to a dry reference area to accurately assess if the moisture problem is resolving.
Patience is critical, as moderate cupping often resolves naturally within two to three weeks once moisture is controlled, avoiding premature sanding.
Professional repair involves comprehensive moisture diagnosis, controlled drying, and targeted board replacement, typically completed in a single day using dustless techniques.
Maintaining indoor humidity between 30% and 50% year-round prevents future cupping, with proper acclimation and cautious cleaning habits also crucial.
Table of Contents
What Does Cupped Hardwood Floor Repair Actually Require First?
How Long Does It Take to Dry Out Cupped Hardwood, and What Equipment Actually Works?
Sand and Refinish, Replace Boards, or Just Wait: Which Repair Fits?
How Aosaveswoodfloors Handles Cupped Hardwood Floor Restoration
Where to Learn More About Diagnosing and Fixing Wood Floor Moisture
What Does Cupped Hardwood Floor Repair Actually Require First?
Before you plan any cupped hardwood floor repair, you need to confirm what you’re looking at and where the water is coming from. Cupping shows up as a concave dip, with the edges of each board standing higher than the center. Run your palm across a plank perpendicular to the grain and you’ll feel it before you see it in bright light. That shape matters diagnostically: cupping means the underside of the board is wetter than the top, so it swells more than the finished face and the edges curl upward.
Convex cupping, sometimes called crowning, is the opposite: the center of the board is higher than the edges. It looks similar at a glance but points to a different problem, usually a board that was sanded or dried too aggressively while it was still swollen, or one that absorbed moisture unevenly after finishing. Confusing the two leads homeowners to the wrong fix, so check both directions carefully with a straightedge or a coin held on edge across the board.
Once you’ve confirmed which type you have, a moisture meter turns guesswork into data. Two kinds exist, and you’ll want to understand the difference:
Pin meters insert small probes into the wood to measure electrical resistance between them, giving a fairly precise reading at that exact depth, though they leave tiny holes.
Pinless meters use electromagnetic sensors pressed against the surface, so they’re faster and leave no marks, but they average moisture across a wider area and can be thrown off by dense finishes or foil-backed underlayment.
Professionals typically use both, cross-checking readings against each other and against a bone-dry reference area elsewhere in the house, according to Wagner Meters. That reference point matters more than people realize. A single high reading tells you almost nothing on its own; you need a baseline from an unaffected room to know whether 12% moisture content is a crisis or just normal for your climate that week.
Pro Tip: Test at least five spots across the affected area, including near exterior walls and under any rugs, then map the numbers on a rough sketch of the room. A tight cluster of high readings near one wall points to a localized leak. Numbers that climb gradually room to room point to ambient humidity instead.
The pattern of the problem tells you almost as much as the numbers. A leak under a sink, dishwasher, or washing machine line tends to produce cupping that’s sudden, localized, and often paired with staining or a musty smell in one specific zone. Humidity-driven cupping is slower, spreads across an entire room or the whole main floor, and tends to get worse in summer and ease up in winter as your HVAC runs and dries the air.
Work through this inspection list before you assume anything:
Under and around kitchen and bathroom sinks, including the shutoff valves themselves
Dishwasher supply and drain lines, which fail quietly behind the cabinet toe-kick
Washing machine hoses, especially rubber ones older than five years
Refrigerator ice-maker lines, a classic slow leak that goes unnoticed for months
Crawl spaces, checking for standing water, damp soil, or a missing ground cover
Concrete slabs, where moisture can migrate upward with no visible source at all
If none of those turn up an obvious culprit, the problem is very likely ambient. That shifts your focus from plumbing repair to whole-home humidity control, which is a different conversation entirely and one worth having before you spend money on the floor itself.
Why Do Hardwood Floors Cup in the First Place?
Wood is hygroscopic, meaning it constantly absorbs and releases moisture to match the humidity around it. That’s not a flaw in the material; it’s how wood behaves, full stop. The trouble starts when one face of a board sits in a different moisture environment than the other. According to InspectApedia, moisture imbalance across the board is the primary driver of cupping, and the mechanism is straightforward: the underside absorbs water faster than it can release it through the sealed top, so it expands more, and the edges have nowhere to go but up.
A handful of situations create that imbalance over and over again in homes.
Subfloor moisture is the most common culprit, usually from a crawl space or basement that’s damp more often than anyone checks. Wood sitting a few feet above wet dirt or a leaking foundation wall pulls that moisture upward for months before anyone notices a change in the floor above.
Plumbing leaks create a fast, localized version of the same problem. A slow drip under a dishwasher can soak a subfloor for weeks before it ever shows as a stain, and by the time boards visibly cup, the water has usually been working on the wood far longer than the leak has been visible.
High indoor relative humidity does the same thing on a broader scale. Homes without adequate dehumidification in humid climates, or ones running window units instead of central air, can sit above 60% RH for entire seasons, which is well outside the range wood floors tolerate comfortably.
Poor acclimation before installation sets up problems years in advance. Boards installed too dry, without time to adjust to the room’s actual humidity, later swell once the house settles into its normal moisture range, and that swelling shows up as cupping that seems to appear out of nowhere.
Cleaning mistakes are an underrated cause. Steam mops, soaking wet mops, or excess water during a routine cleaning push moisture directly into seams and edges, which is exactly where cupping starts.
A crawl space with no vapor barrier feeding moisture into a first-floor kitchen for years
A dishwasher line leaking behind cabinetry, invisible until the adjacent boards visibly rise
A finished basement conversion where nobody accounted for slab moisture before installing wood over it
A humid summer with a struggling AC unit, cupping an entire living room evenly
Installation choices compound all of this. A 6-mil polyethylene vapor barrier between a crawl space or slab and the subfloor is standard practice for a reason: it blocks upward moisture migration before it ever reaches the wood. Homes missing that barrier, or ones where it’s torn or improperly overlapped, are far more prone to recurring cupping no matter how well you manage indoor humidity afterward.
How Do You Stop the Moisture Before It Gets Worse?
If you’re dealing with an active leak, everything else waits. Shut off the water source at the valve, not just at the fixture, and confirm the drip has actually stopped rather than assuming it. Extract standing water with a wet-dry vacuum immediately; every hour it sits is another hour it soaks deeper into the subfloor and adjacent boards. Photograph the damage and the source before you clean anything up, both for your own records and in case you need it for an insurance claim later.
Once the active leak is handled, move to the structural side of the problem:
Inspect the crawl space or basement for standing water, damp soil, or condensation on foundation walls, and address drainage issues before touching the floor above.
Install or repair a vapor barrier if one is missing or damaged; a torn or gapped barrier under a crawl space does almost nothing.
Improve crawl-space ventilation, since damp crawl spaces feed moisture upward continuously and can undo any drying work you do inside.
Check your sump pump and downspouts. A sump pump that’s failing or downspouts dumping water right against the foundation are two of the most common, most overlooked causes of chronic subfloor moisture.
Test for slab moisture if your floor sits over concrete. Tape a small square of plastic sheeting to the slab for 24 hours; condensation underneath means the slab is releasing moisture upward, even with no visible cracks or standing water anywhere nearby.
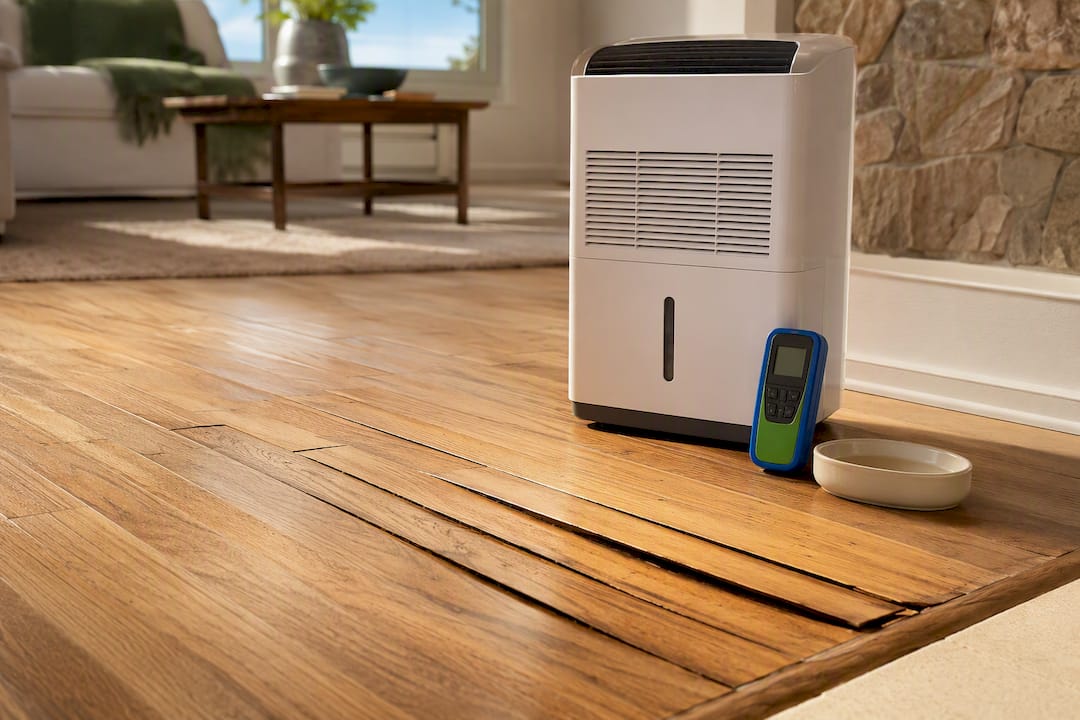
With the source addressed, focus shifts to drying out the room itself. Pull up any rugs and move furniture off the affected area so air can actually reach the boards. Run your HVAC system consistently rather than cycling it on and off, since steady airflow does more to normalize humidity than occasional blasts of cold, dry air. A portable dehumidifier placed directly in the affected room, run continuously rather than on a timer, speeds up the process considerably.
Pro Tip: Don’t rush to replace boards or call a contractor the moment you spot cupping. Give the drying process two to three weeks first. A surprising number of moderate cases resolve almost entirely once the moisture source is gone and the air around them stays dry, saving you a repair bill entirely.
How Long Does It Take to Dry Out Cupped Hardwood, and What Equipment Actually Works?
Drying a cupped floor correctly is about control, not speed. The equipment you choose depends on how severe the moisture problem is and how large an area you’re dealing with.
Air movers (the same box fans restoration companies use, not a standard household fan) keep air circulating across the floor surface, which prevents localized humidity pockets from stalling the drying process in corners or under cabinets. Portable dehumidifiers work fine for a single room with moderate cupping, pulling moisture out of the air so the wood has somewhere for its own excess moisture to go. For anything beyond that, restoration professionals typically switch to LGR (low grain refrigerant) dehumidifiers, which extract far more water per hour than a household unit and are built for exactly this kind of job. A serious subfloor or slab moisture event will often overwhelm a standard home dehumidifier before it makes meaningful progress.
Monitoring is where most homeowners lose patience, and where most premature sanding mistakes happen. You want to track three things over time:
Moisture meter readings at the same marked spots, checked every few days rather than daily
Relative humidity in the room itself, logged with a simple hygrometer
A comparison reading from an unaffected reference room, so you know what “normal” actually looks like in your house
Aim to stabilize indoor relative humidity in the 30% to 50% range, which is the band most flooring manufacturers and finish makers recommend for wood floor longevity generally, not just cupping recovery. Stabilization means your moisture meter readings hold steady across multiple checks, not just a single good reading after a lucky dry day.
Timeline expectations vary by severity, and this is where the wait-and-see math actually helps: minor cupping often reverses on its own once the moisture source is gone and RH stabilizes, while moderate cupping may take several weeks to substantially flatten. Severe cupping, especially where boards have been saturated for a prolonged time, can be permanent regardless of how well you dry the room afterward.
The temptation to speed things up by sanding early is understandable and almost always a mistake. Wood that hasn’t returned to equilibrium moisture content will keep shrinking after you sand it flat, and that shrinkage creates crowning, where the center of each board ends up higher than the edges. Crowning is harder to fix than cupping ever was, because you’ve already removed material trying to flatten a board that was going to keep moving anyway.
Sand and Refinish, Replace Boards, or Just Wait: Which Repair Fits?
Not every cupped floor needs work beyond patience. If the cupping is minor, symmetrical across the room, and your moisture meter readings show steady improvement week over week, doing nothing for a while is a legitimate strategy. Boards that are recovering on their own don’t need intervention that could introduce new problems.
Wait and monitor is the right call when:
Cupping is mild (barely visible, felt more than seen)
Readings are trending down consistently over two or more check-ins
The moisture source has been confirmed stopped, not just suspected
Sand and refinish becomes the right move once moisture readings have held stable near your reference-room baseline for a sustained period, not just a single good day. This is the stage where restoration crews lean on the same principle raised earlier: fixing the environment always comes before mechanical repair, because sanding boards that are still adjusting to a new moisture level just resets the clock on the problem. Once you’re clear to sand, a few things matter more with cupped floors than with a routine refinish:
Sand slightly deeper than usual to fully remove the raised edges, since a light pass can leave a faint ridge pattern visible under raking light
Work in the direction of the boards, checking frequently with a straightedge to confirm the surface is actually flat and not just visually smoother
Seal the floor immediately after sanding. Bare, freshly sanded wood absorbs ambient humidity fast, and finishing quickly is what keeps the floor from drifting right back into a cupped or crowned state within a couple of days. If you want a deeper look at how finish choice affects long-term moisture resistance, this guide to hardwood finish types breaks down which finishes hold up best against future moisture swings.
Board replacement is the answer when cupping doesn’t resolve after drying, or when you find soft spots, visible splitting, or a spongy feel underfoot that indicates the wood fibers themselves have broken down. Boards that stayed saturated for an extended stretch, particularly near an old undetected leak, often cross that line permanently. A partial board replacement done by someone who can match species, grain, and stain accurately blends into the surrounding floor far better than most homeowners expect, and it’s usually far cheaper than a full-room replacement.
Before scheduling any of this work, clear the room completely and check what’s underneath any built-in cabinetry or appliances that sit against the affected boards. Refinishing is disruptive for a day or two, but most professional jobs, including sanding work, are dust contained with modern equipment. If you’re prepping for a project like this, a refinishing checklist helps you set realistic expectations for timeline and what to move out of the way beforehand.
How Do You Keep Hardwood Floors From Cupping Again?
Prevention comes down to controlling two things you actually have power over: indoor humidity and how much water touches the floor during routine cleaning.
Keeping relative humidity in the 30% to 50% range year-round is the single biggest lever you have, and it’s the range most flooring and finish manufacturers recommend for exactly this reason. A whole-home dehumidifier tied into your HVAC system handles this automatically in humid climates; portable units work for problem rooms in a pinch. In dry winter climates, the opposite risk applies, so a humidifier prevents the gapping and shrinking that comes from air that’s too dry rather than too wet.
If you’re ever installing new wood, acclimation isn’t optional. Boards need time in the actual room, on-site, before installation, so their moisture content settles to match the space they’ll live in. Skipping this step, or rushing it because a contractor is on a tight schedule, is one of the most preventable causes of cupping years down the road.
Cleaning habits matter more than most people realize:
Skip steam mops entirely; they push moisture directly into seams
Wipe up spills within minutes, not hours
Use a damp, well-wrung microfiber mop rather than anything that leaves standing moisture
Choose breathable, natural-fiber rugs over rubber-backed ones that trap moisture against the finish
Pro Tip: Rotate rugs and furniture every few months, especially in kitchens and entryways. Trapped humidity under a stationary rug for a year can create a cupping pattern in the exact shape of that rug, which is a confusing thing to diagnose later if you’ve forgotten it was ever there.
If your home sits over a crawl space or slab, confirming the vapor barrier is intact and properly sealed is a five-minute check that prevents a much bigger problem. For ongoing care once your floors are flat and refinished, long-term maintenance guidance covers the cleaning routines and humidity habits that keep them that way.
When Should You Call a Flooring Professional?
Some situations are past the point of DIY monitoring. Soft or spongy spots underfoot, moisture readings that won’t come down no matter how long you run a dehumidifier, visible buckling where boards have separated from the subfloor, or a persistent musty smell all point to a problem bigger than surface-level drying can fix. If you’ve already tried stabilizing the room and the cupping hasn’t budged after several weeks, that’s also a sign to bring in someone with commercial equipment.
A professional’s process typically starts with moisture mapping across the entire affected area, not just a spot check, followed by a subfloor inspection to rule out structural moisture damage. From there, commercial-grade drying equipment addresses anything a household dehumidifier couldn’t handle, and targeted plank replacement swaps out only the boards that are actually beyond saving. Dustless sanding and refinishing finish the job without turning your home into a construction site for a week.
Homeowners across central Illinois and the St. Louis metro area have relied on Aosaveswoodfloors for this kind of work since 2003, with more than 450 Google reviews backing up two decades of hands-on floor restoration experience. Most restoration jobs are completed in a single day, with floors walkable again in about three hours, using dustless techniques that skip the mess and lingering odors typical of older sanding methods.
Before you replace a floor with lasting cupping damage, a proper moisture diagnosis often reveals the problem is fixable with the right drying approach and a targeted repair, not a full teardown.
Before hiring anyone, ask a few direct questions: What moisture readings are you getting, and how do they compare to a dry reference area in my home? What’s your plan if the readings don’t stabilize on the first visit? Request the actual meter readings in writing, not just a verbal assurance the floor “looks dry.” A professional worth hiring will hand that documentation over without hesitation, and organizations like NWFA maintain directories of certified pros if you want a second opinion on scope before committing to a repair.
What I’d Tell a Friend Staring at a Cupped Floor
Stop the moisture first. Everything else, the sanding, the board replacement, the refinishing schedule, is downstream of that one decision, and getting it backward is the single most expensive mistake I see homeowners make.
The most common error isn’t ignorance, it’s impatience. Someone spots cupping, panics a little, and calls a contractor to sand it flat the same week, without ever tracking down whether the leak is actually fixed. That’s how you end up paying for a refinish twice, once now and once in six months when the same moisture problem resurfaces and undoes the work. The second most common mistake is the opposite: assuming a floor will “just dry out eventually” without ever checking humidity or moisture readings, so nobody notices when a fixable case slides into a permanent one.
Here’s a same-day checklist worth running through the moment you notice cupping:
Inspect every plumbing line and appliance connection near the affected area.
Photograph the damage and any visible water source before cleanup.
Extract standing water immediately if there’s an active leak.
Ventilate the room and get a dehumidifier running.
Call a professional if readings won’t stabilize after a few weeks on your own.
— Jim
How Aosaveswoodfloors Handles Cupped Hardwood Floor Restoration
A general contractor can sand a floor. Fewer companies actually start with a moisture diagnosis before touching a sander, and that sequencing is exactly where Aosaveswoodfloors focuses its cupped-floor restoration work. An on-site assessment includes real moisture meter readings at multiple points, a written plan explaining what’s causing the problem and what it’ll take to fix it, and a realistic timeline before any sanding begins.

Once your floor has stabilized, the right service depends on how far the damage went. Floors with only light cupping that dried out cleanly often just need a screen and recoat to refresh the finish without a full sand. More significant cases call for controlled drying, dustless sanding, and targeted plank replacement where boards didn’t recover. Every job uses dustless techniques and eco-friendly products, and most restorations wrap up in a single day, with floors ready to walk on in about three hours. If you’re in central Illinois or the St. Louis metro area and you’re staring at a cupped floor right now, request an on-site moisture assessment before you assume the worst. It’s the fastest way to find out whether you’re looking at a repair or a full replacement.
Where to Learn More About Diagnosing and Fixing Wood Floor Moisture
A few resources are worth bookmarking if you want to go deeper on any part of this process. InspectApedia’s wood floor damage guide covers diagnostic photos and moisture mechanics in more technical detail than most homeowner blogs attempt. Wagner Meters publishes practical guidance on moisture meter selection and reading interpretation, straight from a manufacturer’s perspective. For finding a certified professional near you, NWFA’s directory lists inspectors and restoration companies vetted against industry standards. Restoration-focused blogs covering commercial drying protocols, like the guide on LGR dehumidifier use, fill in the equipment details a typical homeowner article skips entirely.
Sources
Recommended

Comments